Month: January 2020

Emergency Toilet Options For When Plumbing Fails

There may come a time when you are faced with a true disaster: You got to go, but there’s no where to do business. This is what’s called a SHTF scenario, where there’s no running water, no electric, and no way to get to a toilet. Though it’s a messy situation to plan for, knowing that you have an emergency toilet option ready to go can give you peace of mind.


Here are some emergency toilet for when plumbing fails:


Latrines and Catholes

Here are two quick options for relieving yourself in an emergency situation. Of course, there are dozens of reasons why you might be unable to go outside to dig a hole; but if you can and must, a cathole or a latrine trench is good for short-term disasters.


Catholes are as the name implies. You simply dig a hole about 12-15 centimeters deep. Squat, do your thing, cover it, and move on. Latrine trenches are just an upgraded version of a cat-hole and are often longer, wider, and can hold more.


These options aren’t very sanitary or environmentally-friendly, though. You can’t count on them for too long.


Composting Toilets

A self-contained compost toilet is a great option for two reasons. One, it can save you during a crappy situation, and it is also excellent for off-the-grid sanitation. However, these units can be rather expensive to purchase, and while you can build one yourself, even the materials needed for construction are pricey.


Compost toilets also need to be placed somewhere with adequate ventilation. So, you wouldn’t be able to put a compost toilet in, let’s say, a bomb shelter or bunker.


Camping Toilets

For a short-term catastrophe, like getting snowed in and having burst pipes, you can have a camping toilet or portable commode available. It’s better than having to go outside, and it helps keep your space clean.


Of course, the downside to this is that the waste is all going in one place, it is bound to smell, and the reservoir is small, so it will fill rapidly.


Relevant: Why Does The Toilet Whistle After Flushing?

Twin Bucket Toilets

Just as the name states, the twin bucket method means taking two compost buckets and separating your waste accordingly. While using a bucket to relieve yourself might take some getting used to, it is the best method for long-term SHTF scenarios and is much cleaner than a camping toilet. Not only are buckets easy to come by, but they hold a lot.


Why The Twin Bucket Works Best

Separating urine and feces has some benefits. Urine can be used as a fertilizer, and it is easy to dispose of. All you need are two 5-gallon compost buckets with lids. You should line the buckets with vinyl bags—the thicker, the better. Always line the poo bucket. Feminine hygiene products should also be disposed of in the one designated for feces.


No one wants to think about what would happen if toilets suddenly stopped working, but it is best to be prepared than be caught with your pants down. Literally. Now that you know your options for emergency toilets, it’s time to stockpile some vinyl bags and buckets! 

The post Emergency Toilet Options For When Plumbing Fails appeared first on The Irish Plumber.

DIY Plumbing Tricks in 2020 To Save Time & Money

Most people would love to have a personal plumber or some plumbing skills to tackle whatever pipe-related problems come their way. This year, why not make it a resolution to learn some DIY? Even if you aren’t experienced with handling tools, these plumbing hacks are bound to save you both time and money.


Let’s get started. 


No Plunger? No Problem!

When the toilet is clogged, most people reach for a nifty tool called the plunger. But what if you’re visiting someone’s house or are at a party? No one wants to deal with that embarrassment.


Here’s how you unclog a toilet without a plunger:


  • Step 1: Stop the flow of water. This means closing the flapper by opening the water tank at the back of the toilet and make sure the plug connected to the chain is in place.
  • Step 2: Find something to hold water, like a cup. Fill it with hot water—the hotter, the more effective.
  • Step 3: Pour the hot water into the toilet. Heat can help break up whatever is clogging the toilet. Wait a few minutes to see if it works.
  • Step 4: If the first round of hot water doesn’t work, add some more. You can also add soap or shampoo and/or baking soda to the mixture to help breakdown the clog.


Stop Dripping Faucets

Although dripping faucets often require some work to repair, you can use this temporary solution to quiet the sound. Tie a piece of string around the faucet. It should be long enough to reach the drain. The droplets will soak into the string and run down the length of it, right to the drain, preventing that annoying drip-drip-drip.


In the meantime, schedule an appointment with your local plumber to get the leaky faucet fixed.


Stopping Flushing Dollars

If you want to save some water, put a 20-ounce plastic bottle in the corner of the toilet’s water tank. This causes displacement in the tank that allows for less water to be used. You want the bottle to sink and stay in place—never let it float freely. Also, make sure the bottle isn’t in the way of any mechanisms. Another option is to switch to an efficiency flapper.


Unclogging The Sink

Sometimes, the kitchen sink swallows more than it bargained for, like food scraps, grease, and oils. You can remove the clog by taking ¼ cup of dish detergent, preferably blue Dawn, down the drain. Let the detergent sit for about 20 minutes before washing it down with boiling hot water. The detergent works to emulsify grease, and the boiling water will soften and wash it away.


You can also use a mixture of distilled vinegar and baking soda to break up clogs. Use either method over chemicals, since those can corrode your pipes and make matters worse.


What’s Lost Is Found

Have a kid that loves flushing toys down the toilet? Or maybe you dropped a precious ring by accident? Don’t use a plunger. Grab a wet/dry vacuum instead. Before switching on the vacuum, remove the filter. Then, place the hose against the drain of the toilet and turn it on. You should be able to hear the object or even feel it get sucked into the vacuum. If the object is tiny, try a crevice attachment, since that will make it easier to pick up smaller things.


Plumbing problems don’t always require a plumber, especially when you are dealing with accidents or common issues like a congested toilet. Keep these tips in mind, so the next time you are caught unaware by ominous gurgling or dripping, you’ll be prepared.

The post DIY Plumbing Tricks in 2020 To Save Time & Money appeared first on The Irish Plumber.

Top Ten Plumber Tools You Should Have In Your Home

plumbing tools_89517060

When you move into a new home, you may find yourself rapidly accumulating tools for various household projects. Even the least handy homeowners usually have a few screwdrivers or hammers to tend to minor issues. Maintaining your home’s plumbing, however, can be a little more complicated due to the variety of specialized tools required. While you may not plan on replacing your toilet flapper, fixtures, or sink drains, it’s good to have a variety of plumbing tools on hand so you can deal with minor issues that may not be serious enough to require a professional plumber. Read More

How Old Is “Too Old” for a Water Heater?

water-heaterNobody wants to go through the trouble of replacing an old water heater. It’s a big project and costly, so homeowners will often settle for poor performance from an ancient water heater and high heating costs rather than take the step of calling a professional to install a new one.

But if you have an old water heater that can’t guarantee you hot showers and costs far more to run than it once did, it’s much better to say goodbye to it and have a fresh start with a reliable and energy-efficient new system.

The big question is “When is a water heater too old?” Let’s take a closer look at the answers. (Yes, there’s more than one.)

The Age When Failures Start to Set In

The first five years of a water heater’s service life should have zero repair problems, unless the unit has a factory fault, which the warranty will cover. The system must have regular maintenance throughout this period to keep the water heater in the best shape. Not maintaining the water heater will increase the chance of repair, and it will also void the warranty.

After the first five years, the chance of a malfunction starts to climb. At 12 years or more, 75% of water heaters will have needed repairs due to a failure. After 15 years is the point where we recommend you start paying close attention to the water heater’s performance in all aspects: cost to run, water temperature, volume of hot water, and any noises from the tank. After 20 years of service, it’s time for a new water heater—you’ve gotten a great return on the initial investment, and you’re ready to begin reaping the benefits of a new, higher efficiency system.

Finding Your Water Heater’s Age

You may not have installed your current water heater and aren’t sure how old it is. No worries, this isn’t difficult to find out. All water heaters come with a manufacturer’s rating plate on them with their stats. On some of these plates, you find a manufacture date listed. Easy. On other models, the manufacture date will be in the first four digits of the serial number as “month/year.” If you can’t determine the manufacture date from the serial number, you can decode it online. Go to the manufacturer’s website and put in the serial number and you’ll receive the manufacture date.

Warnings Signs Are Warning Signs, Regardless of Age

The age of the water heater is irrelevant if the unit is showing major signs it’s failing. If the water heater is still under warranty, call for repairs for it when you notice these troubles. Otherwise, you probably will need to call our plumbers to have a new one put in.

  • A steep rise in the cost to run the water heater that hasn’t gone down from repairs.
  • Hot water is unreliable and people are going without hot showers in the morning.
  • There is a rusty discoloration in the hot water around the house.
  • Corrosion appears along the tank.
  • The tank is leaking from cracks.

When it comes to water heaters in Glendale, AZ, we’re the experts you can trust. It’s right in our name!

The Trusted Plumber serves Glendale and the surrounding areas. Call us if you have any questions regarding replacing a water heater.

This post first appeared on https://www.thetrustedplumber.com

Things That You Should Do in a Plumbing Emergency

Turning off water valveAt some point, nearly every homeowner will have a plumbing emergency. The good news is that when you’re prepared, the situation doesn’t have to get out of control. Getting professional plumbing repair service fast is always your best defense against water damage and other problems related to bad plumbing. Knowing when to call for 24-hour emergency plumbing in Pittsburgh, PA, and how to handle problems while you wait for help to arrive is crucial.

Whether you have an overflowing toilet, a soggy ceiling, or several inches of water on your floor, you need to know the right steps to take to protect your home. Keep reading to learn how to protect your home during a plumbing emergency.

Don’t Panic

The calmer you are, the better decisions you’ll make. In this post, you’ll learn the steps you need to take to handle all plumbing problems, but these suggestions never take the place of professional expertise. That’s why the #1 way to protect your home during a plumbing emergency is to know who to call. Have a number on hand to an emergency plumbing service near you.

Turn Off the Water

When water is spewing out of pipes or overflowing from sinks or toilets, you need to turn the water off as fast as possible. For sinks and toilets, look for the water shut-off valve near the fixture. Bigger emergencies will require that you shut the water off coming into the house. Do this by turning the main water valve clockwise. The main water valve can be found in the basement or utility room or wherever the main water line enters your home.

Open Faucets and Spigots

After turning the water off to your home, there could be water trapped in faucets and spigots. Plumbing professionals recommend that homeowners open the faucets and spigots to release any water being held in the pipes. Make sure to open outside spigots too.

Stop Small Leaks

Fixing leaking pipe
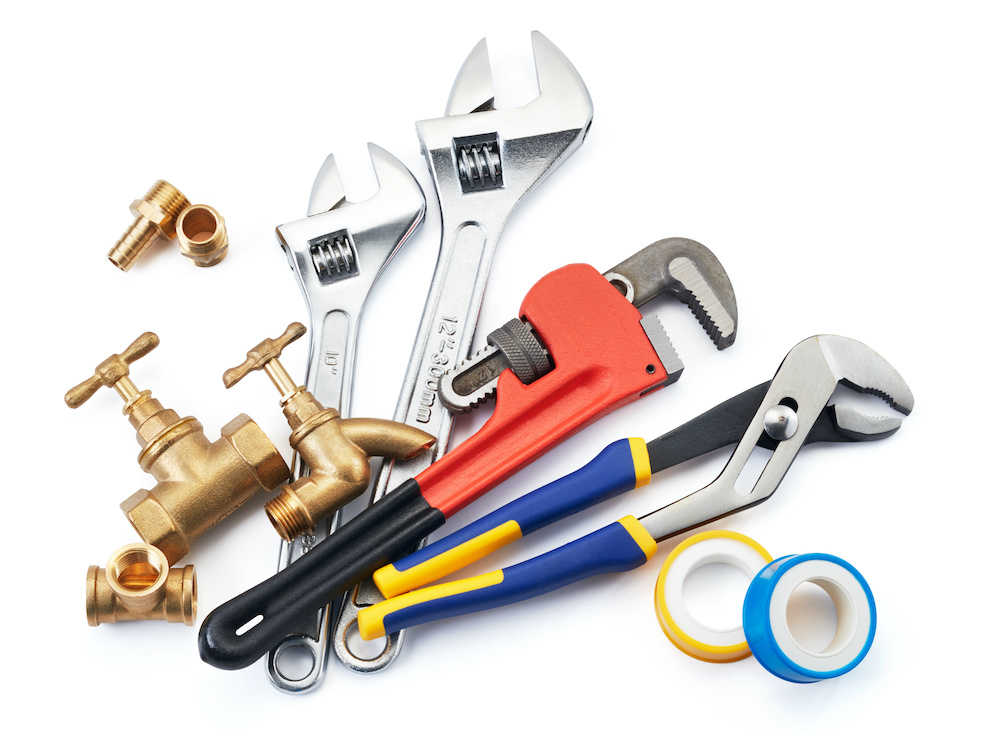
While you wait for the plumber to arrive, you can temporary fix small leaks. This can be done using duct tape, plumber’s tape, or plumber’s putty. Most people don’t have plumber’s putty on hand, but it’s a great item to have in your emergency toolbox.

After the water has been turned off, dry the pipe and apply the tape. Don’t turn on the water again until the plumber arrives.

Keep the Area Clear

Some plumbing emergencies flood parts of the home. If you have a situation like this, keep the area clear. Don’t let pets, children, or other family members near the area. The water could be gray or black water and contain hazardous material.

Never hesitate to call for 24-hour emergency plumbing service in Pittsburgh, PA. The sooner a plumber arrives, the faster you can get back to your day. For affordable plumbing service when you’re facing an emergency, call Stahl Plumbing, Heating & Air Conditioning at (412) 273-1000.

The post Things That You Should Do in a Plumbing Emergency appeared first on Stahl Plumbing, Heating & Air Conditioning.

Water Heater Maintenance 101: What Temperature Is Best for a Hot Water Heater?

If you have a traditional tank-type water heater, you need to make sure the water heating setting is not set too high. When the water heater is set higher, you will notice that your energy bills increase because the water heater has to work harder to maintain the desired temperature setting.

Conversely, if you have your water heater turned down too low, you may run out of hot water much faster and not have enough for showers, running the dishwasher, and doing loads of laundry. Furthermore, at temperatures below 120 degrees Fahrenheit, bacteria and disease can start to grow in the water stored inside the tank, such as Legionella, a bacteria that can cause Legionnaires’ disease.

A leaking water heater

What Temperature Setting Is Best?

An ideal setting to set the water heater to is 120 degrees Fahrenheit. The water is not too hot that it could burn and scald your body and yet it is high enough to kill bacteria. This setting is well-suited for individuals, couples, and families with two children or less. Additionally, setting the water heater to 120 degrees Fahrenheit is considered an energy-efficient setting that could help reduce your water-heating energy costs.

How Can I Maintain That Temperature Setting?

There are several things you can do to ensure you have plenty of hot water without having to turn up the temperature setting. For every ten degrees you increase the setting, your water heating energy costs will increase between 3 and 5 percent.

One viable option is to have your water heater repair plumber install an insulation blanket around your water heater. Adding this insulation will reduce and prevent heat loss and help maintain the water at 120 degrees.

Another option is to avoid using multiple sources of hot water at the same time. For instance, you should not run the dishwasher, the washing machine, and the shower at the same time. Instead, stagger these activities to avoid running out of hot water.

Upgrading your showerhead to a water-conserving model is another way to help reduce how much hot water you use and to maintain the desired temperature setting. When brushing teeth and shaving, shut off the water between rinsing your teeth or fill the sink with hot water for shaving, rather than just leaving the faucet running.

What if My Hot Water Heater Isn’t Keeping the Water Hot?

One common problem with tank-type heaters is the heating elements can slowly start to fail. As they do, they are not as efficient at maintaining the desired hot water temperature setting. To keep your hot water heater operating efficiently and optimally, it is recommended to schedule an annual hot water maintenance service with your plumber.

Smiling technician servicing a hot-water heater

Your plumber can flush the water heater to remove sediment, as well as inspect the heating elements to ensure they are working correctly. If your water heater is nearing the end of its useful lifespan, new water heater installation could also be beneficial.

When considering a new water heater, you may want to look at a tankless water heater. Tankless heaters provide on-demand hot water and can help save even more on water heating bills. Plus, you do not have to worry about running out of hot water since the heater constantly makes it while the hot water is turned on.

If a tankless heater is not right for your hot water needs, you may want to consider upgrading to a larger storage tank to meet your home’s hot water demands.

For further assistance in setting the temperature on your hot water heater, for water heater maintenance, for water heater repair, or for help selecting a new water heater for your home, please feel free to contact MET Plumbing & Air Conditioning at 281-994-6698 today!

The post Water Heater Maintenance 101: What Temperature Is Best for a Hot Water Heater? appeared first on Met Plumbing.

A Guide to Descaling Your Water Heater

1699794_Stahl Plumbing_A Guide to Descaling Your Water Heater


Descaling your water heater is a maintenance task that helps your water heater work better for longer. The descaling process gets rid of hard water deposits and can prevent burner problems and corrosion. It’s a relatively easy task for homeowners to complete. Here is a quick overview of how to descale the average residential water heater: 

  • Disconnect the power to the water heater
  • Turn off all the water to the appliance
  • Open all faucets in the house to release the water
  • Drain the water heater using a garden hose
  • Remove the heating element (Note: Not all water heaters have a heating element. Refer to your owner’s manual for the location of the component, if applicable)
  • Avoid chemical cleaners except those recommended by your plumber
  • Use a natural cleaning mixture of 1 part vinegar and 1 part water 
  • Use a scrub brush and the cleaning mixture to scour the inside of the tank
  • Rinse the water heater by refilling it and then letting it drain again
  • Rinse and repeat as often as needed until you don’t have any hard water particles present in the tank

Although descaling a water heater is something most homeowners can do, at Stahl Plumbing, we recommend professional water heater maintenance services. These services performed by our licensed plumbers ensure the job is done correctly and that there isn’t any damage done to your water heater. Water heater replacement isn’t cheap, and we don’t want you to have to endure this expense if it’s not necessary. 

Stahl Plumbing serves the metro Pittsburgh area and provides exception plumbing, heating, and cooling service. Our #1 priority is to make sure our customers’ plumbing and HVAC systems work well 24/7. To learn more about our services, our current specials, or to make an appointment, visit us online at https://www.stahlplumbingpittsburgh.com.

The post A Guide to Descaling Your Water Heater appeared first on Stahl Plumbing, Heating & Air Conditioning.

+1-877-959-3534