Month: December 2024

Proven and Tested Tips for Handling Emergency Plumbing Repairs

Plumbing emergencies can strike at the worst times, turning a peaceful day into a stressful ordeal. A burst pipe or a severe leak can cause significant water damage if not handled promptly. Knowing how to recognize an emergency and taking immediate steps can save time and prevent costly repairs.

Every homeowner should have a basic understanding of what constitutes a plumbing emergency. Issues like flooding, sewage backups, and no water supply demand urgent attention. Ignoring these can lead to more severe problems, including structural damage and health hazards.

Being prepared with the right tips and tools can make all the difference when facing a plumbing catastrophe. Quick actions can help manage the situation until professional help arrives. Additionally, understanding common repairs and maintaining your plumbing system can reduce the risk of emergencies. This guide will explore practical advice to help you handle plumbing crises with confidence and ease.

Recognizing Plumbing Emergencies

Understanding what qualifies as a plumbing emergency is crucial in preventing further damage to your home. Emergencies typically involve severe issues that can’t wait, such as burst pipes, severe leaks, or water supply failures. These problems can quickly escalate and lead to significant water damage or health risks from mould and mildew.

A burst pipe is a clear emergency, as it can flood your home quickly, damaging floors, walls, and personal belongings. Similarly, sewage backups require immediate attention due to potential health hazards from exposure to waste. When fixtures like toilets or sinks won’t drain at all, this could indicate blockages deep in your plumbing system that need urgent repair.

Ignoring these urgent issues is risky. Letting a small leak go unattended can lead to bigger, costlier repairs in the future. Prolonged exposure to leaks can weaken your home’s structure, create electrical hazards, and promote the growth of mould, which poses health risks. Recognizing these emergencies allows you to act quickly, minimizing both damage and repair costs.

Immediate Actions to Take During a Plumbing Crisis

When faced with a plumbing crisis, taking quick action is essential. These immediate steps can help manage the situation and reduce damage until professional help arrives:

1. Shut Off the Water Supply: Quickly locate and turn off the main water valve to stop the flow of water. This is usually found in the basement or utility room.

2. Turn Off the Water Heater: To prevent damage, turn off the water heater. This protects the unit from overheating or malfunctioning if water levels drop unexpectedly.

3. Address Small Leaks: Use temporary solutions like pipe tape or a bucket to manage small leaks. This helps to minimize water damage and manage the flow.

4. Unclog Drains: If safe to do so, use a plunger to clear clogs in sinks or toilets. Avoid using chemical drain cleaners, as they can harm your pipes and skin.

5. Assess the Situation: Check for other signs of plumbing issues, such as additional leaks or strange noises from pipes. This helps in identifying all areas that may need attention.

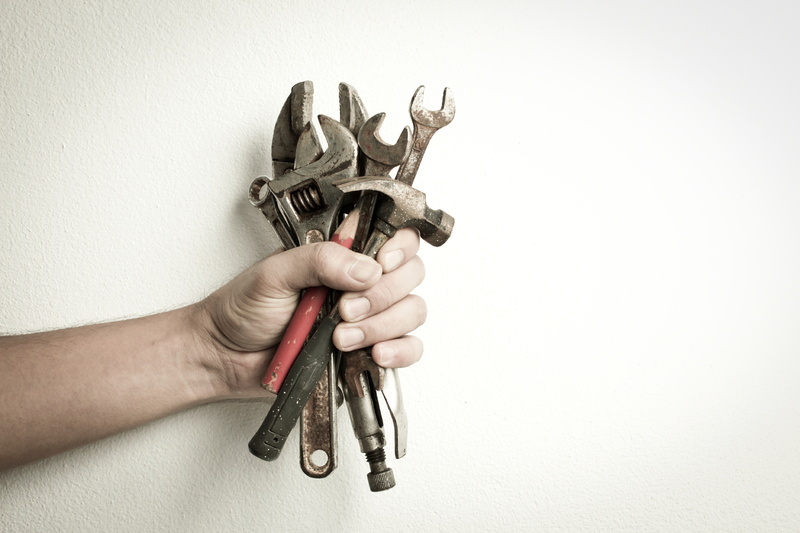
Safety should always come first. Ensure electrical appliances in the affected area are unplugged and avoid standing water to prevent electrical shocks. Having basic tools like a wrench, plunger, and pipe tape handy can be incredibly helpful for managing minor emergencies. Implementing these steps ensures that you minimize potential damage and keep your home safe while waiting for a professional plumber.

Common Emergency Repairs and Solutions

Plumbing emergencies often involve some of the most frequent issues homeowners face. Burst pipes, leaks, and sewer backups top the list, each requiring specific solutions to address. Burst pipes, for instance, can occur due to freezing temperatures or high water pressure. Immediate action involves turning off the water supply and using a pipe repair clamp to temporarily seal the leak.

Leaky faucets and fixtures, while not as severe as burst pipes, can still waste significant water and money if left unattended. For minor leaks, tightening connections with a wrench or replacing worn-out washers may do the trick. However, if a leak persists, it’s best to consult a professional plumber to avoid further complications.

Sewer or drain backups are serious issues, often caused by blockages from debris, grease build-up, or tree roots invading the pipes. Using a plunger or a plumber’s snake can clear minor blockages, but persistent or severe clogs require expert attention to ensure the integrity of the plumbing system.

Knowing when to handle a repair yourself and when to call a professional is crucial. For example, temporary fixes are fine for minor issues, but recurring problems or complex repairs should be handled by a professional to prevent additional damage.

Preventive Measures to Reduce Future Emergencies

Taking preventative steps can greatly reduce the likelihood of plumbing emergencies. Regular maintenance and inspections are key to identifying potential issues before they escalate. Start by routinely checking for leaks, especially in areas prone to moisture like under sinks and around toilets. Early detection can save time and money.

Insulating pipes, particularly in colder regions, can prevent them from freezing and bursting during winter months. Wrap outdoor faucets and disconnect hoses when temperatures drop. Frost-free hose bibs are a wise addition for added protection during harsh winters.

Regular plumbing inspections by professionals can identify hidden problems. They can inspect drains and sewers using advanced tools like sewer cameras to detect blockages or damaged pipes. Upgrading older systems, such as replacing cast iron pipes or outdated water heaters, also reduces the risk of future emergencies.

Maintaining a proactive approach not only protects your home but also extends the lifespan of your plumbing system. By investing a little time and effort into regular care and updates, homeowners can enjoy peace of mind and prevent unexpected crises.

Conclusion

Handling a plumbing emergency requires quick thinking, the right tools, and a clear understanding of when to call in professional help. Recognizing a problem early and addressing it swiftly can mitigate damage and lower repair costs. Preventive maintenance should be part of every homeowner’s routine to avoid plumbing crises. If you find yourself overwhelmed by a plumbing issue, don’t hesitate to seek expert assistance.

When plumbing trouble strikes, it’s good to know you have a reliable team ready to help. The Irish Plumber is committed to providing top-notch emergency plumbing repairs and maintenance solutions tailored to fit your needs.

Whether it’s a pesky drip or a full-scale plumbing overhaul, we’re only a call away, ensuring your home remains safe and comfortable. Don’t let plumbing problems disrupt your peace of mind; contact us today for fast, dependable service.

The 5000 Rule of Furnace Repair vs. Replacement

hand-holding-old-tools

Your heating system won’t last forever. You do want it to last as long as possible, though, right? Well, within reason. If it’s costing you an arm and a leg in repairs and extra-high bills from running inefficiently, you would be better off replacing your old furnace in Montville, NJ. How can you tell whether it’s worth repairing your old furnace or if it’s time for a replacement? We recommend the 5000 rule. Here are the details.

The Many Factors to Weigh

When you know your furnace is getting old, or isn’t in great shape anymore, you should weigh a variety of pieces of information to help you determine whether it’s worth continuing to invest in heating repairs. What should you be considering?

  • Age: How old is your furnace? You shouldn’t expect an electric furnace to last more than twenty years. A gas furnace is unlikely to make it more than fifteen.
  • Condition: Have you been diligent about your furnace’s annual maintenance? If so, it will stay in good condition for much longer, and be far more likely to make it to those age estimates still working well. If not, the furnace might last many fewer years.
  • Efficiency: At some point, even yearly maintenance won’t be able to keep a heating system as efficient as it was when the system was new. At this point, you’ll start to see your utility bills creeping upward, and it will only get worse.
  • Effectiveness: Similar to efficiency, at some point, an old furnace will be less effective, and no matter what maintenance or repairs you get, your home won’t be as evenly warm as you’d like.
  • Repair Cost: How expensive is the repair your system currently needs? It might be worth getting a minor repair on an older system, knowing it’s only likely to help it get through another year. And it might be worth it to spend quite a bit on a newer system, knowing you might get many more toasty winters from it.
  • Repair Frequency: Even small repairs can end up costing a lot if they’re needed very often. A furnace that already needs to be fixed every winter is likely to need repairs more and more frequently as it gets older.

The 5000 Rule

To keep all these factors in mind at once is quite a challenge. Here’s a way to simplify it! Take the amount (in dollars) that you expect the currently required repair to cost. Multiply that by the age of your furnace (in years). A result under 5000 indicates that the repair is worthwhile. A result over 5000 means you’d probably be better off considering replacing the system.

And what if the result is exactly 5000, or quite close? That’s when to take other things into consideration. An excellent maintenance record, infrequent repair needs, and good efficiency and effectiveness would tip the scale toward repair, but spotty maintenance, frequent repair needs, and questionable efficiency or effectiveness would make a new system the better choice.

Contact MarGo Plumbing Heating Cooling Inc. today to schedule an appointment or ask any questions about your heating system!

The post The 5000 Rule of Furnace Repair vs. Replacement first appeared on MarGo Plumbing Heating Cooling Inc..

This post first appeared on https://margoplumbing.com

Step-by-Step Guide to Your Dream Bathroom Renovation

Renovating your bathroom is an exciting project that can breathe new life into one of the most important rooms in your home. Whether your goal is to update outdated fixtures, increase functionality, or create a luxurious retreat, a well-planned bathroom renovation can have a big impact on your daily life.

Starting with a clear plan is essential. Without a roadmap, you might end up overspending or making design choices that you later regret. By setting a realistic budget and designing a thoughtful layout, you can ensure that your renovation journey is smooth and enjoyable. It’s not just about picking pretty tiles or a fancy faucet; it’s about creating a space that works for you and your family.

Choosing the right fixtures and materials is the next big step. With so many options available, it can be overwhelming. Prioritizing quality and durability will save you money and stress in the long run. Additionally, deciding which tasks you can handle yourself and which require professional help will make the process more manageable and less daunting.

In this guide, we’ll walk you through each step of your bathroom renovation, from planning to choosing materials to understanding plumbing considerations. Whether you’re doing a full makeover or a simple update, this comprehensive guide will help you achieve your dream bathroom while avoiding common pitfalls.

Planning Your Bathroom Renovation

Setting a Budget

The first step in planning your bathroom renovation is setting a budget. Knowing how much you can afford helps you make smart choices about materials, fixtures, and professional services. To set a budget, start by listing all the potential expenses. This includes the cost of fixtures, materials, labour, permits, and any unexpected costs that might come up. It’s a good idea to set aside an extra 10-15% of your budget for these unforeseen expenses.

By prioritizing what matters most to you, it becomes easier to allocate your funds. For example, if a luxurious shower is your top priority, you might decide to spend more there and save on other items like vanity lighting or tile. Remember, quality over aesthetics: while it’s tempting to splurge on the prettiest tiles, durable materials will save you more in the long run.

Designing Your Layout

Designing the layout of your bathroom is crucial for both function and style. Think about how you use your current bathroom and what changes could improve it. Start by sketching your existing layout, noting where the plumbing is. This will help you understand what you can keep versus what needs to be moved, which can be costly.

When designing your layout, consider the flow of the space. Ensure there’s enough room to move around comfortably. Place the essential fixtures – like the toilet, sink, and shower – in spots that make sense for daily use. Think about storage as well; a bathroom with well-thought-out storage solutions can greatly enhance your day-to-day experience. Use online tools or consult a designer to visualize your ideas and make necessary adjustments before you start any work.

Choosing the Right Fixtures and Materials

Essential Fixtures and Materials

Choosing the right fixtures and materials can make or break your bathroom renovation. The essential fixtures for most bathrooms include:

1. Toilet: Standard or high-efficiency models
2. Sink: Pedestal, wall-mounted, or vanity sinks
3. Shower/Bathtub: Choose between standalone showers, bathtubs, or combined units
4. Faucets and Showerheads: Various styles to match your decor
5. Cabinetry: Vanity units and additional storage options
6. Lighting: Overhead lighting, vanity lights, and accent lights
7. Flooring: Tiles, vinyl, or waterproof laminate
8. Wall Coverings: Tiles, paint, or a combination

Ensure you choose fixtures that not only match your style but also fit your space and budget.

Tips for Selecting High-Quality, Durable Items

When selecting fixtures and materials, it’s crucial to focus on quality and durability. Here are some tips:

1. Look for Water Efficiency: Choose low-flow toilets and faucets to save water and reduce utility bills.
2. Opt for Durable Materials: Porcelain, ceramic, and stone tiles are excellent choices for durability and easy maintenance.
3. Check for Warranties: High-quality products often come with warranties that can provide peace of mind.
4. Read Reviews: Customer reviews and ratings can give you insights into the longevity and performance of the products you’re considering.
5. Consult Professionals: Don’t hesitate to ask for advice from contractors or designers who have experience with various brands and materials.

By investing in high-quality, durable items, you ensure that your newly renovated bathroom will not only look great but will also stand the test of time.

Steps to Begin Your Renovation Project

Step-by-Step Guide to Start the Renovation

Starting your bathroom renovation can seem daunting, but breaking it down into simple steps makes it manageable. First, disconnect all utilities. Turn off the water supply to the bathroom and switch off the electricity to any fixtures you’ll be working on. This is crucial for safety.

Next, begin demolition. Remove old fixtures, tiles, and cabinetry carefully. If you’re keeping the existing plumbing layout, you don’t need to rip out the walls. However, if you’re relocating fixtures, you might need to remove some drywall.

Once demolition is complete, inspect the plumbing and electrical systems. This is the time to replace old pipes and wiring. Installing new plumbing especially if you’re switching from cast iron pipes, ensures long-term reliability. After plumbing and electrical work, it’s time to install the new fixtures and materials in line with your design. A systematic plan keeps you organized and on schedule.

DIY Tasks vs. Professional Tasks

Not all renovation tasks are suited for DIY. Painting walls, installing new cabinet hardware, or laying simple tile can be good tasks to handle yourself. These tasks are generally straightforward and can save you money.

However, more complex tasks like electrical work, extensive plumbing changes, and major structural alterations require a professional’s touch. Working with your home’s plumbing can be tricky, especially when changing old pipes to modern materials. This is where professionals possess the expertise to ensure safety and compliance with regulations. Knowing when to call in the pros can save you from costly mistakes and ensure the job is done right the first time.

Plumbing Considerations and Upgrades

Importance of Updating Plumbing During Renovation

When renovating, it’s essential to update your plumbing. Old pipes can be prone to leaks and blockages, leading to water damage and costly repairs down the line. Updating to modern plumbing ensures that your new bathroom functions efficiently. Taking the opportunity to upgrade during a renovation is much easier than dealing with plumbing problems afterward.

Consider factors such as water pressure and drainage. Poor water pressure might indicate old, corroded pipes that need replacement. Similarly, updating drainage systems can prevent clogs and backups, ensuring your new bathroom remains trouble-free.

Options for Modern Plumbing Fixtures

Modern plumbing fixtures not only enhance the look of your bathroom but also improve functionality and efficiency:

1. Low-Flow Toilets and Faucets: These fixtures help conserve water, reducing your utility bills.
2. Smart Showers: Control water temperature and flow with digital interfaces, making your shower experience convenient and customizable.
3. Tankless Water Heaters: Save space and provide endless hot water by installing a tankless water heater.
4. Touchless Faucets: Improve hygiene and convenience with touchless technology.
5. High-Efficiency Showerheads: These offer a spa-like experience while using less water.

Choosing modern fixtures enhances both the aesthetic and practical aspects of your bathroom. They often come with warranties and are built to last, ensuring you get the most value out of your renovation.

Conclusion

Renovating your bathroom is a big project, but with careful planning and thoughtful design, you can create a space that is both beautiful and functional. Setting a budget and designing a layout that meets your needs are essential first steps. Choosing high-quality fixtures and materials will ensure durability and longevity.

Starting the renovation with a clear plan and understanding which tasks you can tackle yourself versus those that require professional help makes the process smoother. Updating the plumbing during your renovation is crucial for long-term functionality and to prevent future issues. Modern plumbing fixtures can add convenience and efficiency to your bathroom, making it a true sanctuary.

Ready to start your full bathroom renovation? Contact The Irish Plumber for expert assistance. We’re here to help you transform your bathroom into a space you’ll love for years to come. Call us today to get started!

Handle Emergency Plumbing Repairs Like a Pro

Plumbing emergencies can happen at any time and catch you off guard. A burst pipe or an overflowing toilet can quickly turn into a huge problem. Knowing what to do in these situations can save you a lot of stress and money.

First, it’s important to understand what counts as an emergency plumbing issue. Some problems can’t wait until the next day. Burst pipes, backed-up sewer lines, and overflowing toilets need immediate attention. Recognizing these signs can help you act quickly and avoid bigger headaches down the line.

Once you know there’s a problem, taking some quick safety steps is crucial. Turning off the main water supply and knowing how to stop leaks temporarily can make a big difference. This guide will walk you through the basics of handling emergency plumbing repairs like a pro. Whether it’s having the right tools handy or knowing when to call a professional plumber, you’ll be better prepared to manage the situation.

Understanding Common Emergency Plumbing Issues

Plumbing emergencies can happen suddenly and cause a lot of damage. Here are some typical emergency plumbing problems you might face:

  • Burst Pipes: Burst pipes are one of the most serious plumbing emergencies. When pipes burst, water can flood your home quickly. This can ruin floors and walls and lead to expensive repairs.
  • Backed-Up Sewer Lines: A backed-up sewer line means waste water can’t leave your home. This can cause bad smells, health hazards, and even sewage spilling into your home.
  • Overflowing Toilets: An overflowing toilet can be a huge mess. It can wet floors, cause water damage, and make a very unpleasant clean-up.

Knowing these problems and their signs is important. Signs include water stains on walls, slow drains, bad smells, and strange noises from your plumbing system. If you see these signs, you may have an emergency plumbing issue.

Safety should be your top concern. If you have a burst pipe, turn off the main water supply right away. This stops more water from flooding your home. If you have a backed-up sewer line or overflowing toilet, avoid using other sinks, baths, or toilets to prevent more damage. Always keep a safe distance from any standing water to avoid accidents.

Step-by-Step Guide to Temporary Fixes

It’s helpful to know how to handle issues yourself until a plumber can come. Here’s a list of tools and items you should always have at home:

  • Plunger
  • Pipe wrench
  • Leak repair tape
  • Bucket
  • Towels
  • Rubber gloves
  • Adjustable wrench

Here are some steps to temporarily fix common issues:

  • Stop a Leak: If you find a leaky pipe, turn off the main water valve. Then, use leak repair tape to seal the leaking area. This tape can hold until a professional plumber arrives.
  • Unclog a Toilet: First, use a plunger to try to clear the clog. Press down and pull up with the plunger several times to see if the water level drops. If this doesn’t work, avoid flushing too many times to prevent overflow.
  • Turn Off the Main Water Supply: Knowing how to do this can save you lots of headaches. The main water valve is usually found near your water meter. Turn it clockwise to shut off the water.

Temporary solutions can help stop further damage. Using a bucket to catch water from a leaking pipe, or towels to soak up standing water, can help manage the situation until you get professional help. Simple steps like these can save you from a lot more damage and expense.

When to Call a Professional Plumber

Some plumbing problems are too severe for a DIY fix. Here are scenarios when it’s crucial to call a professional plumber:

  • Major Water Leaks: If a pipe bursts and causes flooding, you need a pro to repair the pipe and clean up.
  • Blocked Sewer Line: If you notice multiple drains clogging at once, it’s likely a blocked sewer line, which requires special equipment to fix.
  • No Hot Water: If your water heater fails, and you don’t have hot water despite checking basic issues like the pilot light, call a professional.

DIY fixes in critical situations can be risky. Incorrect repairs can lead to worse problems. For example, trying to fix a gas water heater without proper knowledge can be hazardous and might lead to gas leaks.

Professional plumbing services have trained experts to handle these situations. They have the right tools and knowledge to fix problems correctly and safely. They can also identify underlying issues that might not be obvious but could cause future problems. Trusting a professional saves you time, stress, and potentially more expensive damage.

Preventive Measures to Avoid Future Emergencies

Preventing plumbing emergencies is easier than dealing with them. Here are some regular maintenance tips:

  • Inspect Your Plumbing: Check your pipes, faucets, and toilets regularly for leaks or signs of wear.
  • Clean Your Drains: Avoid using harsh chemicals. Instead, use a drain snake or a mixture of baking soda and vinegar to clean out any clogs.
  • Watch What Goes Down the Drain: Don’t pour grease or food scraps down the kitchen sink. Use strainers to catch hair and debris in the bathroom.

To winterize your plumbing, especially in Canada’s cold climate, consider these steps:

  • Insulate Pipes: Use pipe insulation on exposed pipes in unheated areas.
  • Disconnect Outside Hoses: Drain and store garden hoses. Install frost-free hose bibs to prevent freezing.
  • Let Faucets Drip: Let a small stream of water drip from faucets on very cold nights to keep pipes from freezing.

Periodic inspections, like sewer camera inspections, are vital. These inspections can catch problems in your sewer lines before they become major issues. A small investment in regular checking can save you a lot of trouble and cost later on.

Conclusion

Handling emergency plumbing repairs doesn’t have to be stressful. Knowing how to identify common issues, using temporary fixes, and understanding when to call a professional can save you from a lot of headaches. Preventive measures also help avoid future emergencies, keeping your plumbing system running smoothly.

Take the time to inspect your home’s plumbing and make small repairs when needed. Small actions can prevent big problems. When you’re unsure or face a serious issue, don’t hesitate to call the experts.

For professional and reliable emergency plumbing repairs, contact The Irish Plumber. We’re here to handle all your plumbing needs, from emergencies to regular maintenance. Contact us today and keep your home safe.

What’s the Longest-Lasting Heating System? A Boiler!

a-home-heating-boiler

In many parts of the country, the furnace reigns supreme. Whether gas or electric or sometimes even oil or propane, forced-air furnaces are quite popular. They make use of the ductwork that many of the homes in our more northern climate don’t have, or didn’t until recently. Around here, another option is very popular, and it shouldn’t be overlooked: a home heating boiler. It lasts longer than any other heating system! Here’s why. When you need a boiler repair in Livingston, NJ, give us a call.

Boiler Life Expectancy

An electric furnace might last for up to 15 years, provided it has maintenance performed every single year. A gas furnace won’t last as long as that. 10-15 years is a good long life for a furnace that combusts natural gas. But a boiler long outlasts either of those. It can keep chugging happily along for 20 years! How is this possible? There are some pretty simple reasons.

Moving Parts

Each moving part in a system is a point of potential failure. Imagine a ball. While the toy itself does move, it is not made of separate components that have to move together or against one another. Now imagine a bicycle. There are endless points where things twist or spin, squeeze or pull. That’s why there are so many bicycle repair shops.

Furnaces have a lot of moving parts. There are motors, fans, and valves. Any one of these receives a lot of wear over the years, and eventually, they’ll wear out. Boilers really only have one main moving component: the circulator pump which keeps the hot water moving throughout your home. With this simpler design, there’s less opportunity for something to break.

Corrosion

Boilers are full of water. It’s true! So why would they be less likely to experience corrosion and rusting than a system that doesn’t consist largely of a water tank? Because water has a pH of around 7, which is neutral, and because the boiler has a special protective coating to guard against it.

Did you know that in addition to producing heat, and the exhaust which must be vented out of your home, a gas furnace produces condensation? This moisture buildup occurs inside the furnace cabinet. But because of how it’s created, it does not have a neutral pH. It is in fact pretty acidic, so it contributes much more significantly to corrosion than pure water would.

Maximizing Boiler Lifespan

Of course, it’s not enough to simply sit back and say, I have the longest-lasting heating system, so I don’t need to do anything about it for 20 years. No, it’s still important to have maintenance done each year. This will prevent tiny problems from building up until you do have a need for repair.

And if repairs are needed, have them done right away. Odd sounds or smells, drips or puddles, cold rooms or uneven temperatures, or rising utility bills can all indicate that your boiler does in fact have a problem. Don’t allow that problem to worsen until serious damage to the system occurs!

Contact MarGo Plumbing Heating Cooling Inc. today to schedule an appointment or ask any questions about your boiler!

The post What’s the Longest-Lasting Heating System? A Boiler! first appeared on MarGo Plumbing Heating Cooling Inc..

This post first appeared on https://margoplumbing.com

Why Frost-Free Hose Bibs are a Must and How to Fix Them

Winter in Canada can be harsh, and your home’s plumbing needs to be ready for it. One crucial part of winterizing your home is ensuring that your outdoor faucets, also known as hose bibs, are protected from freezing temperatures. This is where frost-free hose bibs come into play.

Frost-free hose bibs are specially designed to prevent water from freezing inside the pipe, which can cause it to burst. When temperatures drop, any water remaining in a regular hose bib can freeze and expand, leading to a cracked pipe and significant water damage. Frost-free hose bibs solve this problem by shutting off the water further inside your home, where it’s warmer, thus preventing freezing.

Installing frost-free hose bibs not only saves you from costly repairs but also ensures that you have running water outside your home all year round. This article will delve into what frost-free hose bibs are, how they work, the benefits of having them, common problems you might face, and how to fix these issues. Understanding these points will help you keep your plumbing system in top shape, even during the coldest months.

What Are Frost-Free Hose Bibs and How Do They Work?

Frost-free hose bibs, also called frost-proof faucets, are outdoor spigots designed to prevent water from freezing inside the pipe. They are longer than regular hose bibs, extending further into the house where temperatures are warmer. This design keeps the water sitting in a part of the pipe that stays above freezing, even during the coldest winter days.

The key feature of a frost-free hose bib is its shut-off valve, located inside the house rather than near the spout outside. When you turn off the faucet, water drains from the outer part of the pipe, preventing any water from being trapped in the cold section. By doing this, frost-free hose bibs minimize the risk of the pipe freezing, expanding, and then bursting, which can cause significant water damage and expensive repairs.

Another component often included is a vacuum breaker, which prevents water from flowing backward into the home’s plumbing system. This feature adds an extra layer of protection, especially during winter when the hose bib isn’t in use. Understanding how frost-free hose bibs work can help you appreciate their importance and ensure you use them correctly to protect your home.

Benefits of Installing Frost-Free Hose Bibs

Installing frost-free hose bibs brings several important advantages, particularly for homeowners in cold climates:

1. Prevents Pipe Bursting: The main benefit is their ability to prevent pipes from freezing and bursting, which can lead to significant water damage and costly repairs.

2. Year-Round Use: With frost-free hose bibs, you can use your outdoor faucets throughout the year without worrying about winter damage. This is especially useful for tasks like cleaning walkways or filling bird baths during the winter months.

3. Peace of Mind: Knowing that your plumbing is protected from freezing temperatures offers peace of mind. You don’t have to go through the hassle of disconnecting hoses and winterizing your faucet every year.

4. Long-Term Savings: While the upfront cost may be higher than regular hose bibs, frost-free models can save you money in the long run by avoiding extensive repairs and replacements due to burst pipes.

5. Ease of Installation: They are relatively easy to install, making them a practical upgrade for many homeowners. For new constructions, it’s a no-brainer to opt for frost-free faucets right from the start.

Frost-free hose bibs are essential in cold climates as they help you avoid the common pitfalls of regular outdoor faucets. By preventing freezing and bursting pipes, they protect your home and make winter plumbing maintenance much simpler.

Common Problems with Frost-Free Hose Bibs

Even though frost-free hose bibs are designed to be durable, they can still develop problems. One common issue is leaking. If you notice water dripping from the spout, it might be due to a worn-out washer or a loose connection. A leak can also occur inside the wall, which is much harder to spot but can lead to severe water damage.

Another problem is a broken valve stem. This part can become damaged, preventing the faucet from shutting off correctly. If you turn the handle and water keeps flowing, it’s a sign that the valve stem might be broken. This issue needs to be addressed quickly to avoid wasting water and causing potential flooding.

Cracks in the pipe can also occur, especially if the frost-free hose bib wasn’t installed correctly. These cracks may not always be visible, but if you see water stains or damp spots on your exterior wall or basement, it’s a clear indication that there’s a problem.

To identify these issues, watch for signs like reduced water flow, continuous dripping, or strange sounds when you turn on the faucet. Regular maintenance checks can help you catch these problems early and prevent more extensive damage.

How to Fix Common Issues with Frost-Free Hose Bibs

Fixing common issues with frost-free hose bibs can often be done with some simple tools and a little know-how. Here’s a step-by-step guide:

1. Fixing Leaks: First, turn off the water supply to the hose bib. Remove the handle and unscrew the packing nut. Replace the washer inside, as this is often the cause of leaks. Reassemble the parts and turn the water back on to check for leaks.

2. Repairing the Valve Stem: If the valve stem is broken, you’ll need to replace it. Start by turning off the water supply and removing the faucet handle and packing nut. Carefully pull out the valve stem and replace it with a new one. Reassemble the faucet and test it to ensure the water shuts off correctly.

3. Addressing Cracks: For cracks in the pipe, it’s best to call a professional plumber. While there are temporary fixes like pipe tape, they are not reliable for long-term use and may lead to more significant issues down the line.

When you notice water stains or damp spots on your wall and suspect a hidden leak, it’s crucial to call a professional immediately. They have the tools and expertise to locate and fix these leaks before they cause severe damage.

Conclusion

Frost-free hose bibs are a must-have for any home, especially in cold climates like ours. They help prevent the common problem of pipes freezing and bursting during winter. While these special faucets are designed to withstand cold temperatures, they are not entirely free from issues. Knowing what to look for and how to fix common problems can save you time, money, and hassle.

Being proactive about fixing small problems will help you avoid bigger ones. Regular inspections and simple maintenance checks can keep your frost-free hose bibs in excellent condition, ensuring they work effectively when you need them most. However, some repairs require professional attention to be done right. It’s important to recognize when a problem is beyond DIY solutions and call an expert to take care of it.

If you’re facing issues with your frost-free hose bibs or need any other plumbing assistance, don’t hesitate to reach out to The Irish Plumber. We offer expert services to help you maintain your home’s plumbing system efficiently. Contact our Ottawa plumbers today to ensure your plumbing works perfectly through every season.

Exploring Easy Fixes for Common Building Drain Problems

Having trouble with your building’s drains can be a real headache. From slow draining sinks to foul smells, these issues can disrupt your life and cause significant damage if not addressed quickly. Understanding the common causes of drain problems and knowing some easy fixes can help keep your plumbing in good shape.

Drains can become blocked for many reasons, such as hair, grease, and other debris. Over time, pipes can also corrode and degrade, leading to more serious issues that need professional attention. By learning how to handle minor problems yourself and knowing when to call a plumber, you can save time and money.

Common Causes of Building Drain Problems

Blockages and Clogs

One of the most common causes of building drain problems is blockages. These can occur when foreign objects, such as hair, soap scum, food particles, and grease, accumulate in the pipes. Over time, these materials build up and obstruct the flow of water, leading to slow draining sinks and bathtubs. You might notice gurgling sounds or unpleasant odours coming from your drains, indicating a blockage.

Fixing blockages can be straightforward or complex, depending on the severity. In most cases, a plunger or a drain snake can help dislodge the material causing the blockage. However, recurring blockages might signal a deeper issue within the plumbing system that requires professional attention.

Pipe Corrosion and Material Degradation

Another major cause of drain problems is pipe corrosion. Pipes, especially those made from cast iron, can corrode over time due to constant exposure to water and various chemicals. Corrosion weakens the pipes, making them susceptible to leaks and breaks. Signs of corroded pipes include rust-coloured water, low water pressure, and frequent leaks.

Material degradation isn’t limited to metal pipes. Plastic and PVC pipes can also degrade, particularly if they’re old or exposed to extreme temperatures. These materials can crack over time, leading to similar issues as corroded metal pipes. Regular inspections and timely replacements of old pipes can help prevent these problems and ensure the longevity of your plumbing system.

Simple DIY Solutions for Minor Drain Issues

List of Common DIY Fixes

You don’t always need to call a plumber for minor drain issues. Here are some common DIY fixes you can try:

1. Plunging: A plunger can be very effective for minor clogs in sinks, toilets, and bathtubs. Ensure a tight seal around the drain and use a firm, up-and-down motion to dislodge the blockage.
2. Drain Snake: A drain snake, or auger, is a handy tool for clearing deeper clogs. Insert the snake into the drain and twist it to break up or pull out the obstruction.
3. Baking Soda and Vinegar: Pour a mixture of baking soda and vinegar down the drain, followed by hot water. This can help dissolve minor clogs and remove odours.
4. Boiling Water: Simply pouring boiling water down the drain can often dissolve grease build-up and minor blockages.

Safety Tips for DIY Drain Repairs

While DIY fixes can be helpful, it’s important to stay safe:

1. Wear Gloves: Protect your hands from bacteria and chemicals by wearing rubber gloves.
2. Use Tools Properly: Follow the instructions for any tools you use, like plungers and drain snakes, to prevent damage to your pipes.
3. Avoid Harsh Chemicals: Chemical drain cleaners can damage your pipes and are harmful to the environment. Stick to natural solutions whenever possible.
4. Know Your Limits: If the problem persists or seems too complex, call a professional to avoid worsening the issue.

By understanding these common causes and simple fixes for drain problems, you can better maintain your plumbing system and prevent minor issues from turning into major headaches.

When to Call a Professional Plumber

Signs That the Problem Is More Serious

Sometimes, a drain problem is too big for DIY solutions. It’s important to recognize when you need to call a professional plumber. Here are some signs that the problem might be more serious:

1. Recurring Clogs: If you find yourself constantly dealing with the same clog, it could indicate a deeper issue in the pipes.
2. Slow Drains Everywhere: If multiple drains in your home are slow, it might be a sign of a blockage in the main sewer line.
3. Bad Odours: Persistent bad smells coming from your drains can signal a severe blockage or sewer line problem.
4. Unusual Noises: Gurgling or bubbling noises from your drains could indicate a clog or air trapped in the pipes.

When you notice these signs, it’s best to get a professional inspection to avoid causing further damage to your plumbing system.

Benefits of Professional Drain Inspection

Hiring a professional for a drain inspection comes with several benefits:

1. Accurate Diagnosis: Professionals use advanced tools, like sewer cameras, to accurately identify the problem. This avoids guesswork and ensures the right fix.
2. Long-Term Solutions: A professional plumber can provide long-term solutions rather than quick fixes, saving you time and money in the future.
3. Safety: Dealing with severe clogs or damaged pipes can be dangerous. Professionals have the expertise and equipment to handle these issues safely.
4. Comprehensive Service: Plumbers can inspect your entire plumbing system and address any underlying issues, preventing future problems.

Advanced Techniques for Drain Repair and Maintenance

Use of Sewer Cameras for Inspection

One of the most advanced tools in plumbing is the sewer camera. This small, flexible camera is inserted into the pipes, providing a clear view of the interior. This inspection method has several advantages:

1. Precise Identification: A sewer camera can locate the exact position and nature of the blockage or damage.
2. Non-Invasive: Unlike traditional methods, sewer camera inspections don’t require digging up floors or walls, making it less disruptive.
3. Time-Saving: Quick and efficient, this method speeds up the diagnosis process, allowing for faster repairs.

Seeing the problem directly helps in planning the appropriate repair method, ensuring a more effective solution.

Modern Methods for Pipe Repair

When it comes to fixing drain issues, modern methods have made the process easier and more reliable. Here are some advanced techniques:

1. Relining: This method involves inserting a resin-coated tube into the damaged pipe. Once it hardens, it forms a new, durable lining, restoring the pipe’s integrity without full replacement.
2. Pipe Bursting: For more severe damage, pipe bursting is used. A new pipe is pulled through the old one, breaking the damaged pipe apart and replacing it in one go.
3. Replacing Cast Iron Pipes: Old cast iron pipes are prone to corrosion. Replacing them with modern materials like PVC can prevent future problems and improve water flow.

These methods are efficient, less invasive, and provide long-lasting solutions to complex drain issues.

Conclusion

Building drain problems can range from minor annoyances to significant issues that need professional attention. By understanding the common causes, such as blockages and pipe corrosion, you can take steps to prevent them. Simple DIY solutions can fix many minor issues, but knowing when to call a plumber is crucial to avoid larger problems.

Advanced tools like sewer cameras and modern repair techniques make diagnosing and fixing drain problems more efficient and less invasive. Whether it’s preventing recurring clogs or replacing old cast iron pipes, these methods ensure your plumbing system remains in top shape.

If you’re facing drain problems that seem too complex to handle on your own, don’t hesitate to reach out for professional help. At The Irish Plumber, we have the expertise and tools to tackle emergency plumbing repairs. Contact us today to ensure your drains are functioning smoothly!

+1-877-959-3534