Month: January 2025

DIY Simple Kitchen Pipe Repair

kitchen_plumbing

Tackling minor kitchen pipe issues yourself can save you time and money, but it’s important to approach the task with the right knowledge and tools. Whether it’s a leaky joint, a clogged drain, or a dripping pipe, many common problems can be resolved with simple DIY solutions

In this guide, we’ll walk you through the signs it’s time for a repair, common mistakes to avoid, and easy steps to get your kitchen plumbing back in working order. Let’s dive into the basics of DIY kitchen pipe repair and empower you to handle these fixes like a pro!

When is it Time to Repair Your Kitchen Pipes?

When it comes to kitchen pipe issues, minor problems can often be addressed with a bit of DIY know-how. However, knowing when to repair your pipes is crucial to avoid larger, more expensive plumbing disasters. If you notice any of the following, it’s time to consider taking action:

  • Leaky or dripping pipes: Persistent leaks can waste water and lead to higher utility bills.
  • Low water pressure: This might indicate blockages or corrosion inside the pipes.
  • Unusual odors: Foul smells can suggest a broken or clogged pipe allowing sewer gases to escape.
  • Visible rust or discoloration: Signs of aging pipes that may fail soon.
  • Unexplained water stains: Water damage under the sink or on walls near pipes often points to hidden leaks.

Addressing these issues early can save time, money, and prevent further damage.

Simple Pipe Repair in 4 Steps

Pipe Repair Sacramento

Follow these easy steps for your DIY pipe repair.

1. Prep

Before you begin your pipe repair, clear out the items below the sink to give yourself more room. Then turn off the water to the kitchen sink, or the entire house if there’s no turn-off valve. Next, place a bucket under the pipes. This will catch water that’s already in the pipes as you complete your pipe repair.

2. Disassemble Pipe

To begin your pipe repair, loosen the slip nut of the leaking pipe. You can do this by hand for plastic pipes. For metal pipes, use a pipe wrench.  

Remove the pipe and dispose of the old washer and slip nut. For metal pipes, pull off any old plumber’s tape.  

3. Replace Parts

The next phase of your pipe repair is to replace the old parts. Place the new slip nut onto the pipe. Make sure the threads of the nut are facing the threading on the pipe that you want to connect it to.

Next, push the new washer on the pipe with the slip nut. The thicker end of the washer must face the slip nut.

The next step in your pipe repair is to reassemble the pipes. Reconnect the pipes by inserting the pipe with the slip nut and washer into the pipe that it connects to. Press the washer into the gap between the two pipes. The thinner end of the washer should go into the gap between the two pipes.

For metal pipes, wrap plumber’s tape on the threads of the pipe without the slip nut on it. (PVC pipe does not need plumber’s tape.) Screw the slip nut onto the threading of the other pipe you want to connect to. Tighten the nut by hand, or use a pipe wrench for metal pipes. Your pipe repair is complete!

4. Test

Now that you’ve successfully replaced the necessary parts and carefully reassembled your pipe, it’s time to thoroughly check your pipe repair to ensure everything is functioning correctly. Begin by turning the water supply back on, either at the kitchen sink or the main valve if you had to shut off the entire house’s water.

Once the water is flowing, run the faucet for a few minutes to allow water to pass through the newly repaired section of the pipe. As the water runs, closely inspect the area around the repaired joint for any signs of leakage. Look for drips, moisture, or any unusual sounds that might indicate a problem. If the pipe remains dry and there are no leaks, congratulations! Your repair is successful. However, if you notice any leaks, you may need to tighten the connections further or reassess the installation of the washer and slip nut.

Common Mistakes to Avoid When Repairing Your Kitchen Pipes

Repairing kitchen pipes can seem straightforward, but many DIYers make mistakes that lead to bigger problems down the line. Avoiding these pitfalls is key to ensuring a successful repair. Here are some common mistakes and how to steer clear of them:

  • Using the wrong tools or materials: Improper tools or mismatched pipe fittings can worsen the issue. Always double-check compatibility before starting.
  • Overtightening connections: Excessive force can crack fittings or strip threads. Tighten connections snugly but not excessively.
  • Skipping the water shutoff step: Failing to turn off the water supply can lead to unexpected flooding. Always shut off water valves before repairs.
  • Neglecting to clean or dry surfaces: Dirt and moisture can interfere with proper sealing. Clean and dry all areas thoroughly before applying sealants or connecting pipes.
  • Ignoring proper measurements: Misjudging pipe lengths or fitting sizes can result in leaks or a poorly assembled system. Measure twice to ensure accuracy.

By taking these precautions, you can prevent common errors and tackle kitchen pipe repairs with confidence.

Call For More Help With Pipe Repair

That’s it! You’ve completed a simple pipe repair at home. If the pipe continues to leak or you have another plumbing need, call the experts at Express Sewer & Drain. We’ll be glad to answer any questions you have about pipe repair or other household plumbing problems.

Sp

This post first appeared on https://www.expresssewer.com

Old Cast Iron Pipes: Here’s When to Replace Them

Cast iron pipes have been a reliable choice in plumbing for many years and are known for their durability and strength. However, like any materials, they age and eventually require replacement. Recognizing when your old cast iron pipes need attention can help you avoid plumbing disasters and costly repairs.

Old pipes can pose several risks, including leaks, blockages, and even structural damage if left unchecked. Paying attention to warning signs such as frequent clogs or visible rust can ensure timely interventions. Replacing aging pipes prevents damage and improves your plumbing system’s efficiency and safety.

Understanding when and why to replace cast iron pipes can save a lot of trouble down the line. This guide explores the typical lifespan of these pipes and modern replacements that offer improved performance. Armed with this knowledge, you can make informed decisions on maintaining and upgrading your home’s plumbing in a proactive way.

Understanding the Lifespan of Cast Iron Pipes

Cast iron pipes have been used in plumbing for many decades due to their robustness. However, they do not last indefinitely. On average, cast iron pipes can last between 50 to 100 years. The actual lifespan depends on several factors, such as the quality of the installation, the materials used, and how well they have been maintained throughout the years.

A big factor that influences the longevity of cast iron pipes is the quality of the water they carry. Hard water, which contains high levels of minerals like calcium and magnesium, can accelerate wear and lead to mineral deposits and scaling inside the pipes. This makes it hard for water to flow smoothly, potentially shortening the pipe’s lifespan. Additionally, environmental conditions such as soil type and climate can also impact how long these pipes last. Soil that is particularly acidic or moist can cause external corrosion faster.

Regular maintenance can extend the life of these pipes. Inspections, especially using technology like sewer camera inspections, help spot early signs of problems. This allows homeowners to address small issues before they become big, costly repairs. Keeping track of the age and condition of your pipes is key to determining the right time for replacement.

Warning Signs Indicating Pipe Replacement

Old cast iron pipes often give clear warnings when they start to fail. Being aware of these signs can help you decide when it’s time to replace them. One major indicator is frequent clogs and sewage backups. If you’re experiencing constant blockages despite regular cleanings, your pipes might be deteriorating on the inside.

Look for visible signs around your home, too. Rust, corrosion, and leaks are strong signals that your pipes are in trouble. Rusty spots or patches of moisture along pipes can indicate leaks or developing weak spots. These shouldn’t be ignored, as they can lead to bigger issues down the road.

Strange noises coming from your plumbing, like banging and gurgling, can also be a sign of internal pipe issues. This could mean that the inside of the pipes is getting rough or scaling up from mineral deposits, affecting water flow and leading to more serious damage.

Neglecting these warning signs increases the risk of more significant failures and can lead to costly repairs. If you notice any of these symptoms, it’s wise to consult a plumbing professional for a thorough inspection and discuss the best course of action.

Risks of Delaying Replacement

Ignoring the signs that your cast iron pipes need replacement can lead to serious consequences. One of the most significant risks is potential water damage. Leaking pipes can cause water to seep into your home’s walls and floors, leading to structural issues. Over time, this can weaken your home’s foundation, resulting in costly repairs.

Beyond structural damage, leaks also create ideal conditions for mould and mildew growth. Mould can spread quickly in damp environments, becoming a health hazard. Exposure to mould spores can cause respiratory problems, allergies, and other serious health issues. Bacteria can also thrive in moist conditions, potentially contaminating your water supply and posing further health risks.

Furthermore, delaying pipe replacement can lead to more frequent plumbing emergencies. Blockages and backups might become more common, resulting in inconvenient and messy situations. These issues not only disrupt your daily life but also increase your maintenance costs over time. Addressing pipe problems early can save money and prevent future headaches, protecting both your property and your health.

Modern Replacement Options

When it comes to replacing old cast iron pipes, modern materials offer excellent alternatives. PVC (polyvinyl chloride) and copper have become popular choices due to their durability and efficiency. PVC pipes are lightweight, resistant to corrosion, and easy to install, making them an economical and long-lasting option for plumbing systems.

Copper pipes are another strong contender known for their strength and resistance to bacteria. Copper’s natural antimicrobial properties help keep your water clean, and they can withstand high pressures and temperatures, making them suitable for various plumbing needs. While copper pipes might be more expensive upfront, their longevity and dependability can justify the investment.

Upgrading to these materials can significantly improve your home’s plumbing system. They provide reliable water flow and reduce the likelihood of future leaks, clogs, or maintenance issues. Modern piping systems also enhance water quality, ensuring a cleaner, more efficient water supply. With these options, you can enhance the safety and functionality of your home’s plumbing and enjoy peace of mind.

Conclusion

Updating your cast iron pipes can be a worthwhile investment, offering protection from unexpected damages and enhancing the overall value of your home. By recognizing the signs of wear and tear early and understanding the risks of delaying replacement, you can prevent costly repairs and ensure a safe environment for your family. Choosing modern materials like PVC and copper allows for a smoother transition to a more efficient and reliable plumbing system.

Ignoring the need for replacement can lead to severe issues down the line, so taking proactive steps is crucial. If you suspect your cast iron pipes are nearing the end of their lifespan, it’s time to explore replacement options that suit your needs and budget. With the right materials and professional installation, you can upgrade your home’s infrastructure and enjoy lasting benefits.

If you’re noticing any warning signs in your plumbing, don’t wait for a problem to escalate. Contact The Irish Plumber today. Our plumbers in Ottawa are ready to assess your situation and provide a solution tailored to your home. Let us help you ensure your plumbing is in top condition, so you can have peace of mind and avoid unnecessary disruptions.
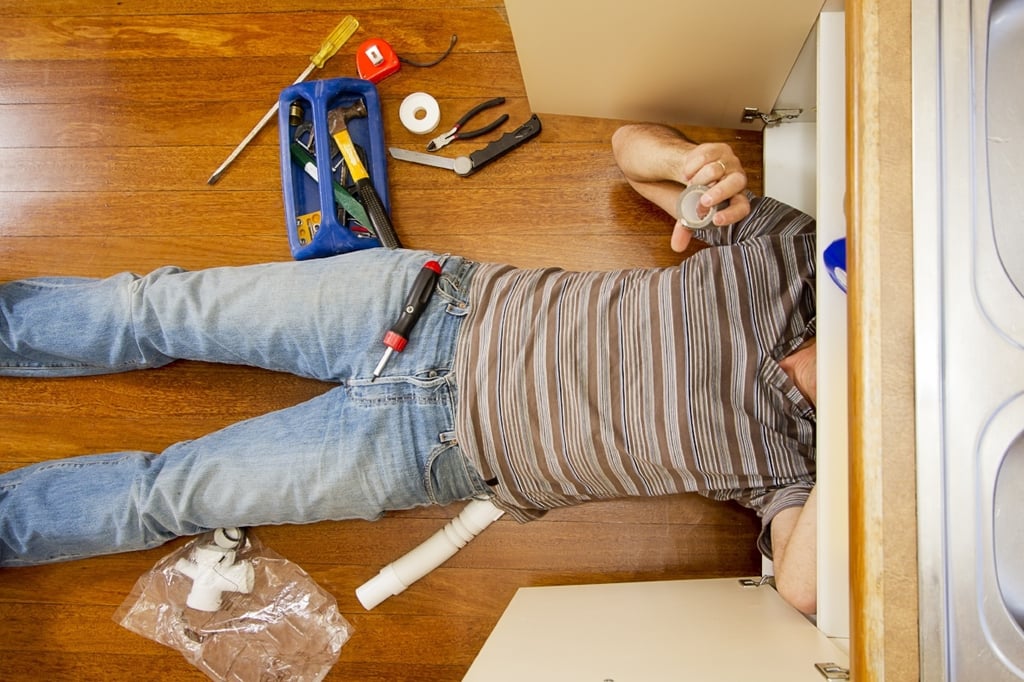
Repiping Your Sacramento Home [6 Steps]

repiping_sacramento_home

Does the plumbing system in your home have leaks, faults, and bad connections that need fixing? Are you preparing to sell your old Sacramento home and are worried that antiquated plumbing may be a sticking point for potential buyers?  Or perhaps you just want to update the piping in your home to meet the current California plumbing code.

Whatever the reason, you’ve decided to repipe your home and take charge of critical home maintenance issues. Read More

Avoid Winter Illnesses With a UV Air Purifier

woman-with-dry-nose

Scenic winter beauty, sparkling snow, beautiful feathery frost patterns etched onto the windowpane… and being stuck indoors breathing in the germs from everyone else’s sneezes! What a great time of year. Well, we do have some good news for you. You can drastically reduce your risk of coming down with illnesses this winter by improving your indoor air quality. All it takes is some UV light! Let’s go over the benefits of UV light services in Cedar Grove, NJ.

Killing Germs with Light

Germs such as bacteria, viruses, mold spores, and more are not like larger organisms. They don’t have complex structures or immune systems. They’re so tiny that they are, in fact, very delicate. The only way they can cause so much harm is by finding ideal environments to reproduce in. And they much prefer those environments to be dark.

Germs are so sensitive to light that close exposure to UV light at the right frequency will destroy them. The light goes right through their flimsy outer membranes and undoes the chemical bonds that hold their proteins together. The germs are dead, and can no longer cause anyone any harm.

UV Light Safety

If this sort of light can be so destructive to single-celled pathogens, will it cause harm to larger organisms like people and pets? Well, we have sturdy skin to protect us. This frequency of UV light is similar to the sun or a tanning bed. It’s not going to scramble your proteins like an egg, the way it does to a germ. But you should limit your exposure, just as you do to avoid sunburn. How? Well, that’s easy. In a UV air purifier, the light stays inside, and you’re never exposed at all!

Whole House Air Purifiers

Your home’s air passes through your ductwork. Whether you’re using the heat or the air conditioning, this network is how the warmth or coolness is distributed throughout the house. That means that all your air (and all the germs in it) will eventually make it through those ducts. So that’s where your air purifier will go!

While a small, portable air purifier is a great option for a little office or dorm room, it can’t cycle all the air in an entire home through its UV light chamber. But whole house air purifiers are meant for exactly this workload. They’re professionally installed by our HVAC technicians and are located inside your ductwork. Every bit of air is sanitized as it cycles through your ducts.

Benefits of Better Air Quality

What can you hope for when you breathe cleaner air? It can have a huge impact on your life! Fewer sick days, headaches, allergy symptoms, asthma attacks, and more. Improved energy and mood, and better sleep at night. And because odors are caused by bacteria in the air, your house will smell fresh and clean, too! It will even reduce the risk of mold growth in your home by killing mold spores in the air.

Contact MarGo Plumbing Heating Cooling Inc. today to schedule an appointment or ask any questions about indoor air quality!

The post Avoid Winter Illnesses With a UV Air Purifier first appeared on MarGo Plumbing Heating Cooling Inc..

This post first appeared on https://margoplumbing.com

+1-877-959-3534