Author: admin

Plumbing Vent Diagram: How to Properly Vent Your Pipes

We are a participant in the Amazon Services LLC Associates Program, an affiliate advertising program designed to provide a means for us to earn fees by linking to Amazon.com and affiliated sites.

If you’re ready to tackle the task of remodeling your kitchen or bathroom, you may be intimidated when you think about the plumbing. There is a lot you should know before you embark on making any major changes. But luckily, it’s easy to learn the basics. Our plumbing vent diagram and simple DIY instructions will have you ready to take on your remodel before you know it.

Let’s take a look at how to properly vent your pipes. Then you can start remodeling your kitchen or bathroom with confidence. Here’s what you need to know to complete your project.

How to Properly Vent Your Pipes

sink-drain-plumbing-image

So, you’re ready to remodel your kitchen or bathroom and realized that new plumbing is in order. If this isn’t an issue you’ve run into before, you might find it a little more difficult than most other DIY projects. Before panicking and calling a plumber, know that there are simple ways to ensure your pipes are properly ventilated.

A quick internet search for “plumbing vent diagram” will bring up multiple ways to tackle this issue. But how do you know which one will work for your home? What are the pros and cons of each system? Whether it’s a new sink, tub, or toilet, here’s how to properly vent your pipes.

Understanding the Plumbing Vent

Visualizing the pipes inside your wall (using a plumbing vent diagram) is made easier if you start from where you can see. You’ve opened up the cabinets under a sink before to see the P-shaped tube directly underneath the drain, right? It’s called the P-trap, and it starts the sewage/ventilation process.

Related Read: Everything You Need to Know About Plumbing Traps

These drain pipes connect to showers, sinks, tubs, and other appliances in order to carry water away after you’re done using it. From there, the water moves into slightly larger drain pipes as they continue to connect and make their way to the stack. Soil pipes do the same for toilets.


vent-diagram-big-image121

The stack pipe leads the whole way out through your roof and further underground in the opposite direction to the main sewer lines. Water and waste head down the pipe, while gasses are vented up and outwards. The stack also allows fresh air in to keep water running smoothly through your piping.

Without the stack to properly ventilate things, your home would reek and fill with noxious sewer gasses. To help the stack do its job, ventilation pipes are often added to fixtures. This allows gasses to freely move away from your home while using fresh air to move sewage freely.

It’s not something most homeowners like to think about. But it is a critical part of any household. Whenever you’re renovating, fixing your plumbing, or just adding a new fixture, it is vital that you make sure this system functions properly.

Types of Vents

There are four main types of ventilation used in piping. They are:

  • The true vent
  • A re-vent pipe
  • The common vent
  • And the loop vent

The true vent is aligned vertically and attaches to your drain line through the roof. This is best implemented if a fixture rests close to the stack and the top floor of your home, allowing the stack to serve as a vent. True vents also have no water running through them. While the true vent is simple, it isn’t always a possible solution since fixtures are rarely located so close to the stack.

Re-vent pipes, otherwise known as auxiliary vents, attach to the drain line near your fixture. They run upwards and over the main vent. They can attach right behind your fixture or horizontally to the drain line. These are excellent options when your sink is too far away from the main stack.

In the event that you have another fixture on the opposite side of the wall, you probably want to use a common vent. This allows both drain lines to tie together in a sanitary cross. You can usually find these on back-to-back sinks.

The loop vent is a solution for many freestanding sink codes. It loops up and around before connecting to the drainpipe. This allows ample ventilation to take place just behind your fixture. There is also a wet vent. However, these are mostly reserved for tubs that sit close to a stack and may not be allowed by your locality’s code.

As an alternative to venting altogether, some codes allow for air admittance valves. These allow air to enter as waste drains, then rely on gravity to seal back up before any gasses can make their way back into the room. These are relatively new, so make sure to check with your area’s codes before buying any.

Placing Your Fixture

placing-fixture-image

Whichever ventilation system you choose to employ, it is equally important to place your fixture a certain distance from the vent pipe. This area is called the critical distance and involves a few calculations to figure out. The size of your pipes, the type of fixture you are installing, and the number of fixtures that are wet vented in your home all play a part in determining that measurement.


During this phase, it is highly recommended that you consult a plumbing inspector after measuring the length of your pipes. They can also tell you how to properly vent your pipes, pointing out which one of the systems works best while satisfying local code.

Installing the Vent

Unlike drainpipes, vent pipes do not need to slope. You can run them level so long as there are no obstacles to work around. The main goal here is to ensure the vent piping will remain dry. That’s why most diagrams depict them running vertically, making sure that no water can back up into the system.

The re-vent is the only exception since it runs horizontally. However, it needs to be at least six inches above your fixture’s flood level to keep from getting wet. On a sink, that would be either the rim or overflow hole.

Related Read: Plumbing Tools The Homeowner Would Use

A Note on the Main Drain

When installing your vents, it’s highly recommended that you plan out your drain lines to minimize the risk of clogging. Both kitchen (1-1/2 inches) and bathroom (1-1/4 inches) are smaller than the rest of the drain system on purpose. They lead into larger branch drain pipes, which lead into the 4-inch stack.

Since the main stack is vertical, it’s a rare occasion that this pipe clogs. While other pipes connecting the stack will need to be horizontal, making them larger allows an ample amount of water to flow through them freely. This is also a good time to have a professional check your main drain line, which resides underground, for any clogging.

Useful Plumbing Vent Diagrams

To help you better visualize what these piping systems look like, we thought it might help to incorporate a plumbing vent diagram. The image below illustrates s typical bathroom with multiple plumbing vents. There’s even a wet vent included that connects to the bathtub.

As you can see, the true vent aligns with the stack just behind the toilet. However, the sink is placed further away. Therefore, a re-vent was added to ensure that sewer gasses could escape.

This next image shows various types of vent piping behind a sink. It gives you a more accurate idea of what those might look like in your own project. Depending on the layout of your home, one of these will more than likely work best for you.

sink-vent-diagram-image3232

This image clearly displays what the loop vent looks like, which you may need to use if your sink is too far away from the stack for a re-vent pipe. It also shows what the sanitary cross would look like if you happen to have a sink on the other side of the wall. Both sinks connect at one point, sharing a common true vent to the stack.

From the side angle, it becomes easier to imagine what these pipes might look like behind your bathroom or kitchen walls. Notice how the main vent and waste pipe remain separated behind the sink, only connecting via the attached went pipe. This revert is at least six inches above the overflow line and properly connected with a drainage T.

Extra Info on the Air Admittance Valve

In the event that your walls do not leave enough space for any of the above vents, then the local code may allow you to opt for an Air Admittance Valve (AAV). This one-way valve is designed to allow air into the plumbing when negative pressure is developed from draining. After allowing air in, it seals itself back up to keep odors and gasses out.

These devices normally attach underneath the sink just past the trap, ensuring amply air makes its way into your pipes. Keep this method in mind if you tear into the wall and discover that there is little room for a vent pipe. Always check your local codes with a plumbing inspector to make sure you can use an AAV, though.

Related Read: How to Install Plumbing Vent in 7 Steps

Venting Your Pipes with a Plumbing Vent Diagram

venting-pipe-iame-0434

Well, that’s all there is to it. Now you know the ins and outs of proper sewage pipe ventilation and are ready to tackle this aspect of your renovation project. Remember to use the best setup possible depending on where your fixture is and to refer back to these diagrams to ensure you’re properly setting up the vents.

Have you used a plumbing vent diagram and your DIY skills to remodel your kitchen or bathroom? Share your experience in the comments below.

This post first appeared on http://www.theplumbinginfo.com

6 Great Things Your Can Do for Your Plumbing

checkmark-greenHomeowners don’t often think of “preventive plumbing” for their homes. Usually, the only major planning people do for their plumbing is to avoid pipe freeze during winter. That’s not something we need to worry about here in Arizona. But there are several preventive measures you can take to stop problems, large and small, in the future. We’ll go over six of them below.

1. Schedule routine drain cleaning

This one we often recommend to our customers. Rather than waiting for clogs to start to happen, you can keep them from happening—all around the house. Drain cleaning is great for getting rid of major clogs when they strike, but it’s also a maintenance service. Our plumbers will use the finest tools available to return your home’s drains to “like-new” condition, making it unlikely there will be clogs in the future. This also prevents drain flies, foul odors, and helps the drain pipes last longer. 

2. Arrange for leak detection

You may have leaks around your home that you aren’t aware of… yet. Hidden leaks are a common problem, and they both waste water and eventually cause building damage and mold growth. We advise our customers to schedule professional leak detection every couple of years. If you’ve never had leak detection done, it’s time to check this one off. That way you’ll have leaks addressed before they become major problems.

3. Install an automatic shut-off valve

This is a defense against flooding because of a major plumbing accident, the sort of disaster that might occur when you’re on vacation and which can keep you from relaxing. The shut-off valve works with leak detection devices around the house in key areas where flooding might occur, and when water begins to accumulate they’ll shut off the water main. The valve will also close if there is a sudden drop in water pressure. The newest in shut-off valve technology will even send an alert to your phone regarding the problem.

4. Install a water softener

Your house may not need this one, but many homes in the area do, so we recommend you ask plumbers about the presence of hard water in your home. Hard water does extensive damage to plumbing and can wreck water heaters. A water softener is attached to where the water main enters the home and counteracts the hard water minerals with sodium to “soften” the water. 

5. Have the water heater flushed

You should schedule maintenance for your water heater each year to ensure it works effectively, efficiently, and safely. Your plumbers will be able to tell you when it’s time to flush out the water heater, which will remove silt build-up that will increase energy efficiency and help with the water heater’s longevity. 

6. For an older home, repipe

If your house was built before 1970, it likely has aging pipes in it made from outdated materials. It’s a good idea to consult with our plumbers about the state of your pipes (such as during leak detection) and find out if it’s time to do a partial or full repiping. 

For all your needs for plumbing in Peoria, AZ, we’re the plumbers to call.

Trust The Trusted Plumber with your plumbing in Glendale, AZ and the surrounding areas.

This post first appeared on https://www.thetrustedplumber.com

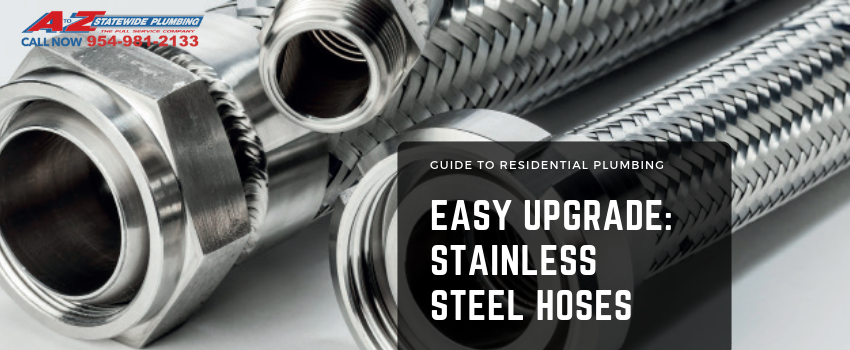
Easy Upgrade – Stainless Steel Hoses

Stainless Steel Hoses

Easy Upgrade – Stainless Steel Hoses

In South Florida, your plumbing system is very important. Alright, it’s important no matter where you live but in South Florida there are some very specific issues we face in our homes or businesses. Sometimes things that go wrong environmentally which can affect your plumbing in this sunny area of the south are leaky faucets, low-water pressure, and clogged drains. Different kinds of pipes which are made of materials that may not last forever can be a big issue. One of the best things you can do in an easy upgrade for your residential home or commercial property is to overhaul your plumbing system, making it stronger with one very specific upgrade. It’s stainless steel hoses. And boy oh boy, is it a worthwhile investment to make sure the life of your plumbing system can go the distance for you and your family.

Here’s the issue with having pipes made of other materials. They may be susceptible to cracking and splitting, causing leaks or broken pipes that need to be repaired (at the minimum), and completely replaced when you have a system failure (maximum problem).

Why Stainless Steel Hoses Are Just Plain Better

Stainless steel braided hoses are simply the very best in connections for toilets, sinks, and refrigerators. They are better than PEX connections and other plastic connections that can pose issues with bursting. You definitely don’t want that to happen.

What’s The Bottom Line On Cost?

You may be thinking that upgrading to stainless steel hoses will be crazy expensive. Not so. In the long run when you make the investment what you are going to save on costly repairs of your other pipe systems pales in comparison to just making the switch to stainless steel hoses. You are absolutely going to fortify and straighten out your plumbing system with this one simple upgrade. Overtime your system will stand up to the wear and tear of daily home life better with less chance of breaks in your hoses or pipes that need repairs.

Some Additional Benefits Of Stainless Steel

Stainless steel is a mighty piece of metal. It’s stronger, lasts longer, and resists damage because of the ability to ward off rust. Sometimes the stainless steel hose tubing is braided to add extra durability and makes it even tougher. This is a top of the line steel that will last for years to come. If you have questions about upgrading your home or commercial business to stainless steel hoses, give us a call today. Our staff will be happy to answer any questions you might have about this important upgrade you can make to your plumbing system.

Trending Topics Right Now

Aaron Atkins

Delivering exceptional customer service is first and foremost, but, when he is not focused on supplying your home or business with the highest level of customer support, Aaron prefers to lace up the running shoes and pound pavement for hours on end. Originally hailing from the snowbelt of Pennsylvania, Aaron currently resides in sunny South Florida with his wife and three children.

This post first appeared on http://www.atozstatewideplumbing.com

Air Purification: A Smart Way to Clean Your Home

It’s time for spring cleaning! Get out the vacuum, the duster, the cleaning supplies, and take on the large projects you’ve been waiting all winter to start. Spring cleaning can be a great reason to spur the family into making their home feel like a sanctuary, and we’re all for it! That being said, you can’t clean everything with a pair of gloves, cleaning spray, and some paper towels.
Air purifiers are a wonderful tool that provides reoccurring cleaning power for the air of your home. As it runs, it eliminates contaminants through your ductwork before they enter your living space, so you never have to deal with those particles at all. Not only can our team perform the installation of an air purifier in Caldwell, NJ, but we will also tell you about why they’re such a great tool for your home.

What Contaminants Are We Talking About?

This is a good question! When you’re cleaning your home with normal cleaning supplies, it can be easy to tell what you’re fighting against. Mold, limescale, bugs, dirt, mud, or even stains that are causing you discomfort. These can all be approached with regular cleaning supplies because you can physically see the problems at hand and find the right tool for the job.

When it comes to air contaminants, these can be microscopic and almost impossible to detect. From viruses to bacteria, these contaminants can be just as dangerous and uncomfortable as the contaminants you can see, but there’s no real way for you to address them with normal cleaning supplies. An air purifier can specifically target these invisible contaminants, eliminate them, and keep your home clean and safe.

The Science Behind Purification

If you’re wondering how exactly an air purifier can keep your home clean, now you’re starting to ask the right questions. UV light air purifiers, which are the most common types, use ultraviolet light to get the job done. UV light produces a low amount of radiation that’s similar to the sun’s rays. This radiation is mostly harmless to humans but is absolutely devastating to microorganisms and single-celled organisms. It inhibits the cell’s ability to reproduce, which is essentially one of the main ways bacteria or viruses can cause an illness in a host. This means that as the organism passes through your ductwork and the UV light, it’s rendered harmless and is sent into your air for easy clean up with a paper towel, a vacuum, or to be sent out your open window.

Put It All Together

Some homeowners love their air purifiers but still need a little more help with their air quality. We often see the best solution as a combination of air purification and air filtration. The air filter catches larger particles like dust and debris, while the air purifier eliminates any of the microscopic contaminants that would otherwise make it through the filter to make you sick. This combined power of two systems that work excellently can keep your home safe, clear, comfortable, and contaminant-free!

Contact MarGo Plumbing Heating Cooling Inc. for comprehensive air quality services.

This post first appeared on https://margoplumbing.com

Why Does My Toilet Flush Twice?

toilet-with-button-flushYou go to flush your toilet and it flushes just fine… but then it flushes again. You noticed this happening a while ago and you thought it was odd, but you brushed it off because it seemed harmless. Now it’s been going on for a while and it’s creating a distinctive pit in your stomach every time it happens. You know this is a problem waiting to happen. Now, you might want to ask yourself the question: “What should I do?”

First, you should contact our team members for toilet repairs in Orlando, FL. We’re completely prepared to fix your odd toilet issue in no time. Today, let’s take some time to understand why this is happening.

The Backstory

To really understand why your toilet is flushing twice, you need to understand the basics of how a toilet operates.

The two main parts of your toilet are a bowl and a tank. When you go to flush your toilet, you push down the handle and the water that’s stored in the tank flows down into the bowl. This is the flush you’re used to seeing on your end. Once enough water flows into the bowl, the waste in your toilet and the wastewater ushering it down flush down into your home’s sewer line.

After the flush is complete, the fill valve in your toilet starts to refill the tank to the standard level. Then your toilet is back at square one and ready to be flushed again.

Why Your Toilet Is Flushing Twice

Understanding the way that your toilet works is essential, but you’re still going to need to understand why your toilet is flushing twice. Let’s get into this now. There are two main reasons why your toilet might do this.

Reason #1: Lightweight Toilet Flappers

The first problem that you might be experiencing is having a toilet flapper that’s too light.

Your toilet flapper is the door that opens to let the water in your tank move down into your toilet bowl. The flapper has a certain weight, so it closes at the appropriate time after you’ve flushed your toilet. If your flapper is too light, it won’t close fast enough after you flush your toilet.

On the inside, this looks like water continuing to enter the bowl even after your flush is over. On your end, this looks like your toilet flushing two times.

Reason #2: Too Much Water In Your Tank

You could also have the problem of having too much water in your tank. Too much water in the tank means that when you go to flush your toilet, there’s an overflow. The extra water continues to pour into the bowl and refills it quickly. This results in your toilet bowl flushing two times.

Trust Professionals for Toilet Repair

Don’t ignore your double flush! It might not be as dire as a toilet leak, but it’s terrible for your toilet efficiency. Help your home by relying on certified professionals to fix your home.

Contact Modern Plumbing Industries, Inc. for your toilet repair services in Orlando, FL.


This post first appeared on https://www.modernpi.com

Is Soft Water Safe? For You, Your Pets, Your Plants: The Answer You Need

We are a participant in the Amazon Services LLC Associates Program, an affiliate advertising program designed to provide a means for us to earn fees by linking to Amazon.com and affiliated sites.

We’ve seen water softeners for sale on the market and read about the damage hard water can do to our fixtures, but is soft water safe?

In a nutshell, hard water contains a lot of manganese, calcium, and other types of minerals. These substances can dry out our skin and hair while also creating an impact on our health. So, if soft water is the solution, the question of its safety arises.

With a water softening system, you can get soft water for showering, cleaning, and drinking. This type of water provides several benefits: it can improve your skin and doesn’t leave soap scum.

The question remains, though; is soft water safe? No matter how tempting the sound of soft water is, there’s still some doubt about its safety. Let’s have a closer look at this issue now.

What Exactly Is Soft Water and Is Soft Water Safe?

A glass of water with a lemon wedge that makes you ask is soft water safe.

Soft water is hard water that’s gone through a water softening system. For example, in places such as Arizona, the water is mineral-rich. It has limestone, gypsum, and chalk deposits.

While there might be some benefits of hard water (perhaps, drinking water rich in calcium could give you your daily quota of that mineral), the verdict is still against this substance.

If you shower and wash your dishes too often with this kind of water, you’ll soon be experiencing dry skin, stained utensils, and scummy bathrooms.

What’s more, hard water will increase the mineral buildup on your fixtures and fast forward the wear and tear on your household items.

Since most of us get our calcium and magnesium intake from our food intake, the extra minerals aren’t needed either. All of these are excellent reasons why water softeners are so popular.

Recommended Read: Water Softener Buying Guide – Things to Consider

Water softener systems use a filtering system that separates ions of minerals (especially magnesium and calcium) from hard water. The result is soft water, which won’t wreak havoc on your skin, hair, appliances, etc.

But what about drinking this type of water? Is soft water safe?

After all, a regular water softener will swap manganese and calcium ions for sodium ones. As a result, soft water has more sodium in it than hard water.

However, it does seem like soft water is a fairly safe option for drinking. Many people within the U.S. have already consumed soft water without realizing it and without any issues.

A lot of cities in the U.S. have hard water in their taps. As a result, most residences, businesses, and workplaces in almost every state have water softeners installed. This includes the water that’s intended for human and animal consumption.

Is the Sodium Content in Soft Water Safe?

A glass of water sitting on a napkin.

The general answer is that you can safely drink soft water. However, there are a few outlying factors. If you want to make an informed decision regarding soft water, you should consider these as well.

First of all, the sodium. This isn’t the same as salt. Still, you should be aware that soft water has around 20 percent more sodium in it than the hard version.

It’s also a wise idea to ask your health practitioner about the usage of soft water if you’re dealing with specific health conditions such as high blood pressure.

Most people’s sodium intake in the U.S. is related to food. Soft water is on the list but at a low level. The suggested cap for sodium according to the Dietary Guidelines for Americans is 2,300 mg per day.

In one 8-ounce glass of soft water, we get 12.5 mg of sodium. This is hardly a considerable amount. Therefore, it’s probably safe to ignore the sodium content here.

If you’re worried about limiting sodium intake, it’s wise to watch your diet for better results. Some folks might have specific health issues, though. For those, we suggest being careful of any sort of sodium intake.

Ask your doctor “is soft water safe?” if the sodium content is making you worry more about consuming soft water.

Is Soft Water Salty (and What Can You Do About It)?

A pitcher of water and a glass of water with ice and strawberries. It looks yummy but is soft water safe?

While it’s clear that we can safely drink soft water, the problem of whether we should do so is another matter. This confusion usually arises when we talk about the taste of soft water.

Let’s clear up one thing first; soft water isn’t meant to be salty. If your water softener is producing salty water, then it needs a proper setup and maintenance session.

The salty water usually only comes out when the system is in need of some servicing and fine-tuning. So, it’s best if you don’t drink salty water from a water softener system.

Soft water isn’t completely flavorless either; some like the taste, some don’t. The latter is in the majority but trying it once won’t hurt.

Even if you don’t like the taste of soft water, you might be able to get a company to install two kinds of taps in the sink. One will give you regular hard water while the other will provide soft water.

That means you can use hard water to drink and cook; and soft water for washing dishes, clothes, and your body.

Another good tip here: you can get a reverse osmosis water system to do away with the smell and taste of soft water.

Is There Such a Thing as a No-Salt Water Softener?

A pitcher of water with lemon wedges, honey, and mint leaves.

You might find numerous companies offering their water softeners and claiming that they soften water but don’t add sodium. The offer might seem tempting, especially when the company demonstrates how the water is cleaned with the help of magnets.

Unfortunately, such options are most likely scams. No legal and legitimate HVAC company will offer them. If you purchase one of these systems, you shouldn’t be surprised if it doesn’t soften the water at all.


The only way to get softened water is to swap the ions in it. If you’re against using sodium in any form, there might be some that make use of potassium for crystallizing the minerals.

Is Soft Water Safe for Babies?

A baby drinking a bottle but is soft water safe for babies?

Hard water is usually not good for a baby to consume. That’s why you shouldn’t consider putting it in a baby’s formula. The baby’s immune and internal system isn’t strong enough to filter out all the hard minerals yet.

So, does all this mean that soft water is fine to use for babies? Some sources agree as they’ll recommend introducing the baby to a soft mineral water when they start eating solids.

Other experts say that a parent should go right to the hard water and drink that for as long as possible.

To get the best answer, you should visit your baby’s pediatrician and have a chat. Make sure to consult a doctor that you’re comfortable with and who doesn’t mind answering all your questions.

Is Soft Water Safe for Pets?

A dog drinking water out of a bowl. Is soft water safe or pets?

Soft water is good for kids, adults, and dogs as long as they’re in a healthy condition.

Of course, if your dog has a kidney or heart disease, even a moderate intake of sodium will put their health at risk. The best option here is to clear your doubts with your local veterinarian.

How to use soft water Safely for pets

If you’re going to use soft water for your pet, take heed. With some dogs having small bodies, the effect of soft water might be a bit serious.

To begin with, water softeners don’t put too high sodium content into water. We’ve discussed that before; the sodium content wouldn’t harm a healthy human. The same goes for most pets but you do want to make sure that the animal is as safe from harm as possible.

If your pet has a health condition that requires you to manage their sodium intake, ask their vet about their consuming soft water. In the meantime, you can get them used to soft water by mixing it with some other type of water.

If the pet is used to consuming hard water and is now cleared for drinking soft water, go for the change a bit gradually. If you change the water all of a sudden, this could be a shock to your pet’s stomach as well as their feelings.

What you might want to do is give the dog a mixture of tap and bottled water. Over time, slowly decrease the hard water ratio in the bowl or glass.

Is Soft Water Safe for Houseplants?

Water being sprinkled over flowers.

While softened water might be better for chores around the house and personal hygiene, it’s natural to be confused about watering your plants with soft water.

Since soft water has some sodium or potassium content, it’s not ideal to use it for watering plants. The relatively high sodium content can wreak havoc on the water balance in your houseplants.

What’s worse, it might even kill off the plants by making them think they’ve taken up enough water.

Plus, the salt in that soft water will cause damage to the plants and also cause a buildup over time. These buildups will then prevent more plants from growing. It might even throw off the pH in the soil.

However, that doesn’t mean you can never use your water for any kind of gardening if you’ve installed a water softening system. There are a few easy ways to get around this difficulty.

First off, you can install a bypass spigot so that you take water for your garden before it gets to the water softening system. That will also allow you to utilize hard water directly from the pipe without having to install separate taps for each kind of water.

A second way is to mix the softened water in distilled water or rainwater, which will reduce the effect of the sodium in the soft water, making it less damaging for the plants.

However, if you do this, stay aware of the possible salt build-ups over time. You’d have to regularly test your garden soil for its salt levels and balance things out if a problem occurs.

How to correct salt levels in your soil

If you’ve used softened water a lot in your garden or have used it for a long time, you might have to correct the soil’s salt levels. Too much salt will hinder the plant’s growth and might even prevent new life from flourishing there at all.

While there are no chemical options for reducing salt in the soil, you can easily flush it out by more watering. Of course, make sure that the watering isn’t done with softened water.

All you have to do is water the soil frequently. This is a leaching process that draws the salt out. Once that’s done, it will push the salt in even deeper or let it stay on the surface to get washed away.

While that might be an effective way to get your soil balanced again, the process will also flush out the essential minerals and nutrients every plant needs for growing and developing.

If you do decide to use softened water for your houseplants, diluting it first might be the best way to go. Though it might not be a necessity, the precaution is worthwhile for maintaining the pH balance and avoiding buildup in the soil.

Recommended Read: 6 Best Water Softeners on the Market

So, Is Soft Water Safe?

Is soft water safe? If this is a question that has been pestering you for some time, the discussion above was hopefully useful.

To summarize, the sodium content of soft water isn’t enough to cause harm to a human adult or a pet if they’re healthy otherwise. However, you may want to avoid it due to certain health conditions, both for yourself and your furry friends.

For babies, you should consult a medical professional first. That should be your first call if the soft water seems a bit off to you.

In any case, drinking soft water certainly has its benefits and challenges. You can try it for a few days and let everyone know about your experience.

Have you used soft water? If so, share your experience in the comments below. It might help others make a sound decision!

This post first appeared on http://www.theplumbinginfo.com

How Safe is Your Home’s Water?

infant drinking glass of water
We all have enough to worry about when it comes to our health and well-being. Worrying about how clean and safe our home’s water is, shouldn’t be one of them.  Here are some reasons you may need a water filtration system and if you notice any of the following, you should have your water tested.

  • Your water supply is near a septic system
  • Your home’s plumbing system is aged
  • Your notice staining when you do laundry
  • Your water tastes “funny”
  • You live near an area of intensive farming
  • Your water has a salty taste
  • You had a chemical or fuel spill near your water supply
  • You got a notice from your water supplier of a boil-water alert

You can have your water tested by contacting your local health department or you can contact a state-certified laboratory. You can find the laboratory serving you by contacting the Safe Drinking Water Hotline at 800-426-4791 or on the EPA website.  Also, the experts at Len The Plumber can also provide you water analysis testing for things such as pH, Iron and other mineral contents that can be unsafe and undesired in your water.

Determining what is in your water will help when choosing the right water filtration system for your home. Water filtration systems can remove contaminants such as:

  • Lead
  • Microbes
  • Radon
  • Arsenic
  • Pesticides

6 Popular Water Filtration Options

A water filtration system can be installed at an individual faucet which will only affect the water quality at that particular point-of-use or it can be installed at the juncture where the water enters the home.

  1. The most basic water filtration option is a carafe system that uses a manual-filled pitcher with a filter cartridge. It’s inexpensive but also labor intensive for homes that go through a lot of drinking water daily.
  2. A simple option is attached to a faucet for an easy and quick filtration The downside is not every faucet works with faucet-mounted filters.
  3. One of the most commonly used filtration systems is one that is installed under the sink and uses cartridges which trap chemicals, metals and other contaminants.
  4. Another popular system is an ion exchange filter system. This system uses positively charged ions to collect ions that are harmful such as magnesium, barium and other harmful chemicals.
  5. Reverse osmosis units, which filters water through a membrane, is often used as an effective system to remove nearly all contaminants from the water. The filter does its job, but does require upkeep to make sure it is running smoothly and efficiently.
  6. Whole house water treatment systems treat all the water entering the home not just the water used for drinking. These systems are convenient and effective, and the most comprehensive. A professional plumber can evaluate your home’s plumbing and how it would integrate with a filtration system. If your home is on a well water system, a whole home water filtration system might be the best option for you.

Which Water Filtration System Should I Choose?

Before selecting a water filtration system, consider how you expect to use the filter and determine your budget. High-demand homes might be best with a system the provides ample filtered water daily.

Give yourself peace of mind knowing that your water is the safest it can be for you and your family. If you are considering a water filtration system, our experts at Len The Plumber can help. Call us today for a free analysis of your plumbing system. Len The Plumbers are your Mid-Atlantic plumbing professionals.

This post first appeared on https://lentheplumber.com

How to Plan For a Basement Flood

When rain falls, do you start sweating just a little? Having a basement prone to flooding can be the cause of a lot of stress. If you live in an area that is prone to torrential rain or flooding problems, or even if your plumbing system has been under the weather lately, you should be prepared for a basement flood. Knowing what to do is key to prevent long-term damage to your basement. 


Here are some ways to plan for a basement flood: 


Keep Your Gutters and Downspouts Clean

It might seem like a stretch to say that unclean gutters and clogged downspouts could cause your basement to flood, but it is very possible. In fact, when the gutters on your home are stuffed with leaves and other debris, that water is not going to be transported away from the foundation. On the contrary, it’s going to go towards the path of least resistance—trickling down the facade of your home, right towards the foundation. 


If there is even a single bit of weakness in the foundation, that water pooling around the border of your home is going to find its way inside. From there, the water could remain, undergoing the freeze-thaw cycle, widening the cracks, and eventually, infiltrating your basement. 


So, if you want to curtail a flooded basement this year, make sure you are keeping the gutters unclogged. It is best to check them out at least twice a year—during spring and the beginning of autumn. But you should check more often if your yard has a lot of trees or if you just experienced an intense storm. 


Change The Angle of Downspouts 

Again, we can’t warn you enough about how essential gutters and downspouts are. When the downspout isn’t functioning correctly, the water getting shuttled away from your home is going to pool in places it doesn’t belong. When that happens, you could get large swathes of saturated earth all around your foundation. The dampness could negatively impact your foundation for the same reasons we mentioned above. 


Keep puddles from forming around your home by angling those downspouts towards sections of the yard with better drainage or towards the road. Try to prevent water from pooling in low-lying areas too close to your home’s foundation. 


Inspect Your Plumbing

Next, get a professional plumber into your home to check for leaking pipes and backed up sewer lines. Though basement leaks are often caused by roofing issues, a broken pipe somewhere in your home could be draining into the basement, too. If you notice any gurgling drains after a shower or running the dishwasher, there could be a clog backing up water and putting pressure on the system


A plumber will be able to recommend some remedies and, ultimately, prevent basement flooding. 


Install a Sump Pump or Backwater Valve

Even if you haven’t experienced a basement flood, living in an area known for flooding is a risk. That means you should invest in a sump pump. Consider a “better safe than sorry” measure. Sump pumps are ideal for removing water from the basement and storing it in a basin. This keeps minor and major flooding from getting too serious. 


If you have a sump pump, make sure you are getting it inspected. Also, make sure you know how to work it. 


Another option is a backwater valve. You can have this installed on the main drain. A backwater valve was designed to stop waste water from washing back into your home, but it will also work to stop water from returning if the City water system gets overwhelmed during floods. Best of all, many municipalities will help you cover the cost. 


Check For Perimeter Flaws

A number of exterior and interior factors could cause basement flooding. Take a walk around your home, looking for places where the foundation is damaged. Do the same thing on the inside. Seek out areas where mold and mildew has grown or where discoloration from water damage is apparent. Get up on the roof to search for spongy sections or where water could have seeped in. Sometimes, a small hole in the roof will let moisture trickle down through the structure of the house right to the lowest point, your basement. 


Don’t forget to check the windows, particularly ones that let natural light into the basement. You want to make sure all the seals are in place. If you find that there is a lot of condensation, use window well covers to stop moisture. 


Install Flood Sensors 

Technology can be a huge boon in planning for a basement flood. Some companies offer smart water sensors that will send you notifications when increasing moisture in the basement is sensed. That way, you are alerted before the problem gets out of hand. 


What to do if Your Basement Floods

Has your basement flooded before you could implement your plan? Restoring water damage can be intimidating, and it could put a dent in your finances. But you are going to want to solve the problem sooner than later. It’s never just a little bit of water that you can ignore. 


Even a small puddle of water on the basement floor can cost you thousands of dollars. Don’t delay clean up, since that can make any issues, such as mold and mildew growth, much worse. 


Here are some steps to jump start the restoration of your flood basement: 


  1. Shut the water and gas lines to your home off as soon as possible. Also, you should call the electric company, since wet electrical work may increase the chance of shock.
  2. Contact a plumber for emergency services. They can help you find the cause and start working on repairs immediately.
  3. Deodorize, sanitize, and cleanup. Make sure you remove any soaked carpets and furniture, since they will breed mildew and mold. 


Conclusion

Having preventative measures and a plan will help you when the rain starts to fall or a pipe breaks. No one wants to deal with a flooded basement, but when you have done maintenance and installed a sump pump, such problems are much less daunting. If you have recently experienced a basement flood, be sure to get in contact with a plumber to get your restoration underway. 

The post How to Plan For a Basement Flood appeared first on The Irish Plumber.

Bad-Smelling Plumbing? Here Are Possible Causes

woman-covering-mouthYou don’t want your house to have the smell of a sewer drifting through it, but this can sometimes happen to even the cleanest house because of troubles with the plumbing. If your house has terrible odors making daily life unpleasant, you’ll want to know the source and have it corrected.

We’re going to look at common causes of foul smells from plumbing in Peoria, AZ. This can help you know what to do about them. Our plumbers are ready to help make your house smell fresh again, and we have 24-hour emergency service to correct any plumbing disaster you run into.

ONE: Problems with the sewer line

We’ll start with a worst-case scenario, but unfortunately a common trouble for residential plumbing systems. The sewer odors in your house may actually be emanating from the sewer line itself. When the sewer line is in regular working shape, it moves wastewater from the drains in your house out to the municipal sewer line without you noticing. But if the line develops breaches, clogs, or root infiltration, it will begin to push sewer gas the wrong direction through the plumbing. The odors are a warning: unless the sewer line issue is addressed, actual sewage backup will eventually occur. You need professional plumbers on the job ASAP!

TWO: Blocked drain vents

Drain vents are the pipes that allow sewer gas to escape up through outlets in the top of the house. This prevents a buildup of pressure between the sewer line and the drains. If these escape-route pipes become clogged, they will push gas up through the drains. 

THREE: The dried p-trap

Here’s an easy one you can fix yourself. Can you track the bad odors to a single drain? If so, is this a drain that hasn’t been used in a few weeks? Then the trouble is that the p-trap—the curved section of pipe that holds a barrier of water—has dried out and sewer gas is rising through it. Simply run water down the drain for a minute or so to restore the p-trap’s water barrier. 

FOUR: The dirty garbage disposal

When you consider how much food waste goes down your kitchen’s garbage disposal on a regular basis, it’s surprising that it doesn’t develop odors more often. But disposals are designed to rapidly move ground-up waste into drain lines and leave little residue. The residue can build up over time, and if the disposal is malfunctioning it can cause a large accumulation of rotten food. The disposal may need to be cleaned, although for older units (more than 10 years) it may be better to replace it.

FIVE: Bacteria

This an issue you may encounter from the shower drain. Bacteria can develop within a substance called “biofilm” that grows inside shower drains because of soap, shampoo, and other body-cleaning products accumulating. It can affect other drains as well, and the best approach to solving this problem is with drain cleaning. No, don’t use chemical drain cleaners! They won’t solve the issue. It takes professionals drain cleaning to wipe out a biofilm buildup in drains. 

Trust The Trusted Plumber! Call us for emergency plumbing repair in Glendale, AZ and the surrounding areas. 

This post first appeared on https://www.thetrustedplumber.com

How Can You Tell When It’s Time to Replace Your Water Heater?

The water heater is an essential appliance that does its important job faithfully, day after day, without much notice – until it’s no longer as dependable as it used to be. Yet determining the time when repair isn’t cost-effective or when to be proactive and replace it before your water heater conks out completely is easier said than done. Fortunately, there are telltale signs to look for and factor into your decision to buy a new unit.

While our state-certified master plumbers at Adams and Son Plumbing have extensive experience answering emergency calls about water heaters that suddenly expire and/or empty their contents all over the utility room floor, we’d rather spare Central Florida homeowners the stress. Here is what you need to know to avoid trouble and extra expense.

How to Tell Before Trouble Starts – How Old is Your Water Heater?

The average lifespan of a typical electric storage tank water heater is 10 to 15 years; that of a gas storage tank water heater is eight to 12 years. Tankless models can last 20 to 30 years.

But what if you don’t know your water heater’s age – which is possible if it was in place when you bought your house? For a tank model, one sure way is to check its serial number. This is typically located on the manufacturer’s sticker on the upper half of the tank. But as if to make things complicated for the average homeowner, it’s listed in code. Decoding the serial number can be tricky, as they vary by manufacturer. Hot Water Solutions provides a helpful guide to make sense of it all.

When you know your water heater is nearing the end of its useful life, you can plan accordingly. You’ll have time to compare and choose the model best suited for the size of your house and the amount of hot water your family uses on average. You may even be able to switch from tank to tankless. This is a far better situation than having to replace your unit during an emergency, when you’ll need to take whatever is available.

Has Trouble Started? Here are the Signs to Look for!

While a leak is the most obvious sign, it isn’t really a sign – it’s the aforementioned emergency. Moisture or a puddle around the unit’s base means you don’t have the luxury of shopping around. Replace it immediately! Leaks are usually caused by a build-up of pressure inside the tank. This occurs when the water pressure or temperature is too high, or when the relief valve isn’t working properly. Neglecting a leak can lead to the tank exploding. Need we say more?

One of the first indications of trouble could be a sudden increase in your utility bill. If there is no other cause (such as a pipe leak), your unit could be expending extra energy to provide the same amount of hot water. Should this be the case, look for the other following signs:

Rusty or cloudy water – Water discoloration is a definite sign your unit is underperforming. Rust-colored water, or water with a metallic odor, can mean a few things. Either the sacrificial anode rod needs to be replaced or the tank itself is beginning to rust, which is often due to corrosion of the steel lining. A rotten egg odor indicates the growth of bacteria in the tank. A corroded tank must be replaced as soon as possible. Cloudy water often indicates a sediment buildup inside the tank, and if the water remains cold, a heating element may be broken. If this is the case, the heating element can be replaced, but be on notice that replacement time may be near.

Rusty pipes – Rust could also come from the pipe that brings water to your faucets. Regardless of the source, you need to address the problem urgently because it is a sanitation issue. To check whether the problem is with your water heater or your pipes, you can open your hot water tap and let it run for some time. If the rusty water continues to flow by the third bucket load, it means the rust problem is in the water heater.

Rusty valve/inlet – If you see rust around the water inlet or pressure relief valve, it means there is rust present in the tank. It also means it’s time to replace the unit as soon as possible. 

Knocking noises – If you hear loud noises coming from your water heater, it means there is sediment buildup inside the tank. When the sediment hardens, it can start moving around the tank, causing those unwanted sounds. 

Once there is sediment buildup in your water heater, it starts consuming more energy to heat the same amount of water. The knocking sound is another indication that your water heater has lived its life of faithful service. If you want to increase the life of your water heater, flush and clean your tank periodically (or call a plumber to do the job).

Cold water – If the water heater dispenses cold water instead, a tripped limit switch, misadjusted thermostat or broken heating element could be the culprit. First, check the water heater’s circuit breaker in the service panel to make sure it hasn’t tripped. If the breaker has tripped, switch it off, then switch it back on again. If the heater’s breaker did not trip (it is still on), try to reset the high-temperature limit on the heater. Our blog post – “Why Does My Hot Water Never Last Long Enough?” – offers troubleshooting tips, as well as how to tell when it’s time to call a plumber.

Another reason could be that the water heater is too small to provide enough hot water for your household’s needs. If the size of your household has increased recently, you may need a larger capacity tank.

Repair or Replace? Which Type of Water Heater is Best for Your Home?

There are occasions when your water heater can be repaired. Some of the replaceable parts include the burner assembly, heating elements, thermostats, valves, thermocouples, motors and igniters.

You can consider getting your storage tank water heater repaired if it is less than 10 years old and a replaceable part fails. However, if it is more than 10 years old, you haven’t maintained it properly, or you see any of the signs mentioned above, you should consider replacement. Repairs are generally not cost-effective once the unit reaches the average limit of its useful life.

As a water heater is an important investment, you need to consider which type is best for your home based upon cost, efficiency and longevity. Traditional storage tank units are still the most popular. However, tankless water heaters are quickly increasing in popularity.

Tankless water heaters use high-powered burners to rapidly heat water as it runs through a heat exchanger and deliver it directly to your faucets or shower without storing it in a tank, providing hot water on-demand. Tankless water heaters are powered with electricity or gas. One of their main advantages is energy efficiency, as they were found to be 22% more energy efficient on average than gas-fueled storage-tank models in tests conducted by Consumer Reports.

Storage tank water heaters are more common. They have an insulated tank that can hold 30 to 50 gallons of water. These water heaters run on gas or electricity. Natural gas storage tank water heaters are more energy efficient (almost 50%) than their electric counterparts. Natural gas storage tank water heaters are slightly more expensive than electric models. These water heaters also have a temperature and pressure release valve that opens up when the pressure or temperature increases beyond the specified limit.

Compared with storage tank water heaters, homeowners who have tankless water heaters and use less than 41 gallons or less of water per day can save anywhere between 24% to 34% in energy costs. If you use around 86 gallons of hot water every day, you can still save 8 to 14% on energy costs. Also, compared to storage tank units, tankless water heaters are less prone to corrosion. Another plus: The lack of a tank eliminates the possibility of a catastrophic water leak that can damage flooring, furniture, etc.

According to U.S. Department of Energy estimates, in comparison to a traditional gas-powered storage tank water heater, a gas-powered tankless water heater can save an average of $108 in energy costs every year. An electric tankless model can save an average of $44 every year over their traditional tank counterpart.

Tankless water heaters can save you money in the longer run, have a longer lifespan, don’t occupy too much space, and can instantly provide you hot water. But this type is more costly than storage tank water heaters, installation is more complex and expensive, and it might not be able to keep up with demand if you are doing numerous chores requiring hot water at the same time.

Storage tank water heaters are not all that costly, and their maintenance and repairs are less expensive. But storage tank water heaters are less energy-efficient, occupy more space, can store only a limited amount of hot water and have a lower lifespan as compared to a tankless model.

The Take-Home Message

Now that you know how to determine whether to repair or replace – as well as the pros and cons of storage tank and tankless water heaters –you will (hopefully) be able to select your next unit based on the factors and features you consider important, rather than under duress.

Whether your water heater needs repair, or you’re ready to replace it, call us! Adams and Son Plumbing is a family-owned business with over 50 years in plumbing service. A state-certified plumbing contractor, we have over three generations of master plumbing experience. Contact us to learn more and schedule a service appointment.

The post How Can You Tell When It’s Time to Replace Your Water Heater? appeared first on Adams and Son Plumbing Services.

+1-877-959-3534