Prepare Your Home for the Florida Rainy Season: Plumbing Tips for Homes in Broward County

Prepare Your Home for the Florida Rainy Season: Plumbing Tips for Homes in Broward County

Prepare Your Home for the Florida Rainy Season

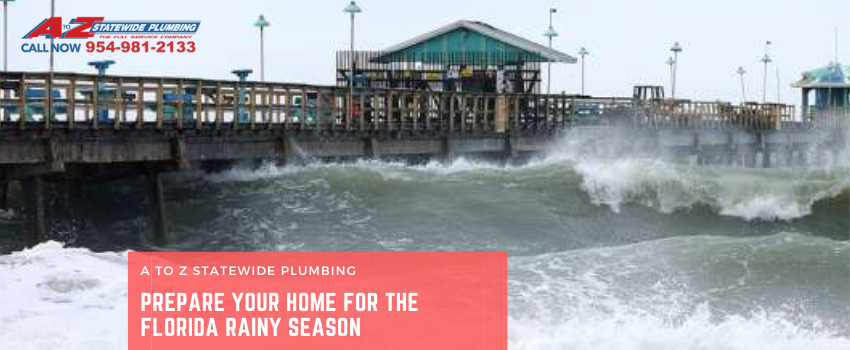
As the rainy season rolls into South Florida, areas like Fort Lauderdale, Miramar, Pembroke Pines, Hollywood, and throughout Broward County often experience heavy rainfall and unexpected storms. While the rain brings relief from the summer heat, it can also bring about plumbing challenges for homeowners. Flooded yards, clogged drains, and overflowing gutters are just a few of the issues that can arise. At A to Z Statewide Plumbing, we want to ensure your home is prepared for the rainy season, so you can avoid costly repairs and water damage.

Common Plumbing Issues During the Rainy Season

1. Clogged Drains and Downspouts
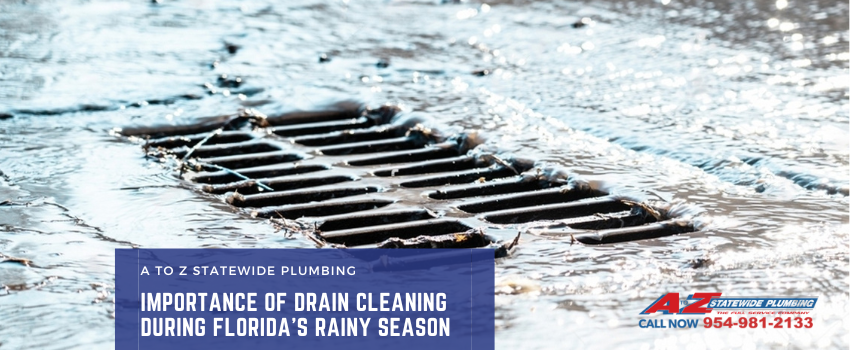
With increased rainfall, leaves, debris, and dirt can quickly build up in your gutters and downspouts, leading to clogs. Water can then overflow and pool around your home’s foundation, causing potential flooding or structural damage. It’s crucial to keep these areas clear to allow proper water flow.

2. Flooded Yards and Waterlogged Drains
Low-lying areas in your yard can become waterlogged, overwhelming your drainage system. If your drains aren’t prepared to handle the sudden influx of water, they can become clogged, leading to backups inside your home or pooling water in your yard.

3. Sewer Backups
Excessive rain can cause an increase in pressure on your sewage system, potentially leading to backups. If your sewer lines are already compromised or partially blocked, heavy rains may exacerbate the issue, leading to unsanitary conditions inside your home.

4. Leaking Pipes
Heavy rains and fluctuating temperatures can put stress on older plumbing systems, leading to leaks. These leaks may go unnoticed until water damage becomes evident inside your home, so it’s important to regularly inspect your plumbing before and during the rainy season.

How A to Z Statewide Plumbing Can Help

At A to Z Statewide Plumbing, we offer a range of services designed to help Broward County homeowners avoid rainy season disasters:

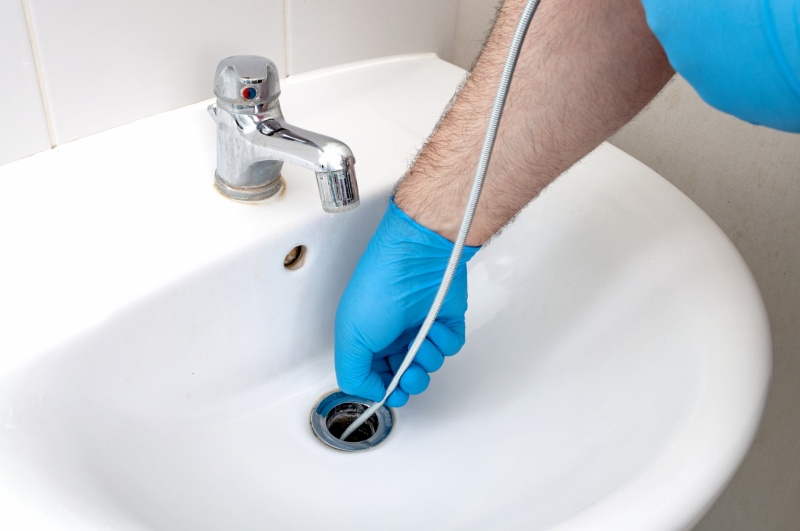
– Drain Cleaning Services
Our expert team provides thorough drain cleaning to ensure your home’s drainage system is free from blockages. Whether it’s leaves, dirt, or other debris, we’ll make sure water flows smoothly to prevent backups and flooding. We recommend scheduling drain cleaning before the rainy season hits to avoid emergencies.

– Gutter and Downspout Maintenance
Our professionals can inspect and clear your gutters and downspouts to ensure water is properly directed away from your home’s foundation, minimizing the risk of flooding.

– Sewer Line Inspections
Sewer backups can be a homeowner’s worst nightmare, especially during a storm. A to Z Statewide Plumbing can inspect your sewer lines, identify any blockages or weaknesses, and provide repairs before the heavy rains arrive.

– Leak Detection and Repair
If you suspect any leaks in your plumbing system, our team can use advanced leak detection technology to pinpoint the source and repair it quickly, helping you avoid costly water damage.

Schedule Your Plumbing Check-Up Today!

Don’t wait for the storm clouds to roll in. Ensure your home’s plumbing system is ready to handle whatever the rainy season brings. Contact A to Z Statewide Plumbing today to schedule drain cleaning, sewer inspections, or a full plumbing check-up. Our dedicated team serves Fort Lauderdale, Miramar, Pembroke Pines, Hollywood, and all of Broward County, ensuring your home stays dry and problem-free during the rainy season.

Call us at 954-981-2133 or schedule your service online today!

Stay prepared, stay dry, and let A to Z Statewide Plumbing handle the rest.

Trending Topics Right Now

This post first appeared on http://www.atozstatewideplumbing.com

The Importance of Drain Cleaning During Florida’s Rainy Season

Importance of Drain Cleaning During Florida’s Rainy Season

If you live in Fort Lauderdale, Miramar, Pembroke Pines, Hollywood, or anywhere in Broward County, you’re no stranger to Florida’s heavy rainy season. While the afternoon downpours can help cool things down, they can also wreak havoc on your home’s plumbing system—especially your drains. During this time, your drainage system is working overtime to handle the influx of rainwater, and without proper maintenance, it can quickly become clogged and overwhelmed.

At A to Z Statewide Plumbing, we understand how important it is to keep your drains functioning properly, especially when the rainy season hits. Frequent drain cleaning is key to preventing serious issues and ensuring your home remains flood-free.

Why Is Drain Cleaning So Important During the Rainy Season?

1. Prevents Flooding
During heavy rainfall, large amounts of water accumulate quickly around your property. If your drains are not clear, this water has nowhere to go, leading to backups that can cause flooding in your yard, driveway, or even inside your home. Frequent drain cleaning ensures that water flows freely through your pipes and away from your property.

2. Avoids Costly Repairs
When drains become clogged, the pressure on your plumbing system increases, which can lead to cracked pipes, water damage, and other serious issues. Over time, this can result in costly repairs. Regular drain cleaning can help catch small issues before they turn into bigger, more expensive problems.

3. Reduces Sewer Backups
In areas like Fort Lauderdale and Pembroke Pines, sewer systems can struggle to handle the heavy rain. If your home’s drains are clogged or slow, there’s a higher risk of a sewer backup. This can lead to unsanitary conditions in your home and damage to your property. Drain cleaning ensures that your pipes can efficiently move water away, reducing the chances of a sewer backup.

4. Stops Unpleasant Odors
Clogged drains can often produce foul odors due to trapped debris, dirt, and stagnant water. During the rainy season, when moisture levels are high, these odors can worsen. Regular drain cleaning removes debris and prevents any unpleasant smells from creeping into your home.

How A to Z Statewide Plumbing Can Help

At A to Z Statewide Plumbing, we offer expert drain cleaning services for homeowners throughout Broward County, including Fort Lauderdale, Miramar, Hollywood, and Pembroke Pines. Here’s how we can help you stay prepared during Florida’s rainy season:

– Thorough Drain Cleaning
Our team uses advanced equipment to clear blockages and clean your drains, ensuring that rainwater and debris flow smoothly through your pipes. We remove any dirt, leaves, and other obstructions that may cause clogs.

– Regular Maintenance Plans
Florida’s rainy season lasts several months, and one drain cleaning may not be enough. We offer regular maintenance plans that allow us to check and clean your drains throughout the year. This proactive approach helps prevent clogs before they happen, giving you peace of mind.

– Sewer Line Inspections
In addition to clearing your drains, we can inspect your sewer lines to ensure they’re in good condition. A clean and well-maintained sewer system is essential for preventing backups during heavy rains.

– Emergency Drain Cleaning
If you experience a clog or backup during a storm, don’t wait for the problem to get worse. Our team is available for emergency drain cleaning services, ready to respond quickly and efficiently to restore your drainage system.

Don’t Wait for Clogs—Schedule Your Drain Cleaning Today!

Whether you’re in Fort Lauderdale, Miramar, Pembroke Pines, Hollywood, or anywhere in Broward County, A to Z Statewide Plumbing is here to help you prepare for the rainy season. Frequent drain cleaning is essential to keep your home’s plumbing system working efficiently and to prevent costly problems down the line.

Contact A to Z Statewide Plumbing today to schedule a drain cleaning service! Call us at 954-981-2133 or book an appointment online.

Don’t let a clogged drain ruin your rainy season—trust the experts at A to Z Statewide Plumbing to keep your drains flowing smoothly year-round!

Trending Topics Right Now

This post first appeared on http://www.atozstatewideplumbing.com

Important Plumbing Maintenance Tips for New Homeowners

Becoming a first-time homeowner is an exciting journey, but it also comes with numerous responsibilities, including taking care of your home’s plumbing system. A well-maintained plumbing system helps prevent costly damage, ensures a healthy living environment, and prolongs the lifespan of your pipes and fixtures. 

In this article, we will share essential plumbing maintenance tips specifically tailored for new homeowners, helping you protect your investment and enjoy a smoothly functioning home. Our experienced team at The Irish Plumber is always here to offer support, guidance, and professional services to assist you in maintaining an efficient and effective plumbing system.

A proactive approach to plumbing maintenance plays a critical role in preventing major issues that can compromise the comfort and safety of your home. By familiarizing yourself with your home’s plumbing system, performing regular inspections, and addressing any concerns in a timely manner, you can prevent costly repairs and maintain a functional, trouble-free system. 

Preventative Measures for a Healthy Plumbing System

Implementing preventative measures is crucial to maintaining a smooth and efficient plumbing system. Here are some valuable practices for new homeowners:

  1. Inspect for Leaks: Regularly check all visible pipes, faucets, and fixtures for any signs of leaks or moisture. Early detection of leakage can prevent water damage, mould growth, and increased utility bills.
  2. Install Strainers: Use strainers in sinks, showers, and bathtubs to catch debris and prevent clogs in your drains.
  3. Insulate Pipes: If you live in a region with freezing temperatures, insulate exposed pipes to prevent them from freezing and bursting.
  4. Know Your Water Shut-Off Valve Location: Familiarize yourself with the location of the main water shut-off valve, which is essential to know in case of emergencies like burst pipes or severe leaks.

Regular Inspections for Plumbing Maintenance

Conducting routine inspections of your plumbing system is a key component of effective maintenance. Plan and perform the following checks to keep your plumbing in optimal condition:

  1. Water Pressure: Monitor your home’s water pressure using a pressure gauge. Low or high water pressure can indicate potential problems within your plumbing system.
  2. Water Heater: Inspect your water heater for signs of wear, rust, or leaks. Drain and flush your water heater at least once a year to remove sediment and prolong its life.
  3. Outdoor Faucets and Hose Bibs: Ensure that outdoor faucets and hose bibs are functioning correctly and not leaking, especially during warmer months when outdoor water use is more frequent.
  4. Sump Pump: Test your sump pump’s functionality at least twice a year by pouring water into the sump pit and verifying that it pumps out the water and shuts off automatically.

Dealing with Common Plumbing Problems

New homeowners should be prepared to address common plumbing concerns, such as:

  1. Clogged Drains: For minor clogs, use a plunger or a mix of baking soda, vinegar, and hot water to clear the drain. Avoid using harsh chemical drain cleaners, which can damage pipes over time. For more severe clogs, seek professional help.
  2. Dripping Faucets: Fix leaky faucets by shutting off the water supply, disassembling the faucet, and replacing any worn-out components.
  3. Running Toilet: Resolve a constantly running toilet by inspecting the flapper, flush valve, and fill valve for any signs of wear or damage and make necessary replacements.
  4. Frozen Pipes: If you suspect a frozen pipe, shut off the main water valve and gently apply heat using a hairdryer or a heating pad wrapped around the pipe. Call a plumber if the issue persists.

When to Call a Professional Plumber

While some plumbing maintenance tasks can be performed independently, there are situations when it’s best to seek the help of a professional plumber:

  1. Major Renovations: If you’re planning a significant remodel or renovation project that involves your home’s plumbing system, it’s wise to consult with a licensed plumber for advice and assistance.
  2. Persistent Plumbing Issues: If you’re experiencing recurring plumbing problems despite your best efforts to resolve them, it’s time to enlist the help of a professional to diagnose and address the underlying issues.
  3. Water Heater Replacement: Replacing a water heater can be a complex and risky task for inexperienced homeowners due to potential risks such as gas leaks and electrical hazards. It’s best to leave this job to the professionals.
  4. Sewer Line Problems: Issues like sewer line blockages or tree root invasions are best handled by professionals with specialized tools and equipment.

Conclusion

As a new homeowner, taking care of your plumbing system is a critical responsibility that helps protect your investment and maintain a comfortable living environment. By familiarizing yourself with your plumbing system, implementing preventative measures, and addressing common plumbing problems, you can effectively avoid costly repairs and damage. However, when faced with more complex issues, don’t hesitate to turn to our expert team at The Irish Plumber. Our qualified plumbers in Ottawa are committed to providing reliable solutions that will ensure the longevity and efficiency of your home’s plumbing system.

Tackle Water Hammer Issues: Causes, Prevention, and Solutions

The sudden and disruptive noise of pipes banging in your walls can not only startle you but also indicate a plumbing issue known as “water hammer.” As experts in plumbing services, we understand the significance of addressing water hammer concerns to protect your property and maintain a seamless plumbing experience.

Water hammer, also known as hydraulic shock, occurs when a sudden change in water flow causes a pressure surge within the pipes. This pressure surge leads to a rapid movement of the water, which in turn, causes the pipes to strike against one another or the surrounding walls, resulting in that loud banging noise. Over time, unaddressed water hammer issues can cause damage to pipes, fittings, and appliances, leading to expensive repairs and potential water damage to your property.

Through this guide, our goal is to equip you with a fundamental understanding of water hammer dynamics and actionable insights to help you solve and prevent this common plumbing problem. We will explore the various contributing factors of water hammers and discuss effective solutions and best practices to maintain a quiet and efficient plumbing system. With the expertise of our skilled and certified plumbing professionals, we are committed to helping you tackle water hammer challenges and prevent potential consequences that could negatively impact your home and your peace of mind.

Join us as we delve into the world of water hammer, dissecting complexities and empowering you to improve your home’s plumbing performance. By understanding the science behind water hammer and implementing preventive measures, you can ensure a durable and reliable plumbing system for years to come.

Recognizing the Causes of Water Hammer

Understanding the causes of water hammer is crucial for developing effective solutions to address this issue. The primary contributing factors of water hammer are:

  1. Sudden changes in water flow: Common daily activities, such as turning taps on and off, flushing toilets, or using washing machines, can create abrupt changes in water flow, leading to pressure surges within the pipes.
  2. High water pressure: Elevated water pressure may amplify pressure surges and subsequent water hammer effects.
  3. Absence of air chambers or compromised air cushions: An insufficient or failing air chamber system may be unable to absorb sudden pressure changes, causing water hammer problems.

With a deeper comprehension of the root causes of water hammer, you can begin to explore effective prevention strategies and troubleshooting techniques.

Preventing Water Hammer Issues

Implementing preventive measures against water hammer before it becomes a problem is essential in ensuring a durable and efficient plumbing system. By considering the following strategies, you can protect your property from potential damage and avoid costly repairs:

1. Install Air Chambers

Air chambers, also referred to as shock arrestors or water hammer arrestors, play a vital role in mitigating the effects of sudden water pressure changes. It is recommended to have air chambers installed at high-risk areas near appliances and fixtures that are known to be associated with abrupt changes in water flow, such as washing machines, dishwashers, and toilets.

2. Maintain Proper Water Pressure

Higher water pressure can contribute to more intense water hammer effects. Regularly monitoring your home’s water pressure and ensuring that it remains within the recommended range of 40-60 psi helps reduce the risk of water hammer. If your water pressure is consistently higher than the recommended range, consider installing a pressure-reducing valve.

3. Inspect and Repair Air Cushions

Over time, air chambers can become filled with water, losing their ability to absorb pressure surges. Regular maintenance of air chambers, including draining the water-logged chambers and replenishing the air cushion, is essential in preventing water hammer issues.

Solutions for Existing Water Hammer Concerns

In cases where you are already experiencing water hammer problems, the following solutions can help alleviate and resolve the issue:

1. Drain the Plumbing System

A simple yet effective solution for addressing water hammer is to drain your entire plumbing system. This process involves turning off the main water supply, opening all faucets and draining valves, and allowing the water to flow out of the pipes, replenishing the air pockets needed to absorb sudden pressure surges.

2. Install Water Hammer Arrestors

If you have persistent water hammer issues, consider installing specialized water hammer arrestors that are designed to absorb pressure surges more effectively than conventional air chambers.

3. Adjust Water-Using Appliances

In some cases, adjusting the water flow rate of specific appliances may help minimize the impact of water hammer. Typically, washing machines and dishwashers provide options for adjusting their water flow settings.

Empower Yourself to Tackle Water Hammer Issues

Knowledge is power, and understanding the phenomenon of water hammer, its causes, and effective solutions empowers you to address this common plumbing challenge. By implementing preventive measures and utilizing appropriate troubleshooting techniques, you can maintain a quiet, efficient, and long-lasting plumbing system. Our team of highly skilled and certified plumbing professionals is committed to helping you tackle water hammer issues and other plumbing concerns to ensure your peace of mind and confidence in your home’s plumbing performance.

With expert guidance and dedicated support, we are here to assist you every step of the way on your journey to better understanding and solving your water hammer challenges. Reach out to our team at The Irish Plumber today to discuss your plumbing concerns and put our expertise to work for you, providing effective solutions and exceptional Ottawa plumbing service tailored to your unique needs.

Is It a Drain Clog or a Sewer Line Problem?

gloved-hands-working-on-a-clogged-bathroom-sink

Nobody enjoys having a plumbing problem in their home. This might be especially true if the problem has something to do with the home’s drains or sewer line. The wastewater you wash away needs to disappear so you don’t have to think about it again. But this is one of those situations when a little thinking and consideration could help you find the right solution faster.

Sometimes, a problem lies within a specific drain. It can likely be addressed with simple home remedies. At other times, the problem is deeper within the drainage system, or even in the sewer line. How can you tell if you have a drain clog or a sewer line problem? Do you need to call the plumber? We’ve got some straightforward tips for you.

If the Problem Is Recurring

If it was only one drain, and you resolved the clog, but it returns within days or weeks, it’s likely that the blockage you addressed was only the tip of the iceberg. Something deeper inside the system is causing a partial blockage that just keeps repeatedly getting clogged the rest of the way. For this, you’ll definitely need a reliable drain cleaning company in Cedar Grove, NJ.

If the Problem Is in One Drain

If the rest of your home is fine, and only a single drain is experiencing a clog, you should be able to resolve this yourself. Try a plunger—a small, clean one if the clog is not in the toilet. Keep the handle vertical as you thrust, and remember, you’re trying to push a clog through, not pull it out. If this doesn’t work, a plastic drain snake or a hand-cranked auger might be able to snag the clog.

If the Problem Is in Multiple Drains

While there may be small, localized clogs in more than one drain, if you have multiple clogged drains within the house, it’s more likely that the problem is deeper in the system. You can try the above methods, but they won’t reach a deep clog or affect anything that’s blocking the sewer line, so you’re more likely to end up calling a plumber.

If You Notice Smells or Sounds

A blocked drain is one thing. But if you hear burbling sounds within your drains or coming from your toilet, or if there is an odor of gas or sewage, you might have a different problem. While there could be a partial blockage decomposing down there, causing odors and trapped air, it’s also possible that your sewer vent is blocked or damaged. This can release dangerous sewer gasses into your home, so get a plumber immediately.

If Your Yard Is Affected

The sewer line crosses from your home to your septic tank or to the municipal sewage pipe. That means it runs under your lawn. If you notice soggy places, puddles, sewage odors, or a patch of surprisingly green grass—as though it has a mysterious source of fertilizer—it’s likely that the problem is with your sewer line. It may be cracked or broken. This requires prompt professional attention.

We hope we’ve helped to point you in the right direction. Whether you’ve got a small issue you can sort out with a plunger or a serious problem that requires qualified help, we’re always happy to answer any questions you have.

Contact MarGo Plumbing Heating Cooling Inc. today with drain concerns or any questions about your plumbing!

The post Is It a Drain Clog or a Sewer Line Problem? first appeared on MarGo Plumbing Heating Cooling Inc..

This post first appeared on https://margoplumbing.com

Tackling Low Water Pressure: Understanding Signs, Causes and Solutions

As experienced plumbing professionals, we understand the inconvenience and frustration caused by low water pressure in your home. A weak shower stream or trickling faucet not only hampers your daily activities, but can also indicate underlying issues within your plumbing system. Therefore, addressing low water pressure is essential to ensuring comfort and efficiency in your household.

In this comprehensive guide, we’ll identify the signs of low water pressure, discuss the potential causes, and explore practical solutions to restore your home’s water flow to its optimal level.

Identifying Low Water Pressure Issues

To begin addressing low water pressure issues, it is crucial to understand and recognize the signs that indicate a problem. Some common indicators of low water pressure include:

  1. Weak shower flow: A reduced or inconsistent water flow in your shower can severely impact your daily routines and overall comfort.
  2. Slow-filling appliances: If appliances like your dishwasher or washing machine are taking longer than usual to fill with water, low water pressure may be the culprit.
  3. Trickling faucets: If your faucets are incapable of providing a steady, uninterrupted flow, it could indicate low water pressure or other plumbing issues.

Once you’ve observed these signs, you can move on to investigating the causes of low water pressure in your home.

Understanding the Causes of Low Water Pressure

Low water pressure can arise due to various factors, each with its own distinct solution. Some potential causes of low water pressure include:

1. Clogged Pipes and Fixtures

Sediment buildup or mineral deposits within your pipes can restrict water flow, causing low water pressure. Similarly, dirt and debris can accumulate within plumbing fixtures, such as faucets and showerheads, resulting in less water reaching its destination.

2. Pipe Corrosion

Over time, metal pipes can corrode, causing the inner pipe diameter to shrink and restrict water flow. This issue is more prevalent in older homes with galvanized steel or copper pipes which are more susceptible to corrosion.

3. Water Leaks

If there is a leak in your plumbing system, water may escape before reaching your faucets or appliances, resulting in low water pressure.

4. Pressure Regulator Issues

Pressure regulators are responsible for maintaining consistent water pressure in your home. If a regulator malfunctions, it can lead to low or inconsistent water pressure.

5. Water Supply Issues

Sometimes, the cause of low water pressure can be traced back to the municipal water supply. Factors such as high water demand or issues with the local water treatment plant can impact water pressure levels.

Effective Solutions for Low Water Pressure Problems

Once you’ve identified the possible cause of your low water pressure, you can explore various solutions to restore optimal water flow. Some effective strategies include:

1. Addressing Pipe and Fixture Clogs

For clogged fixtures, start by removing your faucet’s aerator or showerhead to clean out any sediment buildup. If your pipes are clogged, professional pipe cleaning methods, such as hydro jetting or snaking, can effectively remove blockages and restore water flow.

2. Replacing Corroded Pipes

If corroded pipes are causing your low water pressure issues, consider replacing them with modern materials like PEX or PVC pipes, which are more resistant to corrosion and have a longer lifespan.

3. Fixing Water Leaks

Identify and repair leaks in your plumbing system to restore water pressure. This may require the help of a professional plumber, who can pinpoint the exact location of the leak and carry out proper repairs.

4. Inspecting and Adjusting Pressure Regulators

If your pressure regulator is malfunctioning, it may need to be adjusted or replaced. Consult with a licensed plumber to determine the best course of action and ensure proper installation of a new regulator if necessary.

5. Communicating with Your Water Provider

If the issue of low water pressure originates from your municipal water supply, coordinate with your water provider to investigate the problem and implement appropriate solutions.

Empower Yourself to Resolve Low Water Pressure Concerns

Low water pressure in your home can be a frustrating issue, but by understanding the signs, causes, and solutions, you can take control and improve your plumbing experience. No matter the root of the problem, rest assured that our team of dedicated plumbing professionals is ready to help you tackle any low water pressure challenge and restore your home’s water flow to optimal levels. With The Irish Plumber’s expert plumbing services, you’ll be well-prepared to address and resolve your residential water pressure concerns for a smooth and efficient plumbing experience.

How To Change The Fill Valve In Your Sacramento Toilet

fill_valve_featured_image

Are you tired of dealing with a constantly running or leaking toilet in your Sacramento home? The culprit may be a faulty fill valve. While it may seem like a daunting task, changing the fill valve in your toilet is actually a simple and straightforward process.

In this blog post, we will guide you through the steps to successfully replace your fill valve and restore your toilet’s proper functioning. Say goodbye to annoying leaks and wasted water, and hello to a more efficient and functional toilet. Let’s dive in!

What Does a Fill Valve Do?

A fill valve is a crucial component of your toilet’s flushing system. It is responsible for controlling the flow of water into the toilet tank, which is necessary for a proper flush. The fill valve works by automatically detecting when the water level in the tank is low and then refilling it to the appropriate level. This ensures that there is enough water for a strong and effective flush every time you use your toilet. 

Without a functional fill valve, you may experience weak or incomplete flushes, leading to potential clogging or constantly having to manually refill the tank. Therefore, it is essential to keep your fill valve in good working condition to maintain a fully functioning toilet.

Why You Should Replace a Faulty Fill Valve

A faulty fill valve in a toilet can lead to a variety of problems that can greatly inconvenience the homeowner. The fill valve is responsible for refilling the toilet tank with water after each flush, and if it is not functioning properly, it can cause issues such as constantly running water, low water levels, or even complete failure to refill the tank. This can lead to wasted water and higher utility bills, as well as potential damage to the toilet’s components. 

Additionally, an ineffective fill valve may also result in inconsistent flushing and a noisy toilet, making it uncomfortable for both residents and guests. Therefore, it is crucial to address any faults in the fill valve promptly to avoid further complications and ensure a functional and efficient bathroom experience.

13 Steps for Replacing Your Toilet’s Fill Valve

toilet_flapper

A faulty fill valve can cause your toilet to run, wasting valuable water and money. Replacing the fill valve is a simple, inexpensive home toilet repair you can do yourself. Just follow these steps to replace your fill valve and get your toilet back to normal.

  1. Turn off the water to your toilet by turning the shut-off valve clockwise.
  2. Next, remove the toilet lid from the tank.
  3. Remove the refill tube from the overflow pipe.
  4. Flush the toilet to drain the water from the tank. Hold down the handle until most of the water has drained. Then use a towel or sponge to remove the rest of the water from the tank.
  5. Locate the water supply tube or hose below the tank and disconnect it from the fill valve. You may need pliers or a wrench to loosen the connection.  
  6. Then, loosen the lock nut that holds the fill valve to the tank.  
  7. Lift the old fill valve out of the tank.
  8. Prepare the new fill valve by slipping on the rubber washer, flat side up, and adjusting the height of the fill valve. The fill valve should be slightly taller than the overflow tube.
  9. Insert the new fill valve in the hole at the bottom of the tank, making sure the nipple faces the overflow tube.  
  10. Re-tighten the lock nut underneath the tank and reattach the water supply tube or hose.
  11. Attach one end of the fill tube to the fill valve nipple, and clip the other end to the overflow pipe.
  12. Turn the shut-off valve counterclockwise to turn the water to the toilet back on.
  13. Test the new valve by flushing the toilet. Make sure the tank refills properly and check for leaks below the toilet.

Get Help With Your Fill Valve From the Expert Sacramento Plumbers

If you need help with this or any other plumbing projects, call Express Sewer & Drain. Our skilled Sacramento plumbers will gladly answer your questions and make any necessary repairs.

Dealing With Common Plumbing Problems

This post first appeared on https://www.expresssewer.com

How much does Trenchless Sewer Repair Cost in California?

cost_of_trenchless_repair

Whether your sewage system has cracks in it or is severely damaged, trenchless repairing methods use advanced technology to render poor functioning sewage systems back to new. If you are deciding which professional plumbing company to use, you may want to look into one that can repair fractured pipes using trenchless technology.

Let’s talk more about trenchless sewer repair and the how it can save you more money in the long run. 

What is Trenchless Sewer Repair?

Trenchless sewer repair is a modern marvel in the world of plumbing, offering a cost-effective and efficient solution to damaged sewage systems. By utilizing advanced technology, trenchless methods can restore cracked or broken pipes without the need for extensive digging and disruption to your property.

The cost of trenchless repair may initially seem higher than traditional methods, but when you factor in the expenses associated with re-landscaping, extended repair times, and material limitations, trenchless technology emerges as the more economical choice. With options like pipe lining and pipe bursting, trenchless repair can be tailored to suit the specific needs of your sewage system, providing a durable and long-lasting solution.

Consulting with a professional plumber can help determine if trenchless sewer repair is the right option for you, ensuring a smooth and efficient restoration of your sewage system.

Cost Factors of Trenchless Sewer Repair

manhole_to_manhole_trenchless_sewer_repair

The total cost of repairing a damaged sewage system with trenchless technology is far less than the alternative traditional methods. There are still some factors that affect the cost of pipe repair or replacement, such as:

  • The length of pipe being restored
  • Pipe depth
  • The extent of damage
  • Trenchless pipe repair or replacement technique used
  • Pipe location on your property

The aforementioned factors are far less in financial comparison than the factors to consider with traditional sewage repairs including:

  • The cost of re-landscaping
  • The repair or replacement time
  • Evacuating your home and stay in a hotel for an extended period of time
  • Rapid expiration of repair and replacement materials used

Depending on the type of repair or replacement you are having done to your sewage system, trenchless technologies may appear the more expensive option at the time; however, when you get down to the cost of everything involved in traditional repairs and replacements, trenchless technology repairs are generally more cost effective.  

Below are a few things to think about when evaluating the cost of sewer repair.

Traditional Sewer Repair Methods

For small repair jobs, this replacement can cost between $50- $250 per foot. This can leave a large dent of about $3,000- $6,000 in your wallet or even $5,000- $13,000 for repairs over 50 feet. Don’t forget about the associated expenses of traditional repair methods you will have to cover as well; this includes any relandscaping, road closures and labor costs.

Pipe Lining or Pipe Bursting

Plumbing professionals and leaders of trenchless technology will evaluate the extent of damage your sewage pipes are experiencing and then determine whether to proceed with pipe lining or pipe bursting techniques.

Pipe bursting can cost anywhere from $60- $200 per foot, which can end in about $3,500- $20,000 for an entire repair. This trenchless technique is used for pipe replacement and is dependent on the length and depth of your current pipe.

Pipe Lining is another trenchless technology and relines your damaged lateral or sewer pipe. This technique can cost anywhere from $80- $250 per foot but averages about $160 per foot.

For more standard repairs, the cost varies from $4,000-$20,000; most homeowners pay about $6,000-$12,000 for major sewer connection repairs. For small-scale pipe lining applications, such as pipe repair less than 50 feet long, your damaged pipeline can be completed for about $3,000- $4,000 depending on the pipes location and depth.

Thinking of Going Trenchless?

Trenchless technologies have many benefits, but they also have their place. Trenchless technology might not be right for your specific sewage need. Knowing the costs and benefits of trenchless technology and consulting with a professional plumber will help determine what your trenchless sewer repair cost would be and whether it is the right option for you.

Sp

This post first appeared on https://www.expresssewer.com

Expert Tips on Preventing and Fixing Common Kitchen Sink Plumbing Problems

A functional and well-maintained kitchen sink is crucial for carrying out daily tasks in the heart of your home. However, plumbing issues in kitchen sinks can be both troublesome and inconvenient, causing disruptions in your daily routine. In this article, we will explore common kitchen sink plumbing problems, outline useful preventative measures, and provide practical DIY solutions. Additionally, our skilled team at The Irish Plumber will be available to assist with more complex repairs and maintenance for your kitchen sink plumbing.

Issues with kitchen sink plumbing can range from simple to more complicated scenarios. These problems can result from factors such as poor installation practices, inadequate maintenance, or the natural wear and tear of plumbing fixtures. By familiarizing yourself with the common issues and their causes, you can better address them when they arise and prevent them from escalating into significant problems. Read on to discover our expert advice on understanding, preventing, and resolving common kitchen sink plumbing issues, and learn how we can help keep your kitchen in top shape, ensuring a smooth and worry-free experience in your home.

Identifying Common Kitchen Sink Plumbing Problems

Understanding the most common kitchen sink plumbing issues can help you diagnose problems quickly and accurately. Some of the typical problems you may encounter include:

  1. Clogged Drains: Accumulation of food particles, grease, and other debris can lead to blockages in kitchen drains, resulting in slow water flow or standing water in the sink.
  2. Leaky Faucets: Faulty seals, worn-out cartridges, or corroded valves can cause your kitchen faucet to leak, wasting water and potentially damaging countertops or cabinets.
  3. Low Water Pressure: Insufficient water pressure in your kitchen sink can be due to mineral buildup in the faucet aerator or more severe issues such as water supply problems or damaged pipes.
  4. Garbage Disposal Issues: Overloading your garbage disposal or putting inappropriate items down the drain can result in jams, clogs, or even motor failure.

Effective Prevention Measures

Adopting proactive measures can help prevent kitchen sink plumbing issues and keep your system running smoothly. Consider implementing the following practices:

  1. Use a Sink Strainer: Installing a sink strainer can help capture food particles and prevent them from entering your drainage system, reducing the risk of clogs.
  2. Dispose of Grease Properly: Instead of pouring fats, oils, and grease down the sink, collect them in a container and dispose of them in the trash to prevent drain blockages.
  3. Regular Faucet Maintenance: Periodically check your faucet for signs of wear or corrosion and replace any damaged parts to prevent leaks and low water pressure.
  4. Garbage Disposal Care: Ensure you only put suitable items in your garbage disposal and run cold water while it’s in operation. Regularly clean your disposal by using an appropriate cleaner and allowing it to run for a short duration.

DIY Solutions for Common Kitchen Sink Plumbing Issues

Some kitchen sink plumbing problems can be resolved with simple at-home fixes. Here are some basic DIY solutions for common issues:

  1. Clearing Clogged Drains: For minor clogs, use a plunger to dislodge any blockages. Alternatively, you can try a mixture of baking soda and vinegar followed by hot water to break down debris. Avoid using harsh chemical drain cleaners, as they can damage your pipes over time.
  2. Fixing Leaky Faucets: Turn off the water supply to your faucet, disassemble it, and examine the individual parts for wear or damage. Replace any faulty components and reassemble the faucet, ensuring a proper seal and fit. If the leak persists, consider consulting a professional plumber.
  3. Improving Low Water Pressure: Unscrew and clean the faucet aerator to remove mineral buildup that may be affecting the water flow. If the issue persists, contact a plumber to inspect your home’s water supply and plumbing system for more severe problems.
  4. Troubleshooting Garbage Disposal Issues: If your garbage disposal is jammed, turn off the appliance and use a hex wrench to manually rotate the motor underneath the unit. This action can help dislodge any stuck items and get your disposal working again. If your disposal continues to malfunction, it may be time to call a professional for assistance.

When to Seek Professional Help

While some kitchen sink plumbing issues can be resolved through DIY methods, there are instances when it’s best to reach out to a professional plumber for assistance:

  1. Recurring Clogs: If you experience frequent clogs despite using preventative measures, there may be a deeper issue within your plumbing system that requires professional attention.
  2. Persistent Leaks: When leaks persist even after your attempts to fix them, it may be a sign of more significant problems with your faucet or plumbing that warrant a professional inspection.
  3. Severe Water Pressure Issues: If low water pressure affects multiple fixtures in your home or persists even after cleaning the faucet aerator, you may need expert help to diagnose and resolve the issue.
  4. Garbage Disposal Replacement: If your garbage disposal has failed or requires replacement, a professional plumber can correctly install the new unit and ensure its proper functioning.

Conclusion

By understanding common kitchen sink plumbing problems, adopting effective preventative measures, and applying DIY solutions when appropriate, you can help maintain a functional and efficient sink area in your kitchen. However, when faced with more complex issues, don’t hesitate to seek the help of our experienced team at The Irish Plumber. Our skilled professionals are ready to assist you in tackling any kitchen plumbing challenges, ensuring that your sink remains a reliable and integral part of your home. Reach out today for you much needed plumbing services in Ottawa and more!

Need AC Repair? Try This Troubleshooting Checklist First!

red-pen-checking-off-items-on-a-checklist

Oh, no! Did the air conditioner stop working? Are you going to have to call for AC repair, wait for a technician, and pay a repair bill? Well, maybe. But if you do all that, you want to make sure it is truly necessary. Before you decide you need a technician to look at your air conditioner, run through this quick AC troubleshooting checklist. 

A Word of Warning

Air conditioners are electrical appliances. They contain components that could injure you, cause electric shock, or expose you to chemicals like super-cooled refrigerant. And if anything goes wrong with the wiring, you could be left with a sneaky fire hazard you don’t know you need to worry about. Don’t DIY AC repair! Leave the real work to the experts. But actual repair may not be needed at all.

Check the Power

Is your air conditioner receiving power? A common issue is that if another appliance is plugged into the same circuit as the air conditioner—say, if you use the vacuum in a certain outlet—the circuit can overload and trip. Check your electrical panel. Is one of the circuits switched out of position? Just flip it back, plug the vacuum in somewhere else, and cross your fingers.

If this solves it, fantastic! But don’t just keep going through this process over and over. An air conditioner that repeatedly trips the circuit breaker has an actual problem. It’s drawing more power than it should. Perhaps the motor or the wiring needs repair. Have it checked by a professional!

Check the Thermostat

Whether you have an old dial thermostat, a programmable digital thermostat, or one of the new smart thermostats, it’s possible for the setting to be changed without you realizing it. Whether it’s a minor bump from an elbow or the accidental pressing of the wrong button—or a curious small child pressing buttons on purpose—a change to the thermostat’s setting or programming can tell your air conditioner to stop running.

Make sure it’s set to cool and not off or heat. Make sure it’s set to the temperature you intended to set it to. And check that any sort of “away” programming that would keep your home at a different temperature during certain hours wasn’t accidentally triggered. If your thermostat isn’t displaying anything at all, or it seems that signals are only getting through intermittently, change the batteries.

Change the Air Filter

Something you should already be doing monthly is changing the air filter. If there’s a larger-than-normal amount of dust in your home, you might need to change it more frequently. If it’s too badly clogged with dust, it can set off the limit switch, shutting the system down to prevent overheating. Check the filter before you decide you need actual repair.

If none of these things have resolved your AC issue, it’s time for central air conditioning repair in Cedar Grove, NJ. Now when your technician arrives, you’ll know for sure that you really do need their help.

Contact MarGo Plumbing Heating Cooling Inc. today with AC concerns or any questions about your HVAC system!

The post Need AC Repair? Try This Troubleshooting Checklist First! first appeared on MarGo Plumbing Heating Cooling Inc..

This post first appeared on https://margoplumbing.com

+1-877-959-3534