What Exactly Is an AC Tune-Up?

What Exactly Is an AC Tune-Up?

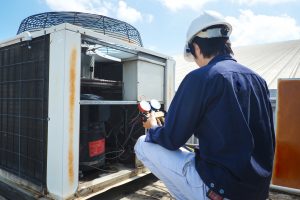
You’re not the only one to ask that question. Lot’s of homeowners are under the impression that an AC tune-up is just a bonus service that technicians sell to get an extra buck, but nothing could be further from the truth. The tough part is, nobody who isn’t in the industry knows what exactly takes place during your scheduled AC tune-up. That’s why we’re your professional air conditioning service in Clifton, NJ, that can give you the inside scoop on an AC checkup.

So, let’s try and shine some light on what an AC checkup really means and why it’s pretty important that you schedule one today. We know how important it is that your money goes towards the longevity of your air conditioning, and with so many scams out there it can be easy to feel like you’re paying too much. Thankfully, this is not one of those, and we’re here to demonstrate with some cold hard facts why a tune-up might be incredibly important for your system.

The Real Benefits of a Tune-Up

So, let’s talk turkey. What are you getting when you pay for a service like this?

Technical Benefits

Regular AC maintenance allows a technician to check the status of all the parts within your system. This includes measuring refrigerant levels to make sure there isn’t a leak, checking electrical connections, testing the motors, as well as cleaning the coils. These will make sure your air conditioner is functioning at maximum efficiency and that no damaging processes are hurting the interior.

For example, if an air conditioner has a low charge of refrigerant, that means the system is leaking because an AC is not supposed to consume refrigerant. Also, if one of the coils is frozen, this could be a sign that the airflow is bad due to an unchanged filter or a number of other problems. These tune-ups can be the perfect time for a technician to get insight on other issues that might be influencing the health of your AC.

Filter Inspections

While it’s totally acceptable to change air conditioning filters once a month by yourself, filters can be a great clue into an ongoing issue with your AC. A lot of the time, homeowners will replace or clean the filter thinking it will solve a much deeper problem. With a routine maintenance checkup, a technician can check your filter along with the rest of your AC unit to see if your filter changes are helping the problem or not.

Basically, don’t just assume changing your filters once every month will solve the deeper issues that you might not see or hear.

Is It Worth It?

Well, worth is subjective. However, based on how expensive some of these air conditioning systems can be, having routine maintenance tune-ups can save you a lot of money in the long run if a technician catches a problem early. Think of routine maintenance like an investment on your AC. Good thing we’re here to help you with great maintenance at an affordable price.

If you’ve got any questions about AC maintenance, contact the experts at MarGo Plumbing Heating Cooling Inc.

This post first appeared on https://margoplumbing.com

Do I Need a Water Softener?

showerhead-water
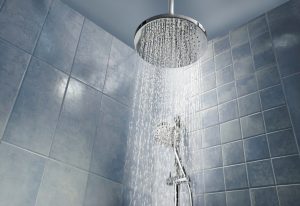
Isn’t water just wet? Can it be hard? How about soft and fuzzy? 

Well, to answer your question, water can certainly be hard, and no, we don’t mean hard like a bed of nails or like a bed of rocks. We are talking about water that is riddled with contaminants — contaminants capable of causing all sorts of problems for your plumbing system.

Fortunately, water softener installation in Orlando is the best solution for hard water, mitigating the negative effects that it has on appliances like dishwashers and washing machines. But, how do you know if you have hard water? Why, you keep reading below of course!

What is Hard Water?

Hard water is water with high concentrations of magnesium and calcium particles. Though these particles do not pose a threat to your health and safety, they can wreak quite a bit of havoc on your plumbing system and appliances. Long term exposure to these mineral particles will lead to limescale build-up, restricting water flow and causing damage to your pipes as it hardens.

Signs That You Have Hard Water

Soap Scum in Bathtub or Shower

A rapid build-up of soap scum might suggest that you have hard water in your home. The minerals found in hard water prevent soap from dissolving, causing it to stick around after your bath or shower.

Water Spots on Glasses and Dishes

Have you ever looked at your glassware after running your dishwasher and noticed little water spots along the surface? Water spots are the result of mineral residue left behind from hard water. Calcium and magnesium build-up in your dishwasher can negatively impact its function by restricting the flow of water in and out of the appliance, leading to damage and ineffectiveness.

Yellow or White Residue Around Sinks and Drains

This is a tell-tale sign that you have hard water in your plumbing system. The same mineral deposits that you see outside of your pipes are likely accumulating inside your pipes. When this limescale hardens, you will likely need to replace your pipes much sooner than later.

Clogged Showerheads

Mineral deposits can end up clogging your showerheads, which makes for a not-so-great shower experience. Over time, the showerhead can become so clogged that no amount of water will be allowed through, leading to a need for replacement.

Residue on Hair and Skin

Hard water can leave a residue on your hair and skin. Your hair may feel slimy, lack volume, or be hard to style after it has been dried. You also may notice that your skin feels dry. This is because the minerals in hard water are likely diluting the shampoo or body wash you use, reducing their effect on your body.

Your Clothes Don’t Feel Clean

Just as it prevents soap from dissolving inside your bathtub, hard water can have the same effect inside of your washing machine. This can prevent clothes from rinsing off or can make them stiff after they come out of the dyer. It can also cause colors to fade much faster than they would have otherwise.

If you are interested in having a water softener installed in your home, contact the team at Modern Plumbing Industries, Inc. today! 

This post first appeared on https://www.modernpi.com

Why Does My Sewer Line Keep Backing Up?

Len The Plumber truck pulling out of Northern VA homeowner's driveway.

It only takes one sewer line backup to cause homeowners major problems and big headaches. But, when sewer lines keep backing up, these problems and headaches can snowball into a full-blown crisis!

If you’re frequently dealing with sewer line backups, here’s a look at what may be going wrong—and what you can do to fix it and stop the backups for good.

4 Reasons Sewer Lines Keep Backing Up

  1. Clogs, clogs, clogs: Recurring clogs can be one reason that sewer lines keep backing up. You’ll experience persistent clogs if things like oil, grease, hair, “flushable” wipes, or other items keep entering your drains and sewer line. The good news is that this is one of the easiest problems to fix. Simply take extra precaution to avoid letting these items go down your drains and toilet. You can also install drain catches throughout your home to help catch items before they go down a drain.
  2. Sewer line damage: After clearing clogs and being careful to avoid future clogs, you can continue having sewer line backups if your sewer line is cracked, has holes in it, or is otherwise damaged. That’s because a cracked sewer line can let dirt and rocks in, creating a new blockage and forcing your wastewater to back up into your home (because it has nowhere else to go).
  3. Tree roots: Another way your sewer line can become blocked and back up is with tree root infiltration. If tree roots are growing near your sewer line, they can damage the line, causing misalignments where buildup of solid matter can lead to blockages. When that happens and the line leaks, the roots can get nutrients from the leakage and start growing toward it—they may even grow into cracks, making them worse and creating new, bigger blockages. As the roots grow, they can eventually prevent any wastewater from passing through. Plus, if the roots aren’t properly removed, they can grow back, causing the same problem and recurring sewer backups.
  4. A broken, sagging, or collapsed sewer line: Sewer lines can break for all sorts of reasons, from pipe aging and corrosion to shifting soil, heavy above-ground construction, and more. No matter how a sewer line breaks, you’re sure to experience backups in your home until your sewer line is fixed.

How to Fix Sewer Lines That Keep Backing Up

The only way to stop recurring sewer backups is to identify the exact problem with the line. And the best way to do that is with a professional sewer line camera inspection. This gives a plumber the opportunity to see:

  • What’s going on inside your sewer line
  • The condition of the line, including vulnerable areas, corrosion, and damage
  • Exactly where in the line the problem lies

With that essential information, the best-fit solution can be determined. That may mean:

The best way to find out what’s causing your recurring sewer line backups and put a stop to them is to contact Len The Plumber.

Schedule Sewer Line Service Now: Contact Len The Plumber

Len The Plumber can diagnose and repair any sewer line problem! With more than 20 years’ experience and state-of-the-art equipment, our expert plumbers are the team you can trust when it’s time to put a stop to sewer backups and other problems.

Call 800-950-4619 or contact Len The Plumber online now for sewer line service. We proudly offer:

  • 24-hour emergency service at no extra charge
  • 2-hour response times for drain and sewer emergencies
  • FREE, upfront, written estimates
  • Exceptional service and top-quality plumbing solutions!

With Len The Plumber, you can always count on:

  • Fast response times for drain and sewer emergencies
  • Zero extra fees for after-hours or emergency service
  • First-class service and the highest-quality solutions!

We invite you to check out our glowing reviews to see why we’re a leading plumbing company in Maryland, Northern Virginia, Pennsylvania, Delaware, and Washington, D.C. And we encourage you to contact us whenever you need plumbing service, so you can experience our excellence for yourself!

This post first appeared on https://lentheplumber.com

What Causes Sewage to Back Up?

Len the Plumber technician holding up very long and large string of debris that was clogging up a DMV Metro home's sewer line.Sewage backups can be caused by a number of issues with your plumbing system. Fundamentally, sewage will back up whenever wastewater is unable to pass through your pipes and sewer line.

Here’s a closer look at:

  • The most common causes of sewage backups
  • How to know when you’re dealing with a sewage backup
  • What to do when sewage backs up into your home

If you’re dealing with an emergency sewer backup and you need help now, call Len The Plumber at 800-950-4619 for 24-hour emergency service at no extra charge!

We provide FREE estimates and a 2-hour response time for sewage backups and other sewer line emergencies.

5 Problems That Commonly Cause Sewage Backups

  1. Clogs: Anything from grease and food to hair and small objects can create blockages in your pipes and sewer line. These clogs can slow down or stop the flow of wastewater through your plumbing system, causing backups.
  2. Cracked sewer lines: When sewer lines crack due to age, dirt settling, tree roots, or any external damage, dirt and rocks can enter the line, creating a blockage that can cause sewage to back up into your home.
  3. Broken or collapsed sewer lines: If a sewer line is completely severed or collapses, wastewater will be unable to get where it needs to go. Some may start to run off into the dirt, but the majority of it will stay in the line and build up there, again, causing a backup.
  4. Tree root infiltration: Tree roots will gravitate toward water and nutrients, including nutrients that seep from sewer lines. If there are any slight cracks in sewer lines, tree roots can start to grow through these cracks, opening them up and creating a blockage that causes a backup.
  5. Problems with the municipal sewer system: When the city’s sewer line is unable to accept wastewater coming from your home’s sewer line, backups can also happen. Usually, this occurs when municipal sewer systems are overwhelmed with runoff water after heavy rains.

How Do I Know If I Have a Sewage Backup?

Graphic from Len The Plumber explaining how to diagnose a backed up sewer line.

If you see or smell sewage coming up through any of your home’s drains, you likely have sewage backing up into your home. Other signs of sewage backups can include:

  • Bubbling or gurgling drains or toilets
  • Clogs in multiple drains, especially the lowest ones in your home
  • Plumbing fixtures experiencing backups when a different fixture is used, like sewage backing up into your tub after you flush a toilet or when you use your shower
  • Backups in your basement (or in first-floor fixtures if you don’t have a basement) when you use water in other areas of your home

Who’s Responsible for Fixing a Sewage Backup?

It depends on the exact cause of the backup. If problems with the municipal sewer line or system cause backups in your home, the city may be responsible for covering the cost of repairs.

If any problems with your home’s sewer line are to blame, you’ll be responsible for the repairs.

It’s important to point out that even if you’re the one who’s responsible for the repairs:

  • Your homeowners policy may cover the damage and the cost of repairs.
  • You should review your policy and contact your insurance provider to verify if you’re covered for this type of damage.

What Should I Do If I Have a Sewage Backup?

Contact Len The Plumber ASAP for emergency sewer line service.

Call 800-950-4619 for emergency sewer line service and a 2-hour response time. We never charge extra for after-hours service, and we always provide FREE estimates for sewer line service.

You can also contact us online for non-emergency sewer line service.

When it comes to sewer line problems, we’ve seen and fixed it all! Our expertise can give you confidence that we’ll accurately and efficiently diagnose the problem and provide the proper repairs. Plus, with Len The Plumber, you can always expect:

  • Upfront pricing
  • First-class service
  • Top-quality solutions from experts who truly care about restoring your plumbing and sewer system!

Len The Plumber has been offering exceptional plumbing services throughout Maryland, Northern Virginia, Pennsylvania, Delaware, and Washington, D.C. for more than two decades. That’s just one reason why we’re a top-rated local plumbing company!

We invite you to experience our excellence for yourself, and we look forward to helping you with any of your plumbing needs!

This post first appeared on https://lentheplumber.com

All About Garbage Disposals

drain-and-spoonSink garbage disposals are so common in residential homes today that people have a difficult time imagining what life would be like without them. Before disposals became common parts of kitchens, food waste needed to be scraped off plates and into a composting bucket which was then taken to the trash. This was not only a time-consuming job, but it also put more waste into landfills. Garbage disposals allow a large amount of food waste to instead go into the municipal sewer treatment system without larger pieces of organic waste clogging up the drains.

We have some information about garbage disposals that can help you take better care of the one in your kitchen.

  • Disposals don’t chop up food: There are no sharp blades in the disposal’s hopper as people often think. Instead of chopping up food waste, the disposal uses blunt impellers to throw the food waste into an outer grind ring to mash up the food. This is why putting ice cubes down a disposal to sharpen the blades won’t work—because there are no blades down there.
  • Broken disposals need professional repairs: When your disposal gets stuck, you can try to reset it by pressing the button on the bottom of the unit, which serves as the breaker switch for the unit in case of too much electric stress. If this doesn’t help, don’t continue to attempt to run the disposal because it will just trip the button again. Your next step is calling for professional plumbing services in Glendale, AZ. It can be hazardous to try to repair a disposal yourself.
  • Disposals don’t last forever: A single sink disposal in a kitchen does an immense amount of work over the year (especially around the holiday season, when you’re more likely to be entertaining), and the stress on the motor, the grind wheel, and all the other moving parts will eventually age the disposal past the point of usefulness. When your disposal breaks regularly or isn’t grinding down food effectively, you may need to have it replaced.
  • Disposals aren’t trash cans: We can’t emphasize this point enough—actual trash doesn’t go in the disposal. This includes all non-organic items, like paper and cigarette butts. If it isn’t something you eat, it should never go into the disposal’s hopper.
  • Not all food waste goes in the disposal: Some organic waste can damage the disposal’s mechanical parts. Fruit pits, unpopped popcorn kernels, meat bones, and anything else your teeth can’t chew must be kept from the disposal. Other food items to watch for: fibrous and stringy foods, pasta, and rice.
  • Watch out for the loose disposal: When you notice the disposal is making a rattling sound as it runs that you’ve never heard before, it may be coming loose where it’s attached to the sink. This is a serious issue because the force of the disposal’s movements can cause damage to the sink. It will also allow water to seep between the disposal and the sink, which often leads to mold and water damage. Call for plumbers to see what’s happening and secure the disposal.

Call The Trusted Plumber for garbage disposal service and all other plumbing needs in Glendale, AZ and the surrounding areas.

This post first appeared on https://www.thetrustedplumber.com

How and Why Is My AC Leaking Water?

Nobody likes a leak. From pipes, to drains, to toilets, leaks can spell disaster for a homeowner. An air conditioner is no exception. Water leaking from an AC can mean warped floorboards, mold, and a slew of other problems. If you’re noticing any water leaks coming from your air conditioner, it’s not a bad idea to contact a technician for fast air conditioning service in Clifton, NJ.

What if I told you that some signs of leaks weren’t actually as bad as you think?

That’s right! Did you know that your AC is supposed to disperse water into a condensate drain? Often, homeowners hear a dripping noise coming from their AC, which is really a sign that it’s functioning perfectly fine.

Let’s take a look and see how you can spot the difference between a good water leak and a bad one.

Why Your AC Leaks

Evaporation and condensation are part of the cooling process. Did you know that most of the discomfort we feel from the summer heat is from the humidity? When the air is moist, our sweat has trouble evaporating, which leaves us feeling sticky and uncomfortable. Luckily enough, your air conditioner serves as a partial dehumidifier, since it draws moisture out of the air through evaporation.

All that moisture must go somewhere though. As it condenses around your AC unit, it drips into a pan and eventually empties through a condensate drain outside. So that dripping noise? Yep, perfectly normal!

The Wrong Leaks

What happens if condensate can’t drain properly? Over time, your condensate drain could plug up with dirt and debris, causing your system to have trouble venting this excess moisture. If this happens, you might see signs of water being in places that you’d rather it not be.

  • Discolored Walls. Are you noticing brown or beige spots on your wall near your air conditioner? This could be from leaking moisture that can’t make it through the condensate drain.
  • Discolored Carpet. AC leaks affect your carpet easily. If you’re noticing discolored spots on your carpet right near your air conditioner, this could be the sign of a leak.
  • Warped Wood. Don’t have a carpet? Leaking condensate could still affect your hardwood floor. Wood can soak up moisture and bend or warp out of place.
  • Mold or Mildew Smells. Yikes! All that moisture in a cool, interior environment is a ripe breeding ground for mold. If you smell or spot mold near your AC unit, there could be a condensate leak.

These are not symptoms of a well-functioning air conditioning system. If you notice any of these signs, you might have a pretty bad problem on your hands.

How to Tell if You Have a Condensation Leak

If you take a metal wire and pass it through your unit’s drain channels, you’ll be able to tell the condition of your AC’s drainage pipe. If you receive a great amount of resistance, or can’t pass the wire through at all, then your condensation drain is most likely plugged and requires some repair.

When in doubt, call us at MarGo Plumbing Heating Cooling Inc.

This post first appeared on https://margoplumbing.com

Ew! What’s That Stench?!

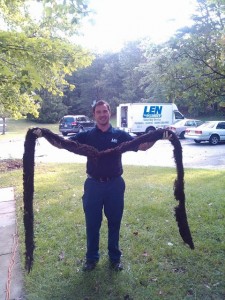
Is it the garbage can? Did someone go to the bathroom? Maybe it’s the litter box. Either way, something smells, and of course, you want to get to the bottom of it. But, have you ever considered that this unpleasant scent could be coming from your drainpipe? That’s right: problems with drains or sewer lines can end up leading to quite an awful scent!
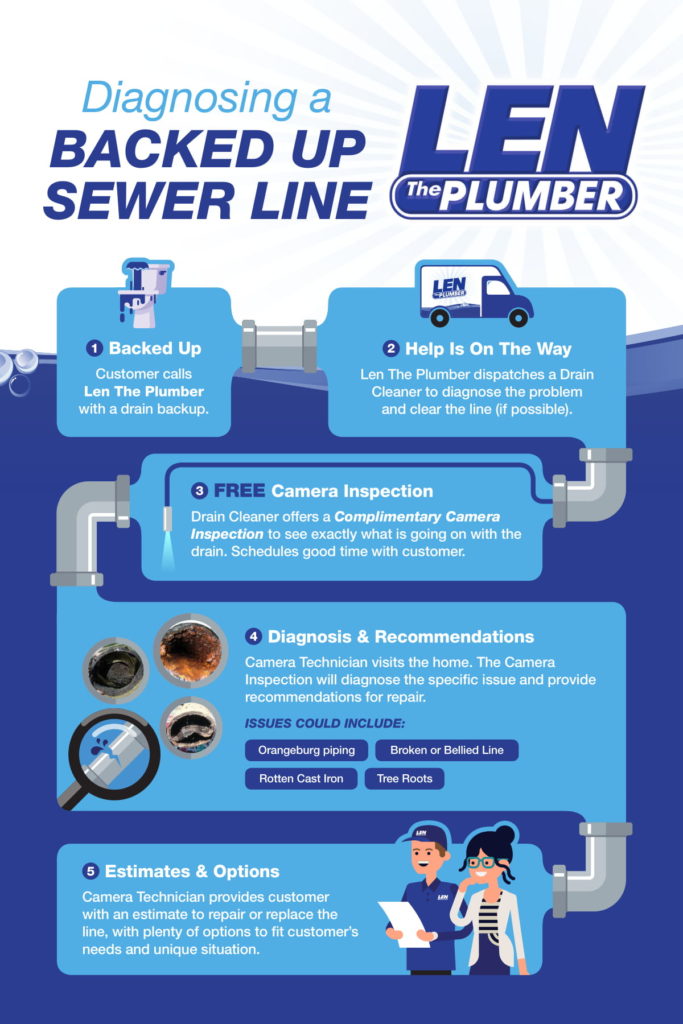
But, why does this happen?

Well, there are plenty of reasons why you might experience a foul odor coming from one or more of the drains in your home, and below, we have listed some of these reasons for you. So, grab your nose plug and keep reading to find out more!

Here’s What Might Be Wrong

Like we mentioned above, there are quite a few issues that can lead to some serious stinkage, including:

Dried out p-trap

If only one drain in your home is letting off odors, it may be due to a dried out p-trap. This is the curved pipe found right under the drain, usually behind your cabinet doors. The shape of the pipe, when looked at from the side, resembles the letter p, which is where the name comes from. The p-trap is designed to hold an amount of water that creates a barrier against sewer gas coming back up the drainpipe. If this p-trap dries out because the drain hasn’t been used in a while, bad odors will start to come from it. Run water down the drain for a minute, and this should solve the problem.

Drain vent issues

Your wastewater pipes have vents in them to prevent a build-up of pressure. These vent pipes connect to a central chimney pipe that goes up to the roof. If vents become blocked, the pressure will force sewer gas up through the water in the p-trap. You might hear a gurgling sound from the drains, a sign that the gas is percolating up through the p-trap’s water. Call professional plumbers to fix the problem.

Sewer line troubles

This is the most serious of all. When you find that each of the drains around your home are emitting bad smells, the trouble might come from a blocked or broken sewer line. Call for our expert plumbers right away, since the sewer lines must either be repaired or replaced, and this is a major task.

You Need a Professional Plumber!

When the time comes to schedule your plumbing services in Orlando, you want to be absolutely certain that you’ve hired a professional for the job! Only a certified plumber has the appropriate tools, knowledge, and experience to safely and correctly handle the complex needs of your plumbing system.

Of course, we understand why you might be tempted to call a plain old handyman to get the job done for you, but remember, an attempt to save money could end up costing you much more in the long run. Trust us, when it comes to your plumbing, you don’t want to take any risks.

Schedule your plumbing services with the team at Modern Plumbing Industries, Inc. today! 


This post first appeared on https://www.modernpi.com

Plumbing Reviews – What To Look For When Reading Them

Plumbing is an essential piece of the household or business, meaning you should never settle for less or have to deal with poor service. When you are searching around for a plumber in Ottawa, you shouldn’t overlook the power of online reviews and testimonials. Visiting sites like Google and other platforms can tell you a lot about the plumbers, the services provided, how they treat their customers, and so on. But what should you look for? How do you know you’re finding the right plumbing company?


Today we’re going to discuss what to look for in plumbing reviews especially in the Ottawa region so you can pick out key points and find the best plumber for the job. Let’s get started.


Plumbing Reviews To Ignore

Before we talk about what to look for in a decent review, you should know what to disregard. You need to be able to distinguish between reviews that are objective—or emotional and exaggerated. Avoid the reviews that use then enraged CAPS LOCK, excessive exclamation marks, cursing, sarcasm, and goes off on long, winding rants.


What is more important than giving credit to anger driven reviews is how the plumbing company responds to this negative feedback. Do they accept it? Do they try to fix it? Do they make it known that the person is overreacting or is in the wrong? Put more emphasis on that.


Look For Themes

If you have ever wrote a review for a business or something else, then you know what the climate is for reviews. Whether it was a glowing review or one about a very negative experience, you understand that there are some points that will almost always come up in a review.


In other words, there are themes. For example if you see a handful of reviews telling you to “stay away” or “don’t even bother,” then you shouldn’t ignore that. Similarly, if you read reviews naming people within the company while giving either good or bad reviews, pay attention.


Themes can also be seen in smaller details, or things that people won’t necessarily pick up on unless it becomes a problem time and again:


  • Has there been an upswing in good reviews recently? What about a recent downturn?
  • Does anyone mention frequent changes in the staff or leadership?
  • Are there reviews complaining about customer service representatives?
  • Is there a pattern in the complaints about service? What does the plumber seem to have difficulties with?


Topics To Seek Out

When you are reading reviews, you want to look for anything that answers your questions about the plumber or plumbing company. This means knowing what to look for in a plumber.


There are a few topics to seek out:


  • Is the plumber licensed and insured?
  • Does the company have hidden fees? Or are they true to their word?
  • Was the plumber prepared and did they have supplies with them for quick fixes?
  • How was the emergency service, if provided?
  • How respectful was the plumber towards the homeowner and their household?


Reading plumbing reviews is an excellent way to gauge the level of service and satisfaction that the plumber and their company brings to the table. You always want to find the plumber who has more positive reviews than negative ones, and who responds back to and engages with those customers who were less than satisfied. Do that, and you will find a trustworthy plumber to use again and again.

The post Plumbing Reviews – What To Look For When Reading Them appeared first on The Irish Plumber.

13 Effective Ways to Conserve Water in Your Home

How do you conserve water in your home?

Water conservation is very vital in our daily activities. Living without water is like digging an early grave, that’s why it’s of great importance to always conserve water whenever possible.

Remember that water use in the home varies. According to the University of Nebraska, a person uses an average of 70 to 100 gallons of water per day.

The main users of water in the home are the toilet, shower/bath, and washing machine.

The faucets and dishwashers equally consumes a lot of water. That’s why adopting effective water-conservation practices for these areas can provide utmost benefit to the family.

Conserving water in our homes come with a token of benefits. It saves your money for the extra water bill that you would have paid before reducing water consumption, and it’s good for this kind of economy.

Many countries over the years have once or severally encountered the tragedy of drought. Bear in mind that drought never gives a signal that it’s coming; it can attack at any time, thus bringing us to the several effective ways of conserving water to greatly escape the tragedy of drought.

Water conservation starts from your own home; therefore, when everyone at their respective homes conserves water, drought will never be part of our problems as a country to solve.

Here are the 13 effective ways to conserve water in your home:

  1. Recycle water whenever possible

When using the shower, use a bucket to collect the water that comes out first before the heater heats up. Use this water in watering your flowers or trees outside or at your garden.

Source: Kmutt

Also, when doing laundry using hands, avoid disposing of water now and then, you can reuse by washing more clothes with the initial water collected then rinse with clean water. Also, reuse water for laundry to clear the dust outside during summertime.

When using a washing machine, ensure it is full of clothes. Recycle water used for washing fruits and vegetables in the kitchen to water your plants at the garden.

  1. Turn off the bathroom faucet

Always turn off the bathroom tap while brushing your teeth, don’t just let water flow while you are brushing your teeth.

It might seem too little, but the amount of time you are brushing your teeth is comparable to losing more than one liter of water. Running water should be conserved.

Use a pool of water to rinse your shaving tool than to rinse on running water, and this helps conserve water.

Use one towel for a week when taking a shower, stop using a clean towel every time you take a shower, this reduces washing towels everyday, thus saving water.

  1. Water your plants in the early morning and late evening

In the early morning hours before sunrise, the air is cool, so when you sprinkle water to your plants, trees, and flowers, the water soaks the soil.

But when sprinkled when it’s dry the water evaporates thus consuming a lot of water. Always collect rainfall water so that you can use in watering your plants. When watering your trees, use drip irrigation.

  1. Fix any leaks

Check and fix any leaks as quickly as possible when you realize leaks in your house, from the faucets to the water pipes and even the shower and the flash.

In most cases, you may realize that the flash in the toilet or the pipe below the sink leaks very little amount of water, which is a lot of water by the end of the day. This leaking water is saved by fixing the leakages on time.

These two areas need to be checked regularly to avoid unnecessary wastage of water. You can also install a modern toilet flash which enables you to regulate the amount of water when flushing your toilet.

  1. Turn off kitchen faucet while washing dishes

It’s always good to turn off the tap while hand washing the dishes. Fill the sink with water then scrub the dishes, then rinse them all at once.

Avoid scrubbing the dishes while water is flowing, and this helps in conserving a lot of water in the long run.

  1. Install dual kitchen faucets

By installing two kitchen sinks for washing dishes, it will greatly help in saving water. Fill the first faucet with water and soap where you will begin by washing your dishes.

Fill the second faucet with clean water to rinse the dishes, and this will help in saving water wasted by hand washing dishes while water is running.

  1. Wash your car from the car wash

Washing a car at home uses a lot of clean water. At the car wash, they use recycled water to do any cleaning; it’s way better than washing from home where you are going to consume a lot of treated water, which is wastage in the expense of recycled water at the car wash.

You can also take your fluffy carpet to be washed at the car wash since it will consume a lot of water when washed at home.

  1. Use less electricity

Use buckets and hand sprinkler to water your plants. Using an electric pump means pumping a lot of water to sprinkle your plants.

Collect rainwater using tanks during heavy rainy seasons to use later in watering plants — to avoid using electricity in pumping water to irrigate plants.

Your plants also get fresh water with no chemicals, unlike piped water, which has treatment.

You can also choose to water your plants using hands. It’s tiresome, but a small amount of water is used than using an automatic sprinkler, this is a good way to conserve water at home.

  1. Invest in a washing machine

Doing laundry by hand requires a lot of clean water.

On the other hand, washing using a washing machine conserves a lot of water since it uses a very little amount of water and its services are the best. Or you can rather buy a small dishwasher.

Modern dishwashers conserve a lot of water because you are going to load all the dishes inside and rinse them at a go. Apart from conserving water, it also saves energy and detergents.

  1. Short showers

When taking a shower, always minimize your time in the bathroom to reduce spending a lot of water running. Of course, if you are going to shower for longer periods, a lot of water is going to be wasted.

While scrubbing yourself turn off the shower to avoid unused water getting wasted.

Turn on the shower after scrubbing yourself when you’re ready to get rinsed, and this will also help you soap yourself well. Conserving water from the bathroom means saving gallons of water.

  1. Choose dishwasher over hand washing

Using hands to wash dishes means you’re going to use a lot of water to wash dishes because it involves water running from the tap as you wash and rinse the dishes.

Investing in a dishwasher will help you use small amounts of water in washing your dishes, ensure the loads are full.

The dishwasher uses half the water you would have used by hand washing the dishes, and that means conserving a lot of water.

  1. The low flow of water

It’s good to use low flowing water. Using slow-flowing water in the bathroom will give you enough time to scrub yourself and rinse yourself and still use a very small amount of water than you would have used with first running water.

In the kitchen, while washing dishes use slow-flowing water while rinsing your dishes, it will help you conserve a lot of water because a very small amount is used.

Even when washing hands or when brushing your teeth, always use slow-flowing water, by doing these you will conserve gallons of water than you never know.

  1. Regularly check your water bills

Keeping an eye on your water meter will always help you track your water usage every month. If there’s an increase in water usage, your water meter will tell you that, and it will help you get control of that, peradventure you’ve been using water carelessly.

It also helps you pinpoint if there are any leakages. If the bill runs too high and maybe your households spend most of their day at work, it means there must be a leakage.

It’s also wise to keep track of your water daily by frequently or daily checking the water bill to avoid eventualities, and this will help you conserve gallons of water that would have gone to waste through heavy leakages.

Conclusion

There you have it, the little things you can do in your home to conserve water all year round. Even though your city or home may have a shortage of water supply, conserving water means you’re reducing energy use and saving money.

This post first appeared on https://blog.antaplumbing.com

DIY Versus Professional Washer Installation

Installing a new washing machine might not seem like it would be that difficult to do as a DIY project. However, before you get started, we recommend reviewing our washer installation guide. This will help you determine if this is a task you can do yourself or if it would better to schedule plumbing service to have the new machine installed.

Step 1: Prepare the area where the washer will be installed.

man reading instructions for installing a washing machine

The first thing you need to do is prepare the location where you want to install your new washing machine. Most likely, you already have an existing machine and will be swapping them out. However, there are several things you will need to do beyond just swapping the machines.

You need to verify that the electrical outlet on the new machine is the same as the current one. Some newer models use the four-prong cords found on dryers, so you might need to have your electrical outlet upgraded. This type of configuration is more common on the newer “all-in-one” washer and dryer models.

The next thing to do is to measure the existing space to verify the new machine will fit. Your new machine may be slightly bigger, especially if you upgraded to a high-capacity washer from a standard-capacity model.

The two most important measurements are the width and depth of the new machine. These will let you know if the washer will fit easily into the existing space.

Step 2: Remove the old washing machine.

Before the new washer installation, you will need to remove the existing one. There will be water left inside the bottom of the machine that will need to be drained. Otherwise, it can run out of the drainpipe and onto the floor.

To start with, shut off the electricity to the outlet at the breaker box. This is done as a precaution since you will be working around water. The last thing you want to do is get electrocuted or cause an electrical surge that blows up your new machine!

Next, you will need to shut off the water supply lines. There might be shut off valves where the existing water lines connect to the water supply lines. If there is not, then you will need to shut off the water main to the home. Once the water is turned off, turn on a kitchen sink or bathroom sink nearest the washing machine to remove pressure from the water lines.

Now you are ready to remove the old washer. Unplug it from the electrical outlet. If you have space, pull the washer out and away from the wall. This will make it easier to access areas behind the machine. Carefully loosen and disconnect the washer hoses from the water supply lines. It is a good idea to keep a bucket nearby to drain any water out of the washer hoses.

Then you will want to take the water discharge drain hose and disconnect it from the drain line. You will need to lower it to ground level and drain excess water into a bucket. You don’t have to remove the washer hoses or drain hose from the machine if you have sufficient room to move it out of the laundry area.

However, if your laundry room door is not wide enough, you may have to remove these first. If you do remove the hoses, place them inside the machine so they are out of your way.

Workman attaches a drain hose to a sewage pipe.

Step 3: Clean the discharge drain line.

Before starting on the new washer installation, you need to clean the drain line to remove any excess soap scum, hair, and other deposits. Skipping this step could eventually lead to a clog or slow-draining drain. Both of these could result in drain plumbing problems where water backflows into the washing machine and/or overflows from the drainpipe out onto the floor.

DO NOT pour chemical drain cleaners down the drain line. These can do more damage than good. Instead, you need to use a plumbing snake and feed it down the line to remove any built-on deposits.

Since most of us do not have a plumbing snake long enough sitting around, this step is one you should have your local plumbing service do, even if you do the rest of the installation yourself. While your plumber is there, he or she can also clean all of your other drain lines in your home.

Step 4: Install the new washing machine.

Place the new washing machine in the laundry area but do not push it all the way up to the wall. You will need to connect the discharge drain hose and hot and cold water washer hoses to the back of the machine. On some models, you may also have to install the electrical cord if it did not arrive already connected.

Make sure to reference the installation instructions that came with your new washer. Read through these at least once. Make note of any tools you will need to do the installation. Common tools required could include:

  • Philips Screwdriver
  • Plumbers Wrench
  • Plumbers Tape
  • “U” Connect for the Discharge Drain Hose
  • Plumbing Washers (if Not Included) for the Washer Hoses
  • Level
  • Adjustable Wrench

Once you have reviewed the installation instructions and gathered all the necessary tools, you will want to start by connecting the discharge drain hose and hot and cold water hoses to the back of the machine.

Some hoses have a red line and blue line on them so you can tell the difference. If not, use a sharpie and make a notation on each end using the letter “H” for hot water and “C” for cold water. It is important to make sure you connect the hoses on the back to the right water intake connections.

If necessary, install the electrical cord to the back of the machine as well. Next, connect the hot and cold water hoses to the appropriate water supply lines. Connect the discharge drain hose to the drain line.

Before doing anything else, turn on the water supply lines and check for leaks. If you discover any leaks, shut off the water supply and fix those. One common cause for leaks is forgetting to put the plumbing washers inside the hot and cold water washer hoses before connecting them to the back of the machine and water supply lines.

Now level the machine. You want the machine level from front-to-back and side-to-side. If the machine is not leveled, it can place strain on the washer drum and cause unbalanced wash load issues. Some models are “self-leveling” and others require manual leveling. Refer to your installation instructions.

After the machine is leveled, plug it in and run a test load. You don’t have to put laundry into the machine. The purpose of the test load is to make sure there are no leaks and that water drains out of the machine correctly. An “express load” is sufficient for this test.

If you discover any leaks, stop the wash cycle and determine the cause of the leaks. Once these are fixed, dry up any excess water from the floor. Restart the test load and let it finish.

Last, slide the machine into place up against the wall. Recheck to verify the machine is still level. If it is not, re-level it before doing any laundry.

plumber installing washing machine in bathroom

Benefits of Professional Washer Installation Plumbing Service

While installing a new washer might not seem that difficult, there are many steps to follow to ensure the washer is installed correctly. You also have to have access to the right tools. With professional washer installation, your plumber is already experienced with numerous makes and models of machines.

They arrive at your home with all the necessary tools. Plus, if you need longer washer hoses or a longer discharge drain hose or other parts that weren’t included, they will have these with them as well.

Additionally, some washer hookups can be a bit more complex than just connecting it to the “box” in the wall. For example, some homes have the water supply lines connected to the same water supply lines as their utility sink in their laundry room. This type of installation is different since it involves connecting the hoses to the sink’s water supply lines. The discharge drain hose is typically hung on the side of the sink rather than connected to a drain line.

Not to mention, you can avoid any potential issues or problems during the installation like finding the source of water leaks or forgetting to level the machine a second time after pushing it into place. Plus, your plumber will take care of cleaning the drain line while installing your new washing machine.

To have your new washer professionally installed, drain lines cleaned, or other plumbing problems fixed, please feel free to contact MET Plumbing & Air Conditioning at 281-994-6698 today!

The post DIY Versus Professional Washer Installation appeared first on Met Plumbing.

+1-877-959-3534