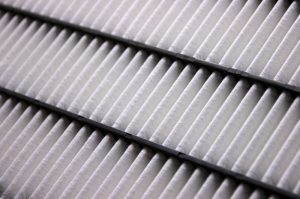
It’s That Time! A Reminder to Change Your Air Filter

It’s That Time! A Reminder to Change Your Air Filter

close-up-of-a-clean-new-air-filter

We always emphasize the importance of having annual, professional maintenance performed on your heating system in Cedar Grove, NJ. We also warn customers against DIY maintenance or repair, as this can injure you, damage your equipment, and void your warranty. However, you should regularly change the air filter to protect your heating system. Here’s everything you need to know.

Yes, Furnaces Have Air Filters

We’re not talking about an air filtration system for your home, to reduce germs and other particles and improve your indoor air quality. No, we’re just talking about a simple component of your furnace. It’s there to catch dust and grit before it can make its way into all the small and precise moving parts of the heating system itself.

If all that mess got into your furnace, it would blanket everything in an insulating coat of dust and grime. Friction between components and overheating from essentially wearing a fuzzy sweater would be the result. But if you let the filter get too clogged and dirty, it will prevent airflow. That can also cause overheating, system shutdowns, short cycling, wear and tear, and wasted energy.

How Often to Change the Air Filter

Most manufacturers recommend changing furnace air filters monthly. This is a good baseline to keep in mind. During seasons of light furnace use, such as spring and fall, the filter might not need to be changed quite as often. However, if your home has extra dust (renovations, deep cleaning, nearby construction, shedding pets), you should check the air filter more often.

How to Change the Air Filter

The first thing to do is turn off the furnace. Next, you need to know where to find the filter. It’s usually located in the blower compartment, which you can access through a panel door. Sometimes, you’ll find it where the air return duct connects with the furnace, often on the lower right. If you’re struggling, consult your owner’s manual or reach out to us with your questions.

To change out a disposable filter, simply slide the old one out, slide the new one in, and turn the furnace back on. You’re done! If you’ve got a reusable filter, it can be washed with water. Make sure it dries completely before you put it back in place. Again, turn the furnace back on, and you’re done. One tiny reminder: if there’s an arrow on the filter, make sure it’s pointing in the same direction as the airflow.

We’re Here to Help

Do you have any concerns about your air filter, how to clean a reusable filter properly, or what replacement filters you should purchase? Or perhaps a different question about your heating system? Don’t hesitate to get the help you need. We’re always happy to hear from you!

Contact MarGo Plumbing Heating Cooling Inc. today to schedule an appointment or ask any questions about your HVAC system!

The post It’s That Time! A Reminder to Change Your Air Filter first appeared on MarGo Plumbing Heating Cooling Inc..

This post first appeared on https://margoplumbing.com

The Best Way for Homeowners to Handle Offset Pipes

offset_pipe

Along with pipe deterioration and collapse, pipe offset damages are one of the most problematic things a homeowner can be faced with in terms of plumbing. Not only are offset pipelines a pain to fix, but also an expensive project few see coming. Traditionally, you would have to call a professional plumbing team and get the pipe in question manually excavated; this meant significant landscaping, material, and labor fees.

Read More

Key Signs That Tell You It’s Time to Replace Your Water Heater

Your water heater is one of the hardest working appliances in your home. It provides hot water for showers, washes, cooking, and cleaning. But like all appliances, it doesn’t last forever. Knowing when your water heater is on its last legs can save you from unwelcome surprises and cold showers.

Aging water heaters often show certain signs before they finally stop working. Paying attention to these signs can make a huge difference in household comfort and safety. Whether it’s trouble maintaining a consistent temperature or strange noises coming from the tank, each sign might be a clue that it’s time to consider a replacement.

Recognizing these signs early on is crucial for addressing problems that could lead to bigger issues, like flooding or unnecessary energy costs. Replacing an old or malfunctioning unit not only increases efficiency but can also lead to long-term savings. Being proactive about checking your water heater helps ensure your home stays safe and comfortable all year round.

Understanding the Lifespan of Your Water Heater

The lifespan of a water heater depends on several factors, including the type and how well it’s maintained. On average, traditional tank water heaters last about 10 to 15 years. Tankless water heaters, which don’t store hot water but heat it on demand, can last more than 20 years with proper care. Routine maintenance and water quality also play significant roles in lifespan.

Water heaters often last longer when they receive regular maintenance, such as flushing the tank to remove sediment buildup. Minerals in hard water can accumulate at the bottom of the tank, leading to corrosion and inefficiency over time. If you live in an area with hard water, consider water softening solutions to extend your heater’s life.

Other factors influencing longevity include the frequency of use and installation quality. A unit that serves a larger household or is used frequently may wear out faster. Proper installation by professionals ensures all components function correctly, reducing strain on the heater. Understanding these aspects helps in assessing when a replacement might be necessary, preventing unexpected breakdowns and ensuring reliability.

Key Signs Your Water Heater Needs Replacement

Detecting the signs of a failing water heater early can save you from cold showers and costly repairs. One of the first indicators is inefficient heating or erratic water temperatures. If your water isn’t as hot as it used to be or you frequently run out of hot water, the heater’s age might be affecting its performance.

Listen for strange noises, which can point to sediment buildup in the tank. When heated, these mineral deposits can cause rumbling or popping sounds. Over time, sediments can damage the heater and lead to leaks. Inspect the area around the heater for moisture, as leaks signal that the tank might be failing.

Rust and corrosion are serious signs. While rust on the outside of the tank is easy to spot, rust inside often goes unnoticed until it causes leaks. If you find rust-coloured water coming from your faucets, it might be time to consider a replacement.

Consistently monitoring these signs can help determine if your water heater needs replacement. Addressing these issues promptly with a new, efficient model can improve performance and save on energy costs, ensuring consistent hot water supply.

Impact of Delayed Water Heater Replacement

Putting off the replacement of an aging water heater can lead to a range of problems. One of the most immediate issues is increased energy bills. An old water heater works much harder to provide the same amount of hot water, using more energy and raising costs. Over time, the efficiency of the heater decreases, translating into more frequent heating cycles and bigger utility bills.

Poor performance is another consequence. As the water heater ages, it may fail to heat water evenly, causing fluctuating water temperatures. This inconsistency can be annoying and inconvenient, especially during peak usage times when demand is high.

More critically, delaying replacement can lead to leaks and extensive water damage. A failing tank is prone to leaks, which can quickly become a pressing emergency if not addressed. Leaks not only waste water but can also damage floors, walls, and belongings. In extreme cases, a serious leak could result in costly repair bills and potential mould growth, posing health risks to occupants. Taking timely action by replacing your water heater avoids these potential headaches and keeps your home running smoothly.

Choosing a New Water Heater

When it’s time to replace your water heater, selecting the right model can make a huge difference. Start by comparing traditional and tankless models. Traditional models store a large amount of water and keep it heated continuously, while tankless heaters provide hot water on demand, which can be more efficient for smaller households.

Consider your household’s hot water needs. Tankless models are compact and energy-efficient, ideal for homes where space is a concern or if energy savings are a priority. However, they may not meet high demand easily in larger households. In contrast, traditional heaters have larger reservoirs suitable for homes with frequent hot water usage.

Think about energy efficiency ratings, as this impacts both environmental footprint and utility costs. Modern water heaters come with higher efficiency standards, which can lead to long-term energy savings. Additionally, look for models with advanced features like smart controls or enhanced insulation to optimize efficiency. Carefully choosing a new water heater tailored to your needs ensures a reliable hot water supply while minimizing energy waste.

Conclusion

A well-functioning water heater is essential for a comfortable home. Recognizing the signs that indicate it’s time for a replacement can save on repair costs and energy bills. By understanding the lifespan and choosing the right model, you can avoid unexpected breakdowns and enhance efficiency. Regular maintenance, like routine inspections and addressing issues promptly, helps prolong the life of your new unit.

If you’ve noticed signs of trouble with your water heater, don’t wait for a total breakdown. Contact The Irish Plumber to discuss your options for a water heater replacement. Our experienced team can help you find the perfect solution tailored to your needs and budget. Start enjoying consistent and efficient hot water with peace of mind today!

Planning a Full Bathroom Renovation: A Beginner’s Guide

Planning a full bathroom renovation can feel like a big task, especially if it’s your first time. Transforming a tired space into something functional and beautiful can significantly improve your home. More than just aesthetic appeal, a well-designed bathroom meets your needs now and adapts as those needs change over time.

Setting Your Renovation Goals

Before embarking on a bathroom renovation, define what you hope to achieve. Whether you’re aiming for aesthetic improvement, enhanced functionality, or a mix of both, having clear goals will set a strong foundation for your project. Think about what isn’t working in your current bathroom. Is it the outdated design, lack of storage, or inefficient fixtures? Pinpointing these issues can help you focus your renovation efforts.

Consider long-term needs to future-proof your space. If you plan to stay in your home for years to come, think about how your bathroom can evolve with you and your family. Features like non-slip flooring, easily accessible showers, or higher toilets can add value and comfort as needs change.

Once you’ve identified your goals, sketch out a rough plan for the changes. Visual aids can help make your ideas more concrete and assist in communicating your vision during consultations with contractors or design professionals.

This clarity will help avoid mid-project changes that can lead to increased costs or delays. Setting the right goals at the start ensures your renovation is on track to deliver the bathroom you envision.

Budgeting for Your Bathroom Overhaul

Creating a solid budget is a crucial step in planning your bathroom renovation. Start by identifying the necessary costs associated with your goals. Your budget should include fixtures, materials, and labour. It’s also wise to set aside a portion for unexpected expenses that might arise during the project.

List the primary components of your budget:

– Fixtures: sinks, bathtubs, toilets, and showers
– Materials: tiles, cabinetry, lighting
– Labour: plumbers, electricians, carpenters

A common guideline is to allocate roughly 20% of your budget for contingencies. Unexpected surprises like hidden water damage or plumbing upgrades can push your expenses higher than planned.

Try to manage your budget effectively throughout the renovation. Choose materials that balance quality and cost. Do some research and compare prices from multiple suppliers to find the best deals. It’s also helpful to consult a few contractors to get a sense of the labour costs involved.

Choosing the Right Fixtures and Materials

Selecting the right fixtures and materials is crucial to achieving a successful bathroom renovation. Start by considering materials that offer durability and style. Tiles, for instance, should be both water-resistant and easy to clean. Ceramic and porcelain tiles are popular choices because they’re sturdy and come in various designs to fit any style preference.

For countertops, consider materials like quartz or granite. These options are not only visually appealing but also resistant to scratches and moisture. When it comes to fixtures like faucets and showerheads, opt for finishes such as chrome or brushed nickel, which are known for their longevity and resistance to tarnishing.

Water-efficient fixtures can significantly enhance your bathroom’s function while saving water. Look for products with the WaterSense label, indicating they meet water-efficiency criteria set by the Environmental Protection Agency (EPA). These fixtures not only conserve water but can also lead to savings on your water bill.

While aesthetics are important, remember to focus on practicality and maintenance. The right choices will minimize upkeep and ensure your new bathroom stays beautiful and functional for years.

Ensuring Efficient Plumbing and Drainage

Efficient plumbing and drainage systems are the backbone of any successful bathroom renovation. Inspect your existing plumbing system to see if any updates are necessary. Outdated or corroded pipes, like cast iron, might need replacement to prevent future issues such as leaks or clogs.

Replacing older pipes with modern materials like PVC or PEX can improve the reliability of your plumbing. These materials are less prone to corrosion and can handle modern water pressures better. Additionally, installing proper venting systems will help maintain consistent water flow and reduce the risk of plumbing problems.

Before renovations begin, consider a sewer camera inspection. This can identify hidden issues within your plumbing that may not be visible otherwise, such as blockages or root intrusions. By catching these problems early, you can address them during your renovation, saving time and money in the long run.

Proper planning of your plumbing layout is another critical component. This can impact the flow and rhythm of your space, so it’s important to work with skilled professionals to ensure everything is installed optimally.

Conclusion

Planning your bathroom renovation takes thoughtful preparation and detail-oriented execution. By setting clear goals, budgeting wisely, selecting quality materials, and ensuring efficient plumbing, you’re building a space that will serve you well for years. This process not only enhances your home’s comfort but also its value, making it an investment in your future enjoyment and property appeal.

If you’re ready to start your full bathroom renovation journey and need expert guidance, look no further than The Irish Plumber. Our experienced team is here to help you navigate every step, ensuring your renovation vision becomes a reality. Let us handle the plumbing complexities so you can focus on enjoying your newly transformed space. Reach out to us today to learn more!

What Is Video Pipe Inspection?

retro-illustration-of-a-plumber-whistling-on-his-way-to-work

In any field, trade, or industry, the way things are done evolves over time. As new technologies develop and new tools become available, all types of professionals must march forward with the times. And although you may picture a plumber as a person who shows up with a wrench and a plunger, today’s plumber has access to much more exciting equipment.

In the past, a plumber might have had to remove large sections of wall or pull up extensive areas of floorboards to access the pipes in a home, because they would have had such limited information about what was wrong or where the problem was. Now, modern plumbers use a technique called video pipe inspection. What’s that all about? How does it work? We’ll tell you everything.

Fiber-Optic Cameras

The room is sealed and secure, the treasure on display in a cabinet. What are the security measures in place? The thief must know before they can steal their prize. They use a tiny camera on a flexible, fiber optic scope to enter the room through a hole less than an inch in diameter, from a storage room in the basement below. Have you seen something like this in a movie?

These are the exact sort of cameras your plumber can use in your home today. Of course, in this case, the plumber is the thief, and the treasure is a clog or leak somewhere in the pipes in your house, but it’s still pretty exciting! These cameras can extend long distances, enter narrow pipes, and show your plumber exactly what’s happening inside your plumbing in real-time, on a video display.

When Video Pipe Inspection Is Done

What are the circumstances that might call for a video pipe inspection? It can be used for a variety of plumbing concerns.

  • Clogs: While most plumbing clogs can be addressed without this method, if you have recurring clogs or slow drains, or it’s happening in more than one drain at the same time, the blockage responsible may be lodged deep within your home’s drainage system. Video pipe inspection can get to the true cause, so your problem will be fully resolved.
  • Sewer Line Trouble: The sewer line extends from your home to your septic system or the municipal sewer pipe. Frequent clogs elsewhere in your drains can indicate a blockage there. Also, soggy, smelly, or particularly green and grassy areas in your yard are clues that the sewer line is damaged and leaking. Video pipe inspection can get all the way into that sewer line.
  • Leaks: If you have a known or suspected leak somewhere in your home’s piping, and you don’t want whole walls torn out in the process of locating it, video pipe inspection will impress you with its precision!
  • Old Plumbing: If your home is getting on in years, you should definitely use video pipe inspection to assess any corrosion or damage that may have occurred over the decades, and to uncover any outdated or unsafe plumbing materials from the past.
  • Home Purchase: When buying a home, video pipe inspection is likely not part of the routine inspection you would have done. But—particularly in the case of an older home—knowing the details of the plumbing could save you a great deal of grief.

If you think video pipe inspection in Livingston, NJ might be a good choice for you, we’re happy to help!

Contact MarGo Plumbing Heating Cooling Inc. today to schedule an appointment or ask any questions about your plumbing!

The post What Is Video Pipe Inspection? first appeared on MarGo Plumbing Heating Cooling Inc..

This post first appeared on https://margoplumbing.com

Is Sewage Backup an Emergency? What to do When Your Sewer Backs Up

sewage_backup

A sewage backup is every homeowner’s nightmare—messy, smelly, and potentially hazardous to your health. If you’re dealing with a sewer backup in Sacramento, CA, you might be wondering: Is this an emergency, and what should you do next? The truth is, a sewage backup is more than just an inconvenience; it’s a situation that requires immediate attention to prevent further damage to your home and protect your family’s safety. 

Read More

Quick and Simple Fixes for Frost-Free Hose Bibs

Frost-free hose bibs are a great help in colder climates, where freezing temperatures can cause regular hose bibs to burst. These special valves keep water away from the coldest parts of the pipe, helping to prevent freezing. They are a simple yet effective way to protect your home’s plumbing system during the chilly months.

Even though they are a smart addition to any home, frost-free hose bibs are not without their problems. Leakage, dripping, and low water flow are some of the common issues that homeowners might face. Fortunately, many of these problems can be addressed with a few basic tools and a bit of know-how.

Understanding how frost-free hose bibs work and identifying common issues is the first step towards keeping them in good shape. With a bit of preventive maintenance and timely repairs, you can ensure that your frost-free hose bibs function properly and last for years. Let’s explore some simple fixes and tips to keep your outdoor taps working efficiently.

Understanding Frost-Free Hose Bibs

Frost-free hose bibs are a clever design solution that helps homeowners combat freezing temperatures. Traditional hose bibs can freeze and crack when left with water in them during cold weather. A frost-free hose bib, however, is designed so that the valve is situated inside the house where temperatures are more stable. This means that when you turn off the bib, the water drains from the exposed section of the pipe, reducing the risk of freezing.

These hose bibs come in various designs, but they all share the same premise: keep the water supply safely insulated within the home’s warm environment. In simple terms, the stem of the valve is longer than a standard hose bib, ensuring the water is cut off deeper inside the house. This clever feature requires minimal effort to work effectively, making it a popular choice for those living in colder climates.

While they generally work well, frost-free hose bibs can experience common issues. Leaks can happen if the internal washer wears out over time. Dripping is another issue and can be annoying, usually indicating a problem with the valve seal. Reduced water flow usually points to a blockage or a partially closed valve. Understanding these fundamentals will help you know what to look for and keep your frost-free hose bib in top condition.

Troubleshooting Common Problems

Troubleshooting frost-free hose bibs involves identifying issues like leaks, dripping, and reduced water flow. These problems are quite common and can usually be fixed with some simple diagnostics and minor repairs.

1. Leaks: Leaks often occur due to worn-out washers or seals. If you notice water seeping from the handle or pipe connection, it’s time to inspect these components. A quick inspection can help determine if a simple washer replacement is necessary.

2. Dripping: Constant dripping from the spout can drive you crazy and waste water. This is typically caused by a worn valve seal. To diagnose, turn off the water supply, remove the handle, and check the valve for signs of wear.

3. Reduced Water Flow: If your frost-free hose bib doesn’t have good water flow, there might be sediment or debris blocking the valve. Alternatively, check if the valve isn’t fully open or if there’s a blockage in the pipe leading to the hose bib.

To diagnose these problems, start by turning off the water supply to the hose bib. This ensures no further water damage occurs during your inspection. Next, unscrew the handle and other components to look for visible signs of damage such as rust, worn parts, or debris buildup. Ensure that each part is functioning as intended. When you find the problem, you’ll often only need to replace a small part to restore proper function.

Step-by-Step Guide to Simple Repairs

Fixing a frost-free hose bib is straightforward with the right approach. Let’s dive into some simple repairs that can restore your hose bib to good working order.

Fixing Leaks:

To fix leaks, start by turning off the water supply. Remove the handle by unscrewing the set screw underneath. Next, remove the stem assembly by unscrewing it from the valve body. Check the washer at the end of the stem and replace it if it’s worn or damaged. A new washer can often stop the leak.

Replacing Washers:

A worn washer can cause constant dripping. Turning off the water supply is essential before any repair. Remove the handle and stem assembly. Swap out the old washer for a new one of the same size. Reassemble the pieces and turn on the water supply to test.

Sealing Connections:

Leaks at the base may require sealing connections. Use pipe sealant or Teflon tape on the threads of the hose bib. Wrap the tape clockwise around the threads three to five times for the best seal. Reattach the hose bib and ensure a snug fit.

Tightening Loose Fittings:

Loose fittings can also cause leaks. Use a wrench to tighten any loose nuts or connections. Ensure you do not overtighten, as this can cause more damage. Tighten until snug to prevent leaks.

These repair steps should help tackle common issues with your frost-free hose bib, keeping it efficient and saving you from potential water wastage.

Preventive Tips to Maintain Your Hose Bibs

Maintaining your frost-free hose bibs helps to avoid issues down the line. With regular care, you can extend the lifespan of these essential outdoor fixtures.

Regular Maintenance Practices:

– Inspect Regularly: Check for leaks, cracks, or any signs of wear and tear every month. Early detection can prevent bigger issues.
– Clean the Hose Bib: Remove the hose and clean the outlet regularly to avoid blockages.
– Check Seals and Washers: Regularly examine seals and washers and replace them as needed to prevent leaks.

Seasonal Checks and Winterization:

Prepare your hose bibs for colder months with winterization. Disconnect hoses before the first frost to prevent water from freezing inside. Consider installing an insulator cap over the bib to shield it from extreme cold. During spring, open the water supply slowly to avoid pressure shocks.

Benefits of Preventive Care:

Investing time in preventive maintenance reduces the risk of emergency plumbing repairs. It helps you catch wear and tear before it turns into a costly problem, keeping your home’s plumbing system running smoothly.

Following these maintenance tips ensures your frost-free hose bibs serve you well year after year, making the most of what they’re designed for.

Conclusion

Keeping your frost-free hose bibs in good shape involves understanding their function, identifying common problems, and performing simple repairs. Regular maintenance and preventive measures ensure they remain effective year-round. Being proactive with your hose bibs helps you avoid disruptions and costly emergency plumbing repairs. With these straightforward tips, maintaining your hose bibs becomes an easy part of your home care routine.

If issues become too complex or you prefer professional help, don’t hesitate to reach out. At The Irish Plumber, we specialise in plumbing repairs and replacements that solve plumbing issues efficiently. Our team is here to help you with expertise and reliable service. Contact us today to ensure your home’s plumbing is always in top-notch condition.
+1-877-959-3534