Category: Uncategorized

Exploring Common Drain Clogging Issues and Solutions for Ottawa Homes

A clogged drain is a common issue that most Ottawa homeowners will encounter at some point. While seemingly minor, a blocked drain can lead to several problems – ranging from slow drainage and unpleasant odors to water damage and costly repairs. Understanding the causes of drain clogging, as well as the various methods to resolve and prevent these issues, is essential for maintaining a comfortable and functional home environment. In this article, we will explore the most frequent drain clogging problems faced by Ottawa residents, their root causes, and how our experienced team at The Irish Plumber can help you effectively resolve and prevent drain blockages in your home.

Clogged drains can wreak havoc on your Ottawa home’s plumbing system, resulting in an array of unpleasant and costly consequences. With this comprehensive guide, you’ll gain insights into the factors that contribute to drain clogging, as well as practical solutions to tackle these issues head-on. Keep reading to discover how our reliable team at The Irish Plumber can help you with your drain clog issues, employing expertise and state-of-the-art technology to ensure the smooth and efficient operation of your home’s plumbing system.

Understanding the Causes of Drain Clogs

Before diving into the solutions for drain clogs, it’s essential to understand the root causes behind these issues. Some of the most common causes of drain clogs include:

  • Accumulation of Hair: Hair strands can accumulate in bathroom drains, eventually clumping together and obstructing the flow of water.
  • Build-up of Grease and Fat: Kitchen drains are susceptible to blockages caused by the build-up of grease, oil, and fat from washing dishes and cookware.
  • Foreign Objects: Items such as toys, sanitary products, and other non-disposable materials can accidentally enter your drains, causing clogs and even damage to plumbing systems.
  • Excess Food Waste: Food particles that aren’t adequately disposed of can accumulate in drains, leading to blockages over time.
  • Mineral Deposits: In areas with hard water, mineral deposits can accumulate and gradually obstruct the flow of water through your pipes.

Effective Solutions for Common Drain Clogs

Now that we’ve identified some of the most common causes of drain clogs, let’s explore the solutions to effectively tackle these issues:

  • Regular Drain Cleaning: One of the most effective ways to prevent drain clogs is to engage in regular drain cleaning. This proactive measure can help to minimize the accumulation of hair, grease, and other debris in your pipes. Engaging a professional team to perform routine drain cleaning can also help you identify and resolve any issues early on.
  • Use of Drain Screens: Installing drain screens is a simple yet effective solution for preventing hair and other debris from entering your drain. These screens can be fitted over your shower and bathtub drains and are easy to clean and maintain.
  • Proper Disposal of Grease and Food Waste: Ensuring that grease and food waste are correctly disposed of, rather than being washed down the kitchen drain, can significantly reduce the risk of blockages. Dispose of grease, fats, and oils in a designated container and place food scraps in the trash or compost.
  • Educate Your Household: Instruct household members on the appropriate disposal of waste, emphasizing the importance of keeping non-flushable items out of the drains. A well-informed family can reduce the likelihood of drainage issues drastically.

How Our Expert Team Can Assist You

At The Irish Plumber, we are committed to helping Ottawa homeowners effectively address and prevent drain clogging problems. Here’s how our team can assist you:

  • Comprehensive Drain Inspections: Our skilled professionals can perform thorough inspections of your drainage system, utilizing advanced drain camera technology to identify any underlying issues and potential blockages.
  • Expert Drain Cleaning Services: In addition to inspections, our team offers professional drain cleaning services to maintain the health of your piping system. We use state-of-the-art equipment and techniques to ensure a safe, thorough, and effective cleaning process.
  • Guidance and Prevention Tips: We believe that education is key to preventing drain blockages. Our team can provide expert advice on how to maintain your drains, including best practices for cleaning and waste disposal to keep your plumbing system in optimal condition.
  • Emergency Assistance: Despite our best efforts, drain blockages can sometimes occur unexpectedly. If you find yourself facing a severe clog or other plumbing emergency, our team is available 24/7 to assist you.

Conclusion

A clogged drain is a common issue faced by Ottawa homeowners, with various causes ranging from the accumulation of hair and grease to the presence of foreign objects. By understanding these causes and learning effective solutions to tackle them, you can maintain a comfortable and functional home environment free from unpleasant drain blockages.

Our drain cleaning in Ottawa at The Irish Plumber is here to assist you in addressing and preventing common drain clogging issues. We employ expertise and state-of-the-art technology to help keep your home’s plumbing system running smoothly.

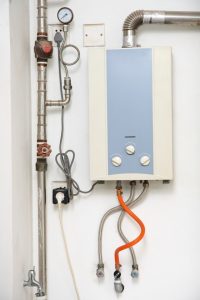
Is a Tankless Water Heater Always the Right Choice?

tankless-water-heater-system

It’s time to replace or upgrade your water heater. It’s gotten too old to get the job done properly, or perhaps it’s got some corrosion, and it’s only a matter of time before it springs a terrible leak. Now you need to do some research about your water heater replacement options. 

What kind of new water heater will be right for you? Surely, you’ve heard great things about tankless water heaters. But are they always the best choice? We’ll give you some facts so you can decide for yourself. If you’d like to have a conversation with an expert about tank water heaters vs tankless water heaters in Wayne, NJ, we’d love to answer all your questions.

How Water Heaters Work

While some water heaters use natural gas combustion for energy, and others are powered by electricity, many of the components of tank water heaters are the same. There’s a hydrostat, which is like a thermostat but for measuring the temperature of water instead of air. There’s a pressure release valve, to control the pressure within the tank. And there’s an anode rod inside the tank.

The anode rod does the critical job of delaying the inevitable onset of corrosion. It attracts the ions that might otherwise cause oxidation on the tank itself. To keep your tank water heater functional for as long as possible, you’ll need that anode rod replaced occasionally. 

In a tank water heater, the heated water is held until it is needed. Then, as it gets used up, cold water enters the tank to be heated. In a tankless system, only a tiny amount of water is heated at a time—just what is actually being called for at the moment. This means there’s no need to keep a quantity of water at a high temperature at all times.

Benefits of Tankless Systems

Without a constant need to keep large amounts of water hot, your tankless water heater can use less energy than a tank water heater would. Plus, there will never be a time when all the hot water is “used up” and you must wait for a tank full of water to heat before you can take a shower!

And without a tank to hold water and be forever trying to hold the threat of corrosion at bay, the tankless system will last longer. While a tank water heater might last eight or ten years, perhaps as many as twelve if it is meticulously maintained, a tankless system might last twenty.

Benefits of Tank Water Heaters

There are two major advantages that tank water heaters have. The first is that they can produce large amounts of hot water all at once, while a tankless system maxes out at 2-5 gallons per minute. This makes tank systems the better choice for large households with several people or appliances using hot water at the same time.

The second advantage is the initial cost. A tank water heater is significantly less expensive than a tankless system. Over time, because a tankless system uses less energy and lasts several years longer, you would slowly recoup that investment. But in the short term, a tank water heater is definitely the more affordable option.

Contact MarGo Plumbing Heating Cooling Inc. today with hot water concerns or any questions about water heaters!

The post Is a Tankless Water Heater Always the Right Choice? first appeared on MarGo Plumbing Heating Cooling Inc..

This post first appeared on https://margoplumbing.com

Trenchless Pipe Repair: Revolutionizing Underground Plumbing Solutions

The world of plumbing has come a long way, and as expert plumbing service providers, we aim to bring you the latest solutions for resolving your residential and commercial plumbing issues. A frequent concern among property owners is the prospect of dealing with underground pipe repairs, as they can be intrusive, time-consuming, and expensive. However, advances in plumbing technology have given rise to an effective and non-invasive alternative known as trenchless pipe repair. This contemporary method not only simplifies the repair process but also has numerous advantages over traditional excavation-based solutions.

By understanding the fundamentals of trenchless pipe repair and its various techniques, you’ll equip yourself with valuable knowledge to make informed decisions when dealing with underground plumbing repairs. Our team of skilled plumbers is well-versed in the latest trenchless repair methods and can adeptly handle your residential and commercial plumbing service needs. So join us on this journey to discover how trenchless pipe repair is changing the plumbing landscape and offering smart and effective solutions for today’s underground plumbing challenges.

How Trenchless Pipe Repair Works

Trenchless pipe repair is an innovative plumbing technique that solves underground pipe issues without the need for extensive excavation. By minimizing the disruption to your property, trenchless pipe repair has become the preferred method for many plumbing professionals and property owners alike. There are two main techniques employed in trenchless pipe repair:

1. Pipe Bursting

Pipe bursting is a trenchless method that replaces damaged pipes by breaking the existing pipe and inserting a new pipe in its place. This method uses a conical bursting head, which is pulled through the old pipe to fracture it, while simultaneously pulling the new pipe behind it. Pipe bursting is well-suited for replacing pipes that are severely damaged, misaligned, or corroded.

2. Cured-in-Place Pipe (CIPP) Lining

CIPP lining is another trenchless approach that rehabilitates damaged pipes by creating a new pipe within the old one. This method involves inserting a flexible tube coated with resin into the existing pipe and inflating it to fit the pipe’s interior. Once the resin hardens, a new seamless, corrosion-resistant pipe is formed and restores the structural integrity of the entire pipe system. CIPP lining is effective for repairing cracks, leaks, and minor damage in underground pipes.

Benefits of Trenchless Pipe Repair

Embracing trenchless pipe repair methods offers numerous advantages over traditional excavation-based pipe repair techniques. Some of these benefits include:

1. Reduced Landscape Disruption

Trenchless pipe repair eliminates the need to dig up large portions of your property, thus preserving your landscaping, driveways, and other structures. This significantly reduces the repair time and efforts needed in property restoration.

2. Lower Overall Cost

By minimizing excavation and damage to your property, trenchless pipe repair can save you money on both the repair process and the subsequent landscaping restoration. Additionally, the durable materials used in trenchless repairs generally have lower maintenance costs, further contributing to long-term savings.

3. Faster Repair Times

Since trenchless pipe repair requires less invasive techniques, the entire repair process is often completed more quickly than traditional excavation-based solutions. By reducing the repair time, property owners can experience minimum disruptions and quickly restore normal operations.

4. Eco-Friendly Option

Trenchless pipe repair is an environmentally friendly solution, as it reduces the amount of excavation, construction waste, and noise pollution associated with traditional pipe repair methods.

5. Extended Pipe Lifespan

The materials used in trenchless pipe repair, such as high-density polyethylene (HDPE) and resin-based liners, are highly durable, corrosion-resistant, and long-lasting. This results in a longer service life for your pipes and reduces the need for future repairs.

When to Consider Trenchless Pipe Repair

Trenchless pipe repair is an ideal solution for a variety of underground plumbing issues, including:

1. Roots Invasion

Tree roots can infiltrate your pipes, causing leaks, blockages, and overall pipe damage. Both pipe bursting and CIPP lining can address this problem effectively without extensive digging.

2. Corroded or Deteriorated Pipes

Older properties with deteriorated pipes can greatly benefit from trenchless repair methods. Pipe bursting can replace entire sections, while CIPP lining can rehabilitate and extend the life of existing pipes.

3. Sewer Line Repairs

Trenchless pipe repair techniques are particularly advantageous when dealing with sewer line issues, as they can save property owners from the mess and inconvenience of excavation-based sewer repair.

Choosing the Right Trenchless Pipe Repair Method

Selecting the appropriate trenchless pipe repair method for your specific situation is crucial for ensuring successful outcomes. Different techniques are suited to different types of pipe issues, and understanding the key factors that influence this choice can help you make an informed decision. Here are some considerations to keep in mind when choosing the right trenchless pipe repair method:

1. Type and Extent of Pipe Damage

Assessing the type and extent of damage to your pipes is the first step in determining the most suitable trenchless repair method. For instance, if your pipes are severely misaligned or collapsed, pipe bursting might be the best option. On the other hand, if the pipes have minor cracks or leaks, CIPP lining could be more appropriate.

2. Pipe Material and Diameter

The material and diameter of your existing pipes play a significant role in selecting the right trenchless repair method. Some methods are more compatible with certain materials; for example, HDPE and PVC pipes are often ideal candidates for pipe bursting. Additionally, the diameter of the pipes may influence the feasibility and effectiveness of certain techniques.

3. Location and Accessibility

The location and accessibility of the damaged pipes are important factors to consider. If the pipes are located under structures such as driveways, buildings, or landscaped areas, a less invasive method like CIPP lining may be preferred to minimize disruption. In contrast, pipes located in more open or accessible areas might allow for a wider range of repair options.

4. Cost and Budget Considerations

Budget constraints are always a critical factor in any repair project. While trenchless pipe repair methods generally offer cost savings compared to traditional excavation, some techniques may still be more expensive than others. Evaluating the long-term benefits and potential savings on future repairs can help justify the initial investment in a particular trenchless method.

Embrace Trenchless Pipe Repair for Your Underground Plumbing Needs

Trenchless pipe repair has transformed the way we address underground plumbing issues, offering a more efficient, cost-effective, and eco-friendly solution for property owners. By understanding the techniques involved and the advantages of trenchless repair methods, you can make better decisions when it comes to handling your plumbing problems.

The Irish Plumber is always ready to assist with your trenchless pipe repair in Ottawa, delivering top-notch service and expertise. For prompt and reliable underground plumbing solutions, look no further than trenchless pipe repair to help protect your property and your peace of mind.

How to Install a Garbage Disposal [Step-by-Step Guide]

garbage_disposal_installation

Installing a garbage disposal may seem like a daunting task, but with the right tools and knowledge, it can be a fairly simple process. Not only does a garbage disposal make kitchen cleanup easier, but it also helps reduce waste in landfills.

We’ll guide you through the steps of installing a garbage disposal in your home, making your kitchen more efficient and environmentally friendly. So whether you’re a novice or experienced DIYer, read on to learn how to easily install a garbage disposal.

Follow These Steps to Install a New Garbage Disposal

water-in-garbage-disposal

The following steps will help to ensure the installation process for your new garbage disposal is seamless and hassle-free. However, if the process ends up being more complex than you anticipated, don’t hesitate to contact a professional. 

Preparation and Safety Measures

Before installing a garbage disposal, it’s important to take some necessary preparation and safety measures. First, gather all the required tools and materials for the installation, including a garbage disposal unit, plumber’s putty, a screwdriver, a wrench, and a bucket. Additionally, make sure to turn off the power to the disposal area by switching off the circuit breaker. This will prevent any accidents while working on the electrical connections.

Next, clear out the area under the sink and remove any items that might hinder the installation process. It’s also a good idea to lay down some towels or a plastic sheet to catch any water or debris that may fall during the installation. Lastly, ensure that you have read the manufacturer’s instructions that come with the garbage disposal unit to familiarize yourself with the specific installation requirements and guidelines.

Removing the Old Disposal

Before installing a new garbage disposal, you’ll need to remove the old one. Start by unplugging the old unit from the power source or disconnecting its electrical wiring. Then, use a wrench to loosen and disconnect the plumbing connections between the disposal unit and the sink drain pipe. Place a bucket underneath to catch any water or debris that may spill out during this process.

Once the plumbing connections are removed, you can unscrew the mounting bracket that holds the disposal unit in place. Carefully lower the old unit and remove it from underneath the sink. Be cautious of any sharp edges or protruding parts that may cause injury. After removing the old disposal, thoroughly clean the area and inspect the mounting assembly for any damage or corrosion.

Installing the New Disposal Unit

With the old disposal unit removed, it’s time to install the new one. Begin by attaching the mounting assembly to the bottom of the sink. Follow the manufacturer’s instructions to ensure proper alignment and secure the mounting assembly using the provided screws.

Next, apply a thin layer of plumber’s putty around the drain opening on the sink. This will create a watertight seal between the sink and the disposal unit. Place the new disposal unit onto the mounting assembly and rotate it clockwise to lock it in place. Use a screwdriver to tighten the mounting screws and ensure a secure fit.

Once the disposal unit is securely installed, connect the plumbing. Start by reconnecting the drain pipe to the disposal unit using a wrench to tighten the connection. Make sure the connections are snug but not over-tightened to avoid any leaks. Finally, connect the dishwasher drain hose, if applicable, to the disposal unit.

garbage disposal-1

Connecting the Plumbing

After installing the new disposal unit, it’s important to properly connect the plumbing to ensure smooth operation. Begin by reattaching the sink drain pipe to the disposal unit. Use a wrench to tighten the connection, ensuring it is secure and leak-free.

If your garbage disposal unit has a dishwasher drain connection, attach the dishwasher drain hose to the disposal unit. This will allow any water from the dishwasher to be drained into the disposal unit. Make sure to secure the connection properly to prevent any leaks or water damage.

Once the plumbing connections are securely in place, turn on the water supply and check for any leaks. Run water through the disposal unit to ensure proper drainage and check for any unusual sounds or vibrations. If everything appears to be working correctly, move on to the final step.

Testing and Final Adjustments

Before completing the installation process, it’s crucial to test the garbage disposal unit and make any necessary adjustments. First, turn on the power to the disposal area by switching on the circuit breaker. Then, run water through the disposal and switch it on to check if it is functioning properly.

Listen for any unusual noises or vibrations that may indicate a problem. If you notice any issues, such as clogs or leaks, turn off the power and make the necessary adjustments. This may involve clearing any obstructions in the disposal unit or tightening any loose connections.

Once you are satisfied with the performance of the garbage disposal unit, turn off the power and clean up any remaining debris or water. Dispose of the old disposal unit properly and store any unused materials for future use. Congratulations, you have successfully installed a garbage disposal in your kitchen!

Contact Express Sewer and Drain for Help With Garbage Disposal Installation

If you need help with installing a garbage disposal, the experts at Express Sewer are here to help. Our team of experienced plumbers can quickly and efficiently install your new garbage disposal, ensuring that it is properly integrated with your plumbing system. We also offer maintenance services to keep your garbage disposal running smoothly.

Don’t let a faulty or outdated garbage disposal ruin your kitchen experience. Contact Express Sewer today for expert installation and maintenance services. Let us help you make the most out of this essential kitchen appliance.Dealing With Common Plumbing Problems

This post first appeared on https://www.expresssewer.com

Expert Commercial Plumbing Maintenance Tips from The Irish Plumber

Maintaining a well-functioning commercial plumbing system is vital for the success and efficiency of any business. A properly functioning system ensures a healthy and productive working environment, prevents disruptions, and minimizes the risk of expensive plumbing repairs and property damage. In this article, we will outline essential tips for maintaining your commercial plumbing system, share advice on preventing common issues, and discuss the benefits of seeking professional assistance from our expert team at The Irish Plumber.

A well-maintained commercial plumbing system is not only crucial for the daily operations of your business but also essential for the satisfaction and comfort of your employees and customers. A comprehensive plumbing maintenance routine can help prevent unpleasant issues, such as clogged drains, leaks, or overflows, and ensure that your business’s plumbing system remains efficient and up to code. 

Read on to discover essential commercial plumbing maintenance tips, the importance of routine system inspections, and the professional services our skilled and dedicated team at The Irish Plumber can provide to support your business and keep your plumbing system in top condition.

Essential Tips for Maintaining Commercial Plumbing Systems

Regular Inspections and Maintenance

Routine inspections and maintenance are crucial components of a well-functioning commercial plumbing system. By regularly checking your plumbing fixtures, pipes, and drains, you can proactively identify potential issues before they become major problems. These checks should include looking for signs of leaks, cracks, or corrosion in your pipes, as well as examining your fixtures for wear and tear. Routinely inspecting and maintaining your system can not only help prevent disruptions to your daily operations but also save your business money by avoiding costly repairs and property damage.

Proper Drain Care and Maintenance

Drain care is an essential aspect of maintaining a commercial plumbing system. Clogged drains are not only unsightly and disruptive, but they can also lead to more severe issues such as overflows and sewer backups. To minimize the risk of clogged drains, ensure that proper drain covers and strainers are in place to catch debris and prevent it from entering your plumbing system. Regularly cleaning and maintaining your drains with eco-friendly cleaning solutions can also help to break down grease, eliminate odours, and reduce the likelihood of blockages.

Water Heater Maintenance

Water heating systems play a significant role in the daily operations of many businesses and the comfort of your employees and customers. Regular water heater maintenance is essential to keep your system running efficiently and extend its lifespan. This routine maintenance should include flushing the system to remove sediment buildup, inspecting for leaks and corrosion, and checking temperature settings and pressure relief valves for safety. Additionally, scheduling an annual professional inspection and tune-up of your water heater can ensure that it operates at peak efficiency, reducing energy costs and lowering the risk of breakdowns.

The Importance of Backflow Prevention

Backflow prevention is an essential aspect of maintaining a safe and healthy commercial plumbing system. Backflow occurs when contaminated water flows back into your potable water supply, potentially posing severe health risks. Most commercial properties are required to have a backflow prevention device in place to protect their water supply from contamination. To ensure the proper functioning of your backflow prevention device, schedule annual testing with a certified professional. This testing is not only required by many municipalities but is also crucial for maintaining the integrity of your water supply and the safety of your employees and customers.

Seeking Professional Assistance for Commercial Plumbing Maintenance

While many regular maintenance tasks can be performed in-house, it is essential to seek professional assistance when necessary. A licensed and experienced plumber can quickly identify potential issues in your commercial plumbing system that may be overlooked by an untrained eye. A professional plumber can also provide valuable advice and recommendations for maintaining and upgrading your plumbing system, helping keep your business running smoothly and efficiently. Additionally, a qualified and insured plumber can ensure that any repairs or installations are completed in compliance with local codes and regulations, protecting your business’s reputation and avoiding potential fines or penalties.

The Irish Plumber’s Expert Commercial Plumbing Services

At The Irish Plumber, we understand the importance of a well-maintained commercial plumbing system and the significant impact it has on your business’s daily operations, employee satisfaction, and customer experience. Our team of skilled and dedicated professionals offers a wide range of comprehensive commercial plumbing services to support and assist your business. These services include:

  1. Routine Inspections and Maintenance: Our technicians can provide regular plumbing system inspections and maintenance to identify and address potential issues before they escalate, saving you time and resources.
  2. Drain Cleaning: We offer professional drain cleaning services to keep your drains flowing freely, preventing clogs and backups that could disrupt your daily operations.
  3. Water Heater Maintenance and Repairs: Our experts can help maintain, repair, or replace your commercial water heater system, ensuring optimal efficiency and performance.
  4. Backflow Testing and Prevention: We provide certified backflow testing, maintenance, and installation services to protect your commercial property’s water supply and ensure compliance with local regulations.

Conclusion

Maintaining a well-functioning commercial plumbing system is critical for the success of your business. By following these essential tips and partnering with our experienced team at The Irish Plumber, you can keep your plumbing system running smoothly, prevent costly repairs and property damage, and promote a healthy and efficient working environment. 

Trust The Irish Plumber to support and assist you in maintaining the integrity and performance of your commercial plumbing system and maintaining a comfortable and efficient workplace for your employees and customers. Contact our Ottawa plumber to get started!

How to Clean a Toilet Tank & Keep it Clean

clean_toilet_tank

Cleaning a toilet may not be the most glamorous task, but it is an essential part of maintaining a clean and hygienic bathroom. While most people focus on cleaning the toilet bowl and seat, the often-overlooked toilet tank can also harbor bacteria and germs.

In this blog post, we will discuss how to properly clean a toilet tank and share tips on how to keep it sparkling clean. By following these simple steps, you can ensure that your entire toilet, including the tank, stays fresh and sanitary

Understanding the Importance of Cleaning a Toilet Tank

Keeping the toilet tank clean is an essential part of maintaining a hygienic and functioning bathroom. Not only does it help prevent foul odors, but it also ensures that the toilet operates efficiently. Here are some important reasons why you should regularly clean your toilet tank:

  • Prevents the buildup of bacteria and germs which can lead to illness
  • Helps maintain a fresh and clean-smelling bathroom
  • Reduces the risk of clogs and plumbing issues
  • Extends the lifespan of your toilet
  • Improves the overall appearance of your bathroom

To keep your toilet tank clean, make sure to regularly scrub the inside with a mixture of water and vinegar. Also, don’t forget to replace the flapper and other parts if they become worn or damaged. By taking these simple steps, you can ensure a clean and functional toilet for years to come.

Gathering the Necessary Supplies for Cleaning a Toilet Tank

cleaning_toilet

Before you begin cleaning the toilet tank, it’s important to gather all the necessary supplies. Here are some common supplies you’ll need:

  • Rubber gloves: To protect your hands from coming into direct contact with any potentially harmful substances.
  • Cleaning solution: Use a mild cleaner or a mixture of vinegar and water to effectively remove stains and disinfect the tank.
  • Scrub brush: A toilet brush with sturdy bristles will help you scrub away any dirt or residue.
  • Old toothbrush: This can be useful for reaching into tight corners and cleaning hard-to-reach areas.
  • Microfiber cloth: Use a soft cloth to wipe down the exterior of the tank and remove any dust or grime.

Step-by-Step Guide to Cleaning the Toilet Tank

Follow these steps to effectively clean your toilet tank:

  1. Turn off the water supply: Locate the water shut-off valve near the base of the toilet and turn it clockwise to stop the flow of water.
  2. Flush the toilet: Flush the toilet to drain as much water as possible from the tank.
  3. Remove the lid: Carefully lift the lid of the tank and set it aside in a safe place.
  4. Empty the tank: Use a container or a sponge to remove any remaining water from the tank.
  5. Clean the interior: Apply the cleaning solution to the interior of the tank, focusing on areas with stains or buildup. Use the scrub brush to scrub away any dirt or residue.
  6. Clean hard-to-reach areas: Use an old toothbrush or a small brush to clean the corners and other hard-to-reach areas of the tank.
  7. Rinse the tank: Use a bucket or a jug of water to rinse the interior of the tank thoroughly.
  8. Wipe down the exterior: Use a microfiber cloth dampened with the cleaning solution to wipe down the exterior of the tank and remove any dust or grime.
  9. Replace the lid: Once the tank is clean and dry, carefully place the lid back on top.
  10. Turn on the water supply: Turn the water shut-off valve counterclockwise to restore the water supply to the toilet.
  11. Test for leaks: Flush the toilet and check for any leaks around the tank or the base. If you notice any leaks, tighten the connections or seek professional help.

By following these step-by-step instructions, you can effectively clean your toilet tank and ensure a fresh and hygienic bathroom.

Tips for Keeping the Toilet Tank Clean

To maintain the cleanliness of your toilet tank, consider the following tips:

Regular Cleaning

It is essential to clean the toilet tank at least once every few months to prevent the buildup of stains and bacteria. Neglecting this task can lead to foul odors, bacterial growth, and even plumbing issues. Regular cleaning not only maintains a fresh and clean-smelling bathroom but also extends the lifespan of your toilet. By taking the time to clean the toilet tank periodically, you can ensure that your entire bathroom remains hygienic and sanitary.

Use Vinegar

Instead of using harsh chemical cleaners, you can use vinegar to effectively remove stains and disinfect the tank. Simply pour vinegar into the tank and let it sit for a few hours before scrubbing and rinsing.

Avoid Commercial Cleaners

While bleach tablets may seem like a quick and easy solution for keeping your toilet tank clean, it’s important to be aware of the potential long-term consequences. These tablets contain harsh chemicals that can gradually erode the rubber seals and plastic components inside the tank, leading to leaks and costly repairs down the line.

To avoid damaging your toilet and compromising its efficiency, it’s best to opt for gentler cleaning alternatives like vinegar. Not only is vinegar effective at removing stains and disinfecting the tank, but it also poses no risk of causing harm to the internal mechanisms of your toilet. By making this simple switch in your cleaning routine, you can ensure that your toilet remains in top condition for years to come.

Check for Leaks

Regularly inspecting the tank and the surrounding area for any signs of leaks is crucial in maintaining the overall efficiency of your toilet. By promptly addressing any leaks that are detected, you can prevent potential water damage and ensure that your toilet continues to function properly. Leaks in the toilet tank not only waste water but can also lead to costly repairs if left unchecked.

Keep the Toilet Bowl Clean

A clean toilet bowl can help prevent the transfer of bacteria and dirt to the tank. Regularly clean the toilet bowl using a suitable cleaner and toilet brush.

By implementing these tips, you can ensure that your toilet tank remains clean and free from any potential issues.

Common Mistakes to Avoid When Cleaning a Toilet Tank

When cleaning a toilet tank, it’s important to avoid the following common mistakes:

  • Using abrasive cleaners: Avoid using abrasive cleaners or scrub brushes that can damage the surface of the tank.
  • Neglecting the corners: Make sure to thoroughly clean the corners and other hard-to-reach areas of the tank to prevent the buildup of dirt and bacteria.
  • Forgetting to rinse: After cleaning the tank with a cleaning solution, always remember to rinse it thoroughly with water to remove any residue.
  • Overlooking the exterior: Don’t forget to wipe down the exterior of the tank as well, as it can accumulate dust and grime over time.
  • Not checking for leaks: After cleaning the tank, it’s important to check for any leaks and fix them promptly to prevent water damage and wastage.

By avoiding these common mistakes, you can ensure a more effective and safe cleaning process for your toilet tank.

In need of Toilet Repair? Call Express Sewer and Drain

Following the steps outlined above can ensure your toilet tank is free from bacteria, germs, and unpleasant odors, contributing to a cleaner, fresher bathroom environment. Regular cleaning, using gentle cleaning solutions like vinegar, and avoiding harsh chemicals will prolong the life of your toilet while ensuring it operates efficiently. Remember, a clean toilet tank is key to a healthy bathroom, so take the time to give it the care and attention it deserves.

Is your toilet clogged or in need of repair? Contact the plumbing experts at Express Sewer

Sp

This post first appeared on https://www.expresssewer.com

What’s That Noise? Your AC Needs Repair!

person-with-hand-to-ear-and-concerned-expression

Many of the issues that can happen with a mechanical or electrical system will create noise. Just like a car with a loose muffler or squeaky brakes, your air conditioner can warn you of problems with the sounds that it makes. What kind of sounds should an air conditioner make? What sounds indicate that you need AC repair? What could possibly be wrong? We’ll tell you.

Sounds Your Air Conditioner Should Make

This is very simple: your air conditioner should always make the same noises. Nothing should seem new, sudden, or loud. During the cooling cycle, the compressor will hum. Depending on how you have your fan set, it may only whirr during the cooling cycle, or it may keep going at all times. But you really shouldn’t be hearing anything else. If you do, take it seriously, and have it checked by a technician.

Sounds Your Air Conditioner Shouldn’t Make

Sometimes it seems that there are more ways for something to go wrong than for it to go right. This is certainly the case when it comes to AC noises. All kinds of sounds might occur when something is wrong with your air conditioner! Here are some of the most common ones and what they mean.

  • Buzzing: This could be as simple as a slightly loose component vibrating. But just in case it’s an electrical buzzing, which could indicate a serious problem and even a risk of electrical shock or fire, you shouldn’t ignore it. 
  • Clicking: This could be something ordinary and mechanical, but it could also be electrical, so it’s important to have it repaired.
  • Booming: If your air conditioner starts with a boom or a bang, it’s called hard starting. This can generally be remedied with a capacitor, which provides an extra boost of power for that startup, making it both quieter and gentler on that all-important component, the compressor.
  • Rattling: A clatter or rattle is probably caused by a loose component. This could be something like a fan blade that is off-kilter and wobbling. Repairs should be straightforward. But if you delay, and keep running the AC like that, the component could come loose, crash into other parts of the system, and cause serious damage.
  • Hissing: The refrigerant that runs through the coils of your air conditioner spends its time cycling between being a gas and being a liquid. When it’s a gas, if there’s a breach in the coil somewhere, it will hiss when it leaks out. This makes your AC less and less effective as more refrigerant is lost, and can damage the compressor.
  • Bubbling: When refrigerant is lost from the coils, air will make its way in, so sometimes, the noisy indicator of a refrigerant leak is the sound of air bubbling through the remaining refrigerant. Get it repaired right away.
  • Grinding: The motor that powers the blower fan has bearings to keep the movement smooth and easy, and during maintenance, those bearings will be lubricated. But eventually—sooner, if you don’t get maintenance every year—those bearings can wear down and make a grinding, groaning noise. Get new bearings before the grinding causes enough damage that you need a whole new motor!

Whatever sounds you’re hearing, take good care of your air conditioner. Get AC repair in Clifton, NJ right away.

Contact MarGo Plumbing Heating Cooling Inc. today with AC concerns or any questions about your HVAC system!

The post What’s That Noise? Your AC Needs Repair! first appeared on MarGo Plumbing Heating Cooling Inc..

This post first appeared on https://margoplumbing.com

+1-877-959-3534