What Should You Do if Your Shower Drain is Clogged?
Homes are getting smarter by the day, but we are still a long way off to a shower drain that politely warns you it’s becoming clogged. Until then, a clogged shower drain will continue to be an unpleasant surprise that suddenly turns your bathtub or walk-in shower into a wading pool. As our colleagues at Art Plumbing AC & Electric point out:
“A clogged shower drain could be caused by anything from a small blockage to a major obstruction in your main sewer line. It’s vital that you investigate the source of the blockage as soon as possible, so that you can determine whether it’s a repair you can carry out yourself, or a job best left to the professionals.”
What causes clogged shower drains?
Unlike kitchen and bathroom sink drain clogs, a couple of different factors contribute to shower drain plug-ups. A combination of hair, soap scum and dirt cling to the inside of the drain pipe, building up over time. Soap contains fats, which – as we’ve previously covered – are not conducive to the free flow of water through pipes. Hair readily sticks to the soap scum, restricting the water flow even more. Some municipal water supplies have a high concentration of minerals, which also build up. If you work outdoors frequently, doing lawn work or gardening, soil gets added to the mix. You do shower after mowing the lawn, right?
You may first notice the problem when water takes longer than usual to drain – especially while you’re showering, and water backs up around your feet. When the clog is at this stage, the water eventually drains, but very slowly. To prevent the total blockage that will occur if left unaddressed, try first to unclog the drain yourself. Should the following methods work and water no longer backs up, congratulations! It was a simple clog. However, if you notice clogs in other drains at the same time, or if the shower drain backs up repeatedly, there may be a blockage in the main sewer line.
A couple of methods to try for unclogging the drain
Unclogging a shower drain is not all that difficult a task. You can try to clear the blockage yourself, especially if it’s a minor clog. A liquid drain cleaner is the most popular method, and is readily available at supermarkets, superstores and home improvement centers. However, the last two types of retailers are more likely to stock a wider choice of brands and product formulas. Be sure to carefully read and follow all label instructions and cautions before using. Don’t assume that all liquid drain cleaners are basically the same!
Should you want to forego this method due to concern for the environment, old pipes or an aged septic system – professional handyman Paul Goodman offers the following in his column for Dengarden:
Baking soda and vinegar – These two natural ingredients form a chemical reaction together, foaming up to remove soap scum and debris from your plumbing system. Pour one cup of baking soda down the drain. Wait a few minutes; follow with a cup of white distilled vinegar. Wait for a couple of hours, then pour boiling water down the drain. The clog should dissolve. If it doesn’t (or seems to dissolve somewhat), repeat the process. If it still doesn’t budge, try the next alternative.
Plunger or plumber’s snake – This method can clear superficial clogs. But if the clog is deep inside the drain and mainly composed of hair, it may not do the job.
Add petroleum jelly on the edge of the plunger’s suction pad to improve suction. Make sure you add water to the shower drain so that the bottom part of the plunger is submerged. Use the plunger as vigorously as you can.
If plunging doesn’t work, try using a plumber’s snake. Push the plumber’s snake in the drain until you reach the clog, then turn the handle of the snake and bring it up. Let the water run through the drain to see if the clog has cleared completely.
However, if you are unable to clear the clog yourself, it’s time to call a pro. A plumber will assess the situation, and can determine if it’s just a stubborn clog, or a more serious issue – such as the afore-mentioned root intruding into a sewer pipe. A septic tank that’s reached its capacity and needs to be pumped out could be another possible cause. In such a case, you’ll also notice a distinct sewer odor.
How to avoid getting the drain clogged
It is not a secret that prevention is better than cure. That is why you should make sure that you take the necessary precautions to avoid clogging in the first place.
Use mesh drain screens on all of your drains. Available at hardware or bath stores, they fit over drain openings to help prevent food, hair, soap scum and other gunk from entering your drain.
Use a liquid drain cleaner especially formulated to prevent clogs. Such formulas use enzymes; look for products that are safe for septic systems (even if you’re on a municipal sewer, this indicates they’re not as harsh).
Use the baking soda and vinegar method. Because you’re trying to prevent a clog instead of dissolve one, pour one-half cup of baking soda down the drain. Follow with one-half cup of white distilled vinegar, and seal the drain. Let the mixture sit for about half an hour, then flush with hot or boiling water. Perform every couple of months.
The take-home message
Our master plumbers at Adams and Son Plumbing believe the more you know about basic plumbing care and maintenance, the better you’ll be able to recognize when it’s time to call a professional to prevent even more serious damage and major expense. We’ve proudly served Central Florida homes and businesses with the highest level of quality and experience for over 60 years. We are family-owned and operated, and all of our plumbers are state-certified master plumbers. Contact us to get – and keep – your home’s plumbing in top repair.
The post What Should You Do if Your Shower Drain is Clogged? appeared first on Adams and Son Plumbing Services.
 When we say “avoid furnace repair” we’re not saying that because you hate seeing our team. There will be plenty of excuses for you to call our expert technicians. However, furnace repair, in general, is not a fun experience.
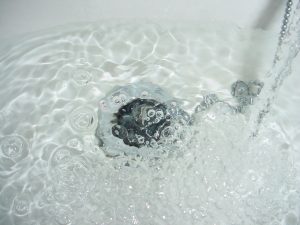 There is so much waste that makes it into our drain pipes, and after a while, things can start to build up. Fortunately, though, there is something you can do for your dirty drains! We are talking about scheduling drain cleaning services!


