Month: March 2019

7 Simple Ways to Keep Your Dishwasher from Clogging

Having a dishwasher is a real lifesaver. All you have to do is load your dirty dishes into the machine and in a few minutes, you get your dishes sparkling clean!

Well, not so fast. Due to the fact that your dishwasher cleans dirt regularly and uses cleaning materials, it needs proper and regular maintenance.

Or else, you have a dishwasher that’s clogged and unable to wash your dishes. Now, having your dishwasher clogged could be a headache as you’ll be unable to carry out your cleaning activities as before.

So the best step here is to prevent your dishwasher from clogging. Then you’ll never have to bother yourself about unclogging a clogged dishwasher. Of course, prevention is better than cure.

By using these simple tips, you can keep your machine working in top condition and getting your dishes clean daily. Let’s consider 7 ways you can keep your dishwasher from clogging.

1. Clear your plates of food particles

In most cases, you find that what clogs your dishwasher are food particles from your plates. Many people make a mistake of just packing their plates into the dishwasher without first checking for sticky food on plates or even some grains of food.

When you pack plates into your dishwasher with these particles, it becomes more difficult for the dishwasher to wash your plates properly.

Furthermore, those food particles can end up clogging various parts of your machine.

Overall, this would lead to unnecessary stress. You can prevent this by removing food particles from your dishes before loading them into the dishwasher.

This would ensure that your dishwasher only needs to clean the oil and other dirt that pose little threat of clogging.

2. Wash dishes regularly

One of the ways to keep your dishwasher from clogging is to use it. Sounds simple right? Using your machine regularly will ensure there’s a flow of water and detergent in and out of the machine to flush dirt out.

Irregular use means dirt can stick around in your machine for a long time. This can happen when you travel or go on a vacation for a while. Before going on the vacation, it’s important that you clean your dishwasher.

This way, when you come back from your vacation, you won’t find dirt that has settled into your machine.

3. Run a hot water cycle

Running hot water through your dishwasher will help you to remove dirt easier as hot water is more effective with oily dirt than cold water will be. Doing this will also ensure that you have cleaner dishes after washing.

You can set the thermostat of your water heater to 120°F(50°C) to get the water warm enough but not too hot. You should do this a few times in a week to help remove all the mineral buildups.

4. Wash the exterior parts and edges

You need to take care of your exterior parts as they can affect the internal workings of your machine.

You need to clean the door and edges of the machine. In many cases, you can have the front part stained with water and fingerprints.

You can use a cleaning rag dipped in hot soapy water to wipe the surface clean. After doing this, take a clean cloth to wipe the surface dry.

While using your machine, you need to check that the door is properly closed.

If your dishwasher door opens during use, then this can lead to the escape of water onto the floor, including dirt from your plates.

When you notice an open door, you need to check your manufacturer’s manual to see how you can tighten your dishwasher’s door.

This is because dishwashers differ in their door mechanisms. Some doors have spring mechanisms while some have adjustable latch plate at the top frame of the machine.

Whenever you see water on the floor, another reason could be that your machine is unleveled. This could happen if your machine wasn’t installed properly. If your machine tilts, it could cause water and dirt to pool and leak out.

Pooled water in your machine can lead to dirt settling in some areas and over time clogging your machine. In cases when your machine is unleveled, you can just adjust the front or back feet to ensure that water is centered.

To do this, you can check the owner’s manual to get more details about how to access your machine’s feet. If you’re unable to adjust it yourself or the feet has been damaged, you may need to contact a plumber or get wooden shims.

5. Clear your dishwasher’s filter and other parts

Some of your dishwasher parts tend to gather dirt over a long period of use. This is why you should check them regularly and clean them before they start affecting your machine’s functions.

One of these important parts is the filter. The filter, as the name suggests, helps to filter water that goes into the drain. It prevents food particles and other materials from going into your drain.

Over time, your machine’s filter will have dirt stuck within the spaces. If you don’t clean the filter regularly, it can accumulate to the point that it clogs your machine.

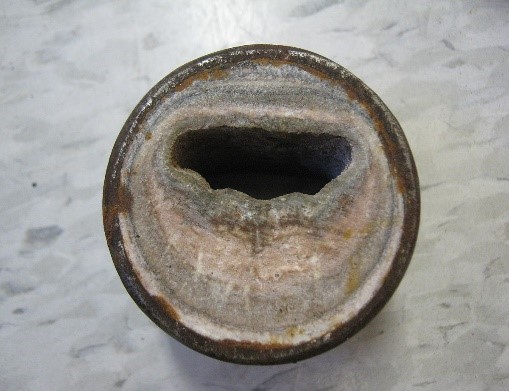
After cleaning your filter, another part you need to clean is the whole float assembly. You need to first remove the dish racks to have space to work with. After that, you can remove your float assembly.

How you remove it will depend on your machine’s manufacturer. If you’ve never done this, it’s important to check your owner’s manual before you proceed.

After removing your float assembly, you should clean all the parts of dirt that may be stuck within.

Another thing you may notice while cleaning your float assembly and your filter is that dirt may still stick to some of these parts. One tool you can use to remove this dirt is your air blower.

With this tool, you can remove dirt stuck in your filter. All you have to do is run your blower through places where you find dirt.

The same thing applies to parts of your float assembly. You can point your blower at different openings in these parts to force the dirt out of the part.

With this, you may not remove all the dirt but it’ll be far better than without the blower. After doing this, you should remove dirt in the area around the float assembly in the dishwasher. You can then replace the float assembly. You should check other removable parts and follow the same process.

Another way to help you reach these hidden parts is to use an old toothbrush as it can reach these parts including parts of your machine you can’t remove.

After doing that, another part to check is your pipes. In some cases, dirt can settle in your pipe and clog the pipe which will make the flow of water from your dishwasher to the sink difficult.

When you inspect the pipe, you can easily clean the waste left in your pipe. You should also check the dishwasher pump.

This pump contains two impellers. The one at the top helps to pump water into the machine while the one below helps to pump water out of your machine into the drain.

Over time, gunk may settle in the impellers and affect your dishwasher’s functions as water finds it difficult to flow.

Check these parts and clean the gunk. You must ensure you turn off your dishwasher before doing all these. You should also unplug it from the wall just to ensure it’s totally safe.

6. Apply vinegar to it

Vinegar works as an antibacterial agent and can help you to remove odors that may build up over time. You can pour two cups of vinegar in a bowl and place it at the center of the bottom rack of your dishwasher.

You can then run a cycle on your machine without detergent. This will help remove bacteria and troubling odors.

You can also put lemonade Kool-Aid into your detergent cup and run the machine empty. The citric acid in this drink can help to remove stains in your dishwasher.

7. Improve the scent with baking soda

Vinegar helps you to remove odors in your dishwasher. But you can give your machine a better smell by applying baking soda to it.

To achieve this, sprinkle one cup of baking soda into the bottom of your dishwasher. You can leave it overnight to allow the soda soak in the dishwasher. This will kill bacteria lying in your machine and also give it a new smell.

In the morning, you can run your dishwasher on an empty cycle to remove the baking soda.

Conclusion

If you use your dishwasher regularly, one of the issues you should always try to avoid is clogging up your machine. Because it can waste your time and make your chores more difficult.

You can always prevent this by ensuring that you use your machine regularly to ensure that wastes are removed.

You should also follow the ways described in this post to remove dirt in your machine before they clog it up.

And lastly, you can add cleaning substances to remove bacteria and improve its smell. Then, you won’t have to worry about your dishwasher giving you sudden problems.

This post first appeared on https://blog.antaplumbing.com

Water in Your Basement or Flooding Due to Snow Melt?

Everything You Need To Know About Marine Deep Cycle Battery Back-Up Sump Pumps

The temperature is starting to rise, and you know what that means. Snow melt. With snow melt comes issues with water in the basement, which also means you are going to be running your sump pump more often. During these times, you need to know that your pump is going to be able to last. That’s where battery back-up sump pumps can be a lifesaver.

Sometimes, primary
sump pumps will fail due to excessive usage, mechanical failures, or even power
outages. When any of these unfortunate circumstances occurs and you lose the
primary sump pump, you could experience a flood in your home.

Why You
Need A Back-Up Sump Pump

Homeowners who are at risk of water damage in their basements should always take a few extra steps to ensure the safety of their home and belongings. This includes a back-up sump pump and decent battery. Power outages can happen at any time throughout the year, and sump pumps can fail. Purchasing a deep cycle battery is a worthwhile investment when considering how much money it could save you in repairs, water removal, and other issues that come from unexpected flood damages. The battery will also increase your peace of mind, because you know that you are more protected than if you didn’t have the back-up.

If your sump pump is
more than 5 years old, then the chance of breakdown increases. Buying a back-up
battery is a good idea, especially if you want your sump pump to come back
online before damage occurs. That said, if you have a 10 year old or older sump
pump, don’t just get a back-up battery. Buy a new sump pump too!

Back-up batteries come
with a sensor that will monitor the sump pump. Once the primary sump pump
fails, it will receive a signal that tells the battery to switch on.

About Deep
Cycle Batteries

There are a few battery types that you could choose from, but the recommended choice would be a marine deep cycle battery. These types of batteries will last the longest against any other type of back-up sump pump battery available. For example, at maximum capacity, a 200Ah battery can operate endlessly for 20 hours straight. These deep-cycle batteries are maintenance free.

Technology has made
back-up batteries even more efficient. Some can connect to smartphones and send
you danger reports. Others monitor primary battery status. Others run
diagnostic tests on themselves. All these little bonuses help keep your
property safe and dry.

You will have to
replace the battery every 3-4 years, depending on how often it is being used.
Deep-cycle batteries can be recharged, but over time the charging will become
less and less efficient.

Installation

You don’t need to hire
a professional plumber to install a back-up sump pump or battery, but you
should be cautious. Consider the following:

  • Keep the battery in the protective that it comes in until you need to use it. When storing the battery, it should be on a shelf high above any water.
  • Never use extension cords to power the battery charger or back-up sump pump.
  • You may need to hire an electrician to install a circuit for the sump pump (both primary and back-up).
  • If you don’t know anything about plumbing or electricity, you should hire a professional.

While a sump pump is
not something every homeowner needs, if you live somewhere with a lot of snow
melt or repeatedly have water in the basement, it is time for a sump pump—and
more importantly, a deep cycle back-up battery. Live with more peace of mind by
knowing that even when your sump pump goes offline, it will come back on in a
blink, thanks to your back-up system.

Have questions or want more information? Contact us today.

The post Water in Your Basement or Flooding Due to Snow Melt? appeared first on The Irish Plumber.

Solar Water Heaters

Solar water heaters have the potential of being an ecofriendly and cost-efficient way of heating one’s household water supply. The process is simple and does just what the name implies. This type of system harnesses sunlight, turning it into heat through a device called a Solar Thermal Collector.

Direct solar water heater systems

There are several types of solar water heaters on the market. While it’s true that these water heaters can work in any climate, some do work better in warmer areas.

Open loop

One of the most common types of Solar Water Heaters is called a Direct System, also known as an “active” or “open loop”.  The process for the Active system is simple: Water is circulated from the water tank, up to the roof to the Solar Thermal Collectors. The water is then heated in the collectors and transferred down to the water tank and into the household, ready, for use. This type of system is best for tropical climates, as it doesn’t require assistance in heating one’s water.

Closed loop

The most common Solar Water Heater, in the Direct System, is the Indirect or “closed-loop” system. These work best in climates where temperatures drop below freezing. This system uses a combination of sunlight and antifreeze to heat the water. Antifreeze is circulated from the water heater up to the Solar Thermal Collectors, heated, and then moved down into the heat exchanger, heating the water in the tank, indirectly. The cooler antifreeze is then pushed back up to the collectors where the process begins again.

Common Problems with Solar Water Heaters

Leaking

Probably the most common problem with a Solar Water Heater is leaking. The most plausible explanation for this is a leaky temperature and pressure relief valve on the solar heater. Do not try to repair this problem on your own. It’s better to call and have a technician come out and replace it. Another reason leaks can occur is because the piping in the solar panel has burst. This may be due to either freezing weather conditions or simply too much pressure in the pipes. It is best to call a technician to come and assess this problem as well. The problem could also be that the pipe fittings just need to be tightened.

Not enough hot water

The second most common problem is not having enough hot water. To address this issue you can do a couple of things.

Make sure the solar panel is in the correct placement on the roof, i.e. away from tree shading, facing south with the recommended tilt. Also consider if the solar panel size is correct for the household size. The amount of hot water that you use will help determine the size you need. Not having enough hot water can also be caused by a leaky or stuck valve. Make sure that if there is a back up storage tank, that the thermostat is set to the right temperature. Be mindful in the winter months that the solar panel is given an adequate slope, so the output end is higher. There could also be a system blockage. If so, all you need to do is flush the system until the flow is no longer blocked. The most important thing you can do is make sure that the solar panels are properly insulated.

No hot waterno hot water, water heaters

Finally, the third most often reported problem is no hot water at all. To avoid this problem, it is best to be preemptive. Make sure to maintain the absorber paint on the collector panels. If this paint deteriorates, it can cause the system to be less efficient. Make sure that the paint is both heat and UV exposure resistant. Also make sure to provide a small weep hole on the bottom of the collectors. When there is a lot of condensation inside the panels, the excess needs to be expelled so as not to affect the performance of the system.

Conclusion

Despite their drawbacks, Solar Water Heaters are a great option for alternative-energy conscious homeowners. If you are looking to save money, we’ve got everything you need to get you started on this eco-friendly alternative energy option for your home. Give us a call today!

The post Solar Water Heaters appeared first on Knoxville Plumbing | Plumber in Knoxville | Plumbing | Tennessee.

Should You Repair or Replace Your Faucet?

Tired of the steady drip, drip, drip of your leaky faucet? Whether those water droplets fall at a regular pace, or until you’re able to locate the “sweet spot” on the handle that stops the drop, a leaky faucet is one of a homeowner’s most annoying problems. The first question is which solution is more cost-effective: repair or replacement? The second question – regardless of the answer to the first – is DIY or hire a plumber? Because we at Adams and Son Plumbing believe that knowledge is power, we offer this guide.


How long do faucets last?

Generally, good-quality faucets can last for about 10 years.

But the life of a faucet depends on several factors:

• Frequency of use

• Make and model

• Water hardness

• Proper installation

• Maintenance

If the offending faucet is at or near the 10-year mark, replacement may be more cost-effective than repair – unless it’s a high-end designer faucet, which could cost well over $1,000 to replace. As many homeowners have learned from experience, however, a fancy European brand and high price tag doesn’t always mean a superior product. In such a case, it’s probably better to cut your losses and replace the temperamental tap with a tried-and-true brand.

Ignoring the drip isn’t an option. Our April 2018 blog post, “Got a Plumbergency?” cautions that a neglected faucet leak can lead to very costly repairs. In addition, leaky faucets can waste thousands of gallons of water over time, and result in higher water bills.


There are three main types of faucets:

  • Cartridge faucets – These generally use an up/down motion to regulate water flow and control temperature with a left/right motion.
  • Compression faucets – This type features two knobs or levers – one each for hot and cold.
  • Ball-type faucets – These have a knob directly above the spout that controls water flow and temperature, depending upon the direction it’s twisted.


Should I do it myself, or hire a pro?

The next question is should you tackle repair or replacement yourself, or hire a professional plumber? There are numerous websites and YouTube videos providing step-by-step instructions for either type of project. But as easy as they try to make the process seem, taking the DIY route isn’t advisable unless you have hands-on experience with plumbing. Even then, your DIY experience with a cartridge or ball-type faucet may not transfer to compression faucets.

Also consider unanticipated problems you may encounter that could result in damage or a more extensive repair that you’d expected. Removing an existing faucet may expose corroded pipes or other components that require replacement.


DIY repair and new faucet installation

Again, many tutorials are available online from reputable sources, such as home improvement stores. If you have intermediate repair skills and feel comfortable, a repair can be done in a half-hour to an hour, depending upon the type of faucet.

Replacement is, of course, a more complex and time-consuming project. Basic tools and supplies required are a basin wrench, adjustable wrenches and bucket. Lowes provides step-by-step instructions and a video. Not all faucets come preassembled, so be sure you have the know-how necessary to install your faucet.


Faucet repair and installation by a plumber

While the cost of professional installation varies, online research can provide the suggested retail price of specific faucet brands and models. If you want a basic, quality faucet, a plumber can provide and install it for one price. Should you buy the faucet yourself, make sure it will fit your sink and is compatible with your home’s plumbing.

A plumber also has the experience and proper equipment to replace supply lines and repair related problems that you may not have noticed, or were hidden until the old faucet was removed. Hiring a professional can save time and money by ensuring the job is done right.

Our colleagues at MillTown provide solid reasons why you should hire a pro, which include:

  • Helping you select the best quality products for your home.
  • Installing your fixtures quickly and cost-effectively.
  • Performing all work in compliance will local municipal codes.
  • Ensuring all connections are safe.

Whether you’re a proud Central Florida homeowner or business owner, Adams and Son Plumbing can keep your plumbing working dependably. We are a family-owned business with over 50 years in plumbing service. A state-certified plumbing contractor, we have over three generations of master plumbing experience.

Contact us to learn more.


The post Should You Repair or Replace Your Faucet? appeared first on Adams and Son Plumbing Services.

Demand-Type or Tankless Water Heaters

scrabble tiles spell save on top of pile of moneyTankless or demand-type water heaters are a type of water heater that only heats up water when one needs it. They are a more cost-efficient way of heating water because they don’t waste as much energy on heating a whole storage water tank. They are also referred to as instantaneous water heaters.

How do they work?


diagram of how tankless water heater works

The way these water heaters are designed is quite ingenious. The hot water is turned on at the tap, and cold water is propelled though the pipeline into the unit. Once this happens, either an electric unit or a gas burner heats the water. This type of system practically insures that one will always have hot water available. It will produce about 2-5 gallons of hot water per minute. Keep in mind that a gas-burning water heater will yield larger quantities of flow rates than an electric-powered water heater. The beauty of this is that the demand-type water heater will do all of this without needing a hot water heating tank, saving space, money, and energy in the process.

While the tankless water heater itself is more expensive than the typical storage water heater, it will usually last longer. Tankless water heaters also cost less to operate, and as mentioned before, save energy. All that counters the initial purchase price. In addition, the storage water heater only lasts about 10-15 years, whereas a tankless water heater will last up to 20. It is also easy to keep up with the maintenance of a tankless water heater because its parts are so easy to come by and usually cheap.

What are some common problems with tankless water heaters?

Running out of hot water

One of the most common problems with a tankless or demand-type water heater is that it runs out of hot water too quickly. There are several variables that one must consider when dealing with this problem. One reason this could be happening is that tankless water heaters cannot supply enough hot water when the hot water is being used for multiple things at the same time. For example, if one household is using the dishwasher, the laundry machine, and the shower all at the same time, this will drastically impede the water heater’s ability to supply hot water to all three places. A simple but slightly pricey solution to this problem is to install an additional tankless water heater next to the original to help spread the hot water throughout the household. Another possibility is to install appliance-specific water heaters onto the appliances.

close-up of blockage in pipeMineral build-up

Mineral build-up can be another culprit. Hard water can be damaging and counter-productive for any water heater. Be sure to flush the tankless water heater about every six months or so to insure optimal usage. Consider a water softener to help keep the mineral build-up to a minimum.

flame lighting matchesFailure to ignite

Failure to ignite is a frustrating problem. This is often caused by blockage of the air supply or exhaust. Many tankless water heaters will have a display with an error code to tell that there is an air supply or exhaust problem. The demand-type water heater is most likely struggling with venting or combustion air. Make sure all the vents are clear. Look out for small animals, birds or even wasps. These creatures like to make their homes in or around the outside vents.

Flame failure

Flame failure is another common problem. This typically occurs from an electrical or gas pressure issue. Make sure that it is not because of an overdue gas bill or empty propane tank before calling professionals.

Sound good?

Give us a call if it’s time to change the way your house heats water! We have professionals standing by to help with the next chapter in your home improvement journey.

The post Demand-Type or Tankless Water Heaters appeared first on Knoxville Plumbing | Plumber in Knoxville | Plumbing | Tennessee.

+1-877-959-3534