How to Protect Your Plumbing in Case of Evacuation
Natural disasters are a threat to your plumbing system.
Recent research has shown that between the years 1900 to 2016 the United States has experienced a lot of natural disasters inclusive of 24 heat waves.
As a matter of fact, the data shows that aside from China, the United States is the country with the most natural disasters.

Furthermore, there have been over 106 cyclones, 40 earthquakes, and 2 tsunamis from 1900 to 2016 alone, which affected over 13.5 million people.
Crazy right? Well, that’s not all, in 2015; the United States recorded 22 natural disasters being ousted only by China.
By now you should understand the importance of knowing exactly what to do in the event of an evacuation due to natural disasters. It’s extremely vital!
The data revealed that 13.5 million people have been directly affected by natural disasters but how many of them knew the right steps to take to protect their plumbing and ultimately their home before being evacuated?
The effects of unprotected plumbing can be disastrous to any home when disaster strikes.
So what do you do when you are a certain disaster is on its way? Below are a few steps that you’ll need to follow to ensure you adequately preserve your home with proper plumbing protection.
Basic Protection of Your Plumbing System
Studies have shown that tornadoes are accompanied by exempt destructive winds moving at speeds of over 289 MPH and what’s more? A tornado’s leaves a messy trail of destruction measuring up 50 miles long and 1 mile in width!

Can you imagine the wreckage? Regardless, of the damage, you can still save your home by preparing it before evacuation and the first thing you need to do is:
1. Ensure Your Water Heater is Safely Hooked to the Wall
This cannot be overemphasized, as the damage a loosed water heater can cause to your home is immense. Before you leave your home due to evacuation ensure that it is properly strapped to the wall. One wrong fall can initiate a domino effect of problems.
It can easily fall off during a storm and break gas lines or cause other damages that could become irreparable.
So how do you safely strap your water heater to the wall? Well first things first, you need to check for the plumber’s tape.
Keep in mind that prior to the Loma Prieta and Northridge earthquakes in 1989 and 1994 respectively, only 1 single strap of plumber tape was recommended by experts, however, now more is recommended due to numerous water heaters bursting as a result of single strapping.
So, what is acceptable now is a heavy-metal gauge strapping instead of a regular plumbing strap. Next, you need to secure both the top and bottom of your heater rather than just the top or bottom as this won’t pull through.
Then ensure that you replace all metal and copper piping with flexible water connectors or natural gas pipes. These will prevent a disastrous outcome in the event of breakage.
Below is an image of what a properly strapped water heater should look like:

2. Switch off Your Main Water Valve
After your water flows through your cities valves it gets to what is termed as the main water valve. This is a very important valve that you need to know its exact location before any form of disaster occurs.
Why? Well, the main water valve is responsible for allowing the full flow of water into your home when turned on and when it is turned off, usually in anti-clockwise motion it shuts off the complete water flow into your home.
You might be wondering why shutting off water is essential during an evacuation. It is highly vital because a simple pipe break can leave your house flooded, which will eventually ruin things left over in your home.
Now, your main water valve is usually located either in your basement or on an outside wall in a utility area of your home, so simply turn it off by turning in an anti-clockwise direction.
Ensure you find the location before you have to hurriedly leave due to an incoming natural disaster; otherwise, it might be quite difficult to locate it when in panic mode.
There are two types of designs for the main valve:
i). Gate Valve: The gate valve has one of the most durable valve design there is, however, they usually become very stiff and extremely difficult to move if they haven’t been touched for some years.
Hence, it’s best you find its location as it’ll be a lot easier getting a tool to move it when you’re in a peaceful state of mind that when a natural disaster is looming over your head.
Take a look at the image below to see exactly what you’re looking for:

b). Ball Valve: If your home uses a plastic or copper pipe then you most likely have full-blown ball valve. In order to know when a ball valve is open or close you need to check its placement. For instance, if the ball valve handle is directly aligned with the pipe then it’s open.
Hence, to turn it off, the ball valve handle has to be turned clockwise, placing it at a right angle to the pipe. The Image below, shows you, what direction it should be turned.

You have to keep in mind that the main valve is a major way to prevent a lot of plumbing disasters, so you need to ensure that you know it’s a location like the back of your hand. So in the event of an evacuation, you can easily turn it off without any complications.
Also, if you are using a gate valve and haven’t touched it for years, you need to keep a plier around you that’s easily reachable, as you may have to use it to change its position in order to shut it off in the event of a hurried evacuation.
If you’re still not sure how to differentiate between a gate and a ball valve below is another picture of the difference.

Furthermore, whenever you adjust the position of the valve, whether open or close, it may begin to leak a bit. All you need to do to stop it is tighten the nut, as the stem of the valve is held in place by a nut called the packing nut.
3. Remove Debris From Your Drains and Sump Pump
The purpose of a Sump Pump is to remove or get rid of water from around your home. They prevent water from getting into your crawl space, basement or home in the event of a flood, so they are extremely important.
However, they can easily get clogged up if proper maintenance is not carried out on them before an evacuation takes place.
Hence, you have to ensure they your Sump Pump has all debris and clogs efficiently removed from it and serviced adequately before leaving.
Now, you should also make sure that your home gutters are a properly cleared of debris as they can easily get clogged up with grass clippings and leaves, so, to ensure that your sewage system works efficiently clear it out completely.
a. How to Clean Out Your Sump Pump
In order to efficiently clean out your Sump Pump, you’re going to need a few tools such as plastic sheets, plastic scraper, container, dry or wet shop vac, and a garden hose.
The next step is to turn off everything your Sump Pump is linked too. All you need to do is turn off the electricity being supplied to it, by either switching off the circuit breaker connected to the Sump Pump or simply turning off the electric connection of the Sump Pump itself.
Second, you need to locate the discharge pipe your Sump Pump is connected too and disconnect it.
After doing all of that, it’s now time to clean it off. So simply wrap up your Sump Pump with a plastic wrapper. This is to prevent debris, dirt, and sludge from spilling all over your house as most of its dirt would be extremely dangerous to your health.
Once you’ve done that and your Sump Pump is outside, take off the plastic wrap and connect your garden hose with water and begin to wash off the sludge and dirt from off the pump.
In some instances, you’ll have to deal with caked dirt on your pump, especially if you haven’t cleaned it out for a while. Well, no worries that’s what the plastic scraper is for.
Simply scrape off all the caked dirt and slime from off the pump completely and rinse it again with water.
For the final cleaning step, you’ll have to remove standing water from the Sump pit. To do this effectively, you would need to use a way or dry vac.
Conclusion
If you’re a homeowner, renter or business office owner you need to have a well thought its plans in place to ensure that you effectively secure the plumbing of your building or home.
And this goes beyond just your home. The life of your loved ones and property is also at stake if these preventive measures are not taking to protect your plumbing.
Furthermore, make sure that your drains and Sump Pumps are completely cleared out before evacuation.
Follow these tips in order to efficiently protect your home plumbing system without struggles.
This post first appeared on https://blog.antaplumbing.com
 Basic Structure
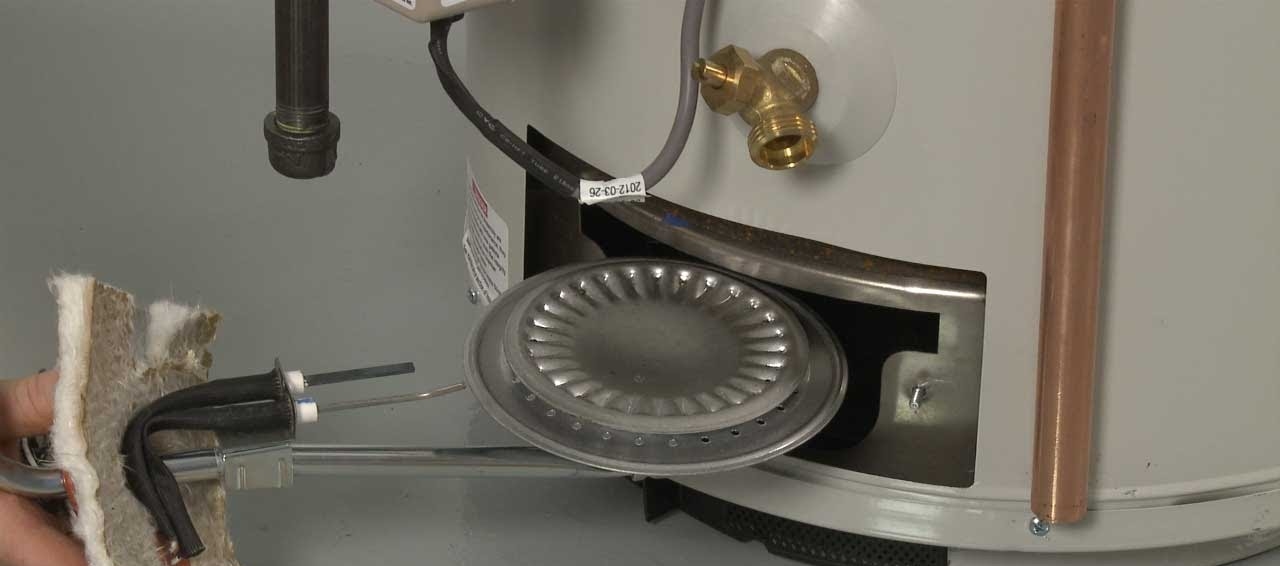 The Burner
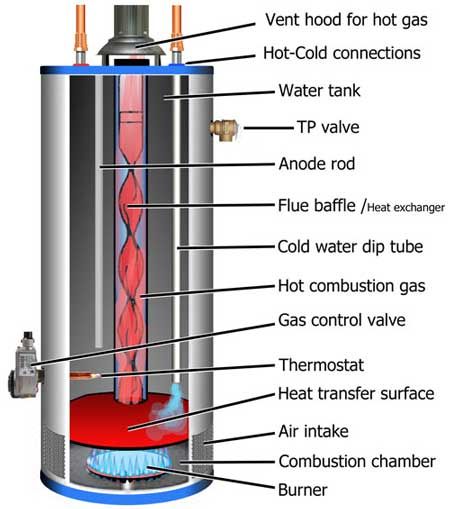 The Venting System
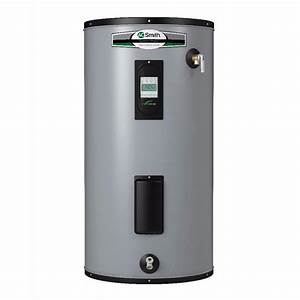
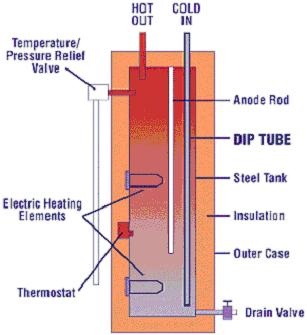 Electric storage water heaters have the same basic parts as their gas-fueled cousins. Rather than heating water with fire, though, electric water heaters use electricity. The heating system for an electric water heater also has to main parts: the elements and the circuit control.
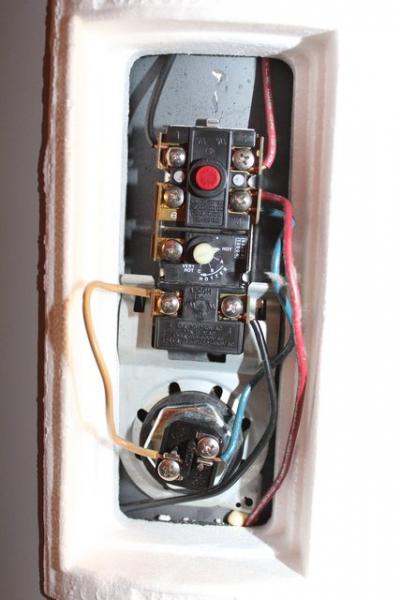 The control circuit includes the elements, thermostats, a high limit control switch, and a reset button. As in the case with the gas-powered water heater, the electric water heater also carefully monitors water temperature and pressure. If water temperature in the electric water heater exceeds the established limit, the high limit switch activates and shuts down the entire unit. You can restart the unit once it cools by pushing the reset button on the thermostat.
 Conclusion
 What Type of Drain is Slow?
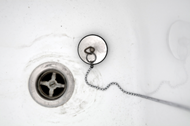 If your shower or bath tub drain is not working as well as it use to, the most common reason for this is hair. It doesn’t matter if you have short or long hair, if you give it enough time, the hair will build up in the pop-up assembly of your shower/tub drain and cause it to drain much slower than normal. If this isn’t taken care of, your hair will soon trap other sorts of debris which will eventually lead your drain not draining all together.
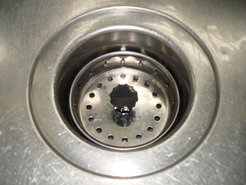 The most common reason your kitchen sink would not be draining will be food related. One of the biggest culprits is grease that gets trapped either in the P-trap, which is the curved section of your drainpipe that is located under your kitchen sink, or the drain basket itself. Food itself can get stuck in the bottom of the P-trap and hinder waterflow. Not only will this problem be inconvenient, but it can also get smelly.
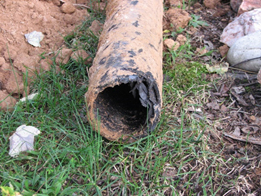 These are the main lines that will carry your household waste water and sewage away. One of the biggest things that can mess up your sewer lines is tree roots. The tree roots are attracted to all the nutrients that flow through these lines, and the roots will find any weak points, cracks or holes in your sewer lines. They will push their way into the pipes, rendering them useless. Its also important to know how old your pipelines are, because another common cause for sewer line problems is that they have begun to collapse or deteriorate. One big red flag that is indicative of a sewer line problem is if your toilet constantly clogs or flushes slowly.
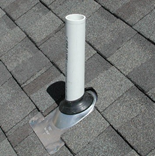 Vent stacks are an important part of your plumbing because they allow air into your pipelines, reducing the vacuum effect that would restrict water flow. These stacks are in your bathroom and kitchen areas around your house. Typically, vent stacks are the pipes that are protruding through your roof. The most common reason they get clogged is by leaves, sticks and sometimes bird nests.
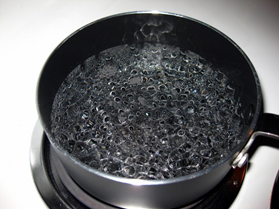
 For this method, you poor about a cup of baking soda into your drain. Next, pour the same amount of either white or apple cider vinegar down the drain. This combination will bubble initially, then it will calm down. Once this happens, put the stopper in your drain and wait for about 15 minutes. After that time frame, run hot water to see if this cleared the clog.
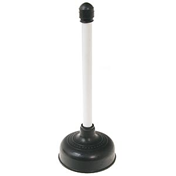 It is a good idea to invest in a designated sink plunger, if you can’t fix the clogs with the previous methods. You can use a sink plunger on either a single or double sink. If you have a double sink, first seal off the second side with either a wet cloth or a stopper. To properly plunge your sink, you will need fill you sink up with enough water to cover the bell of you plunger. Then all you must do is plunge it like you would a toilet. If this works, you should hear the suction clear the clog, remove your plunger and run warm water for a few minutes.
 This tool, also called an auger or plumber’s snake, can clear the clogs that might be stuck deeper in the system. You simply stick this down the top of your drain until you feel something stop it, which is probably the clog. Then you twist it around until you feel the obstruction loosen. If the clog is even deeper, you will have to take apart your drainpipe and P-trap.
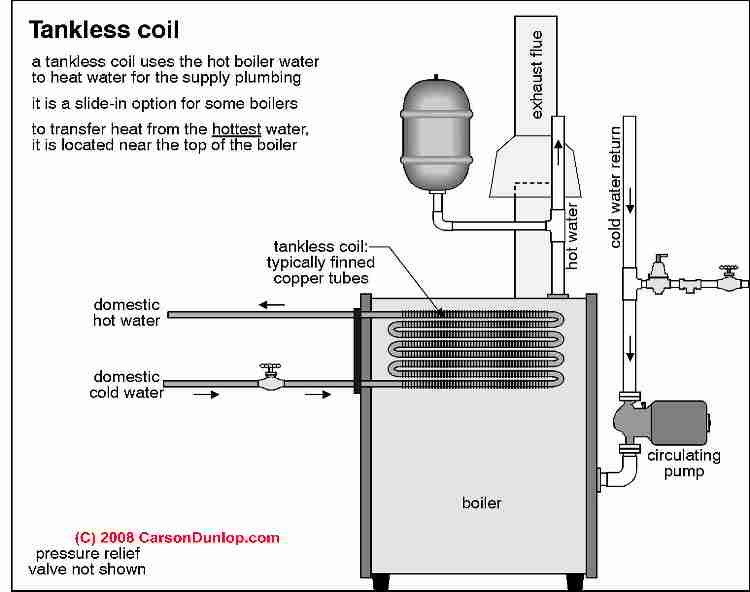
 It’s easily fitted to most boilers, including steam boilers. It is far more cost-efficient in the winter months than a typical water heater. This type of water heater is much cheaper to install and maintain than basic water heaters. If something were to go wrong or break, these water heaters are easier to replace. It basically supplies limitless hot water to the household. The biggest pro is the saving on heating costs because it doesn’t lose any heat from standing heated water.
 months. This is due to the reduced need and frequency for hot water on demand. Also, it’s lifespan is not as long as other water heaters. The Tankless Coil Water Heater only lasts about 10 years if properly maintained. Unfortunately, the Tankless Water Heater is not compatible with a furnace. Something else to consider is the quality of water running to your household. If the household is on hard water supply, the Tankless Coil Water Heater will require a water softener to run smoothly and efficiently.
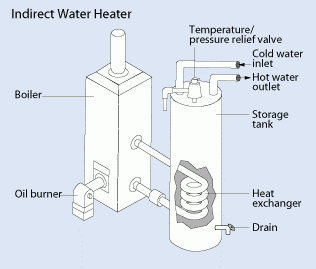 The Indirect Water Heater is a more cost-efficient and environmentally friendly way to heat water. It is a little tank-like device that holds a coiled heat exchanger. The Indirect Water Heater relies on the boiler to heat the household water, as it does not produce its own heat.
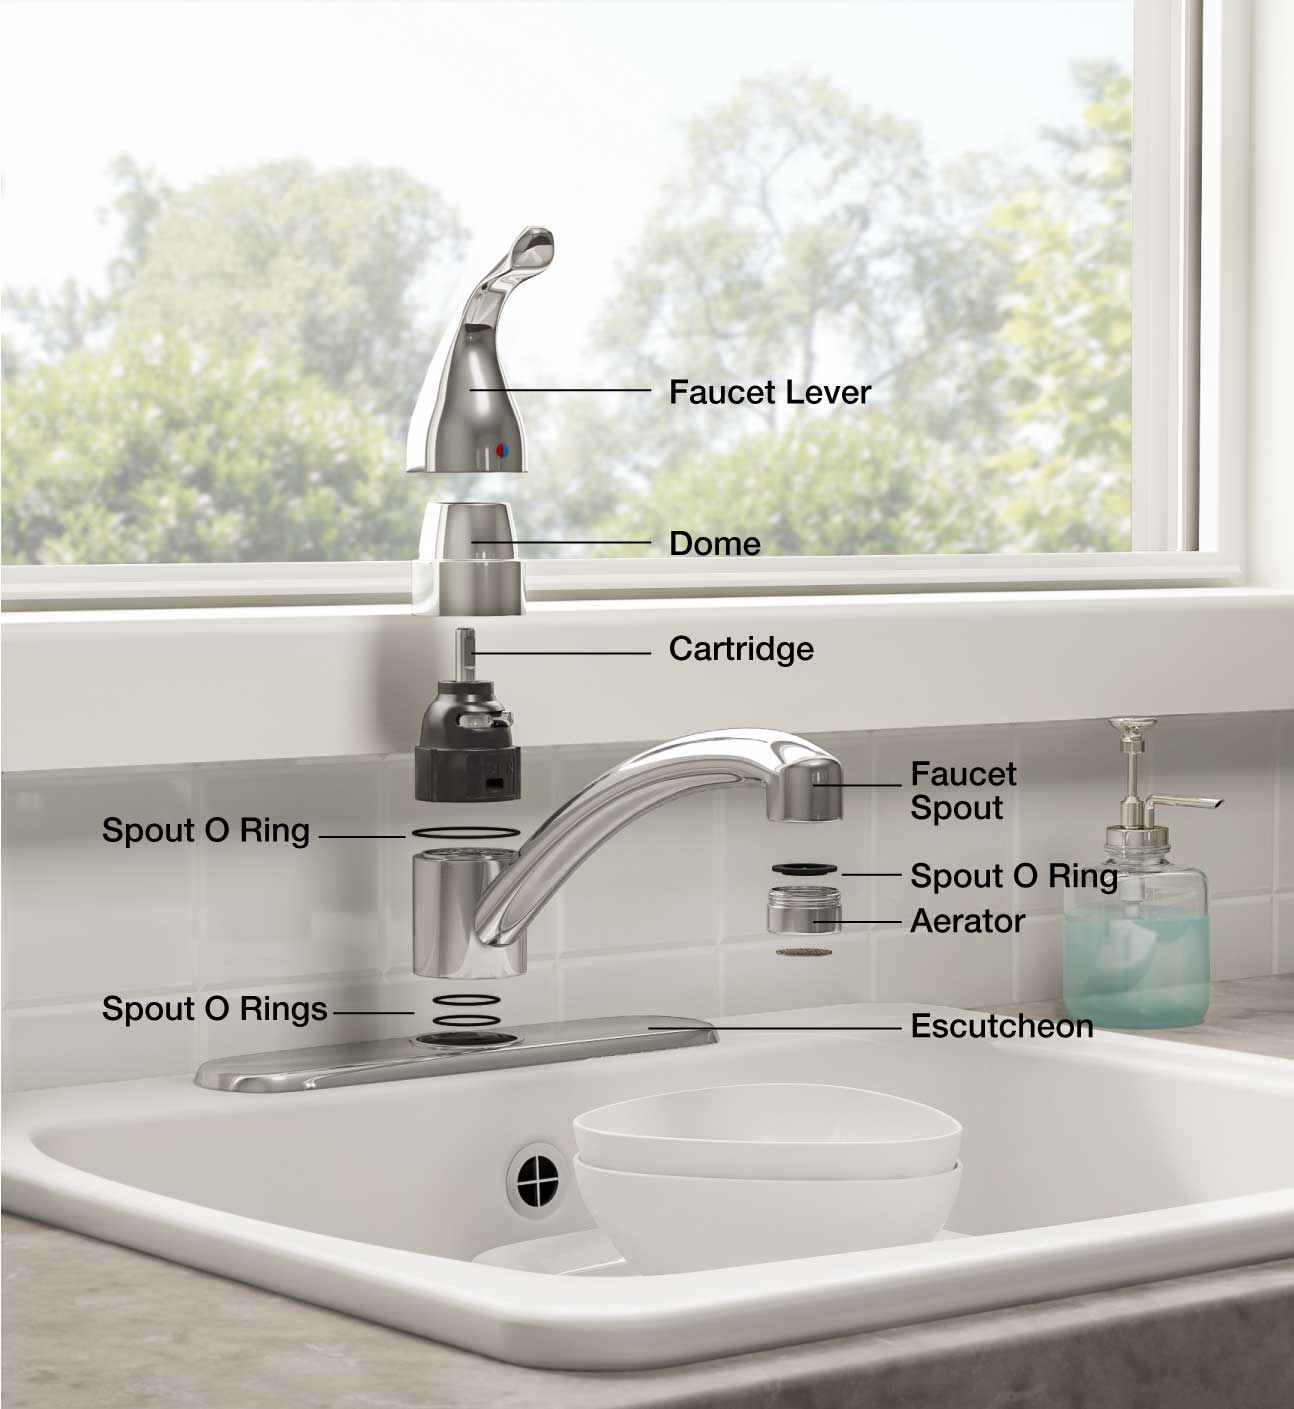 Leaky faucets
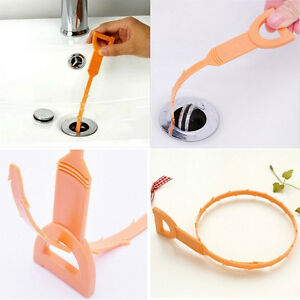 Clogs
Clogs Toilet “running” or “phantom flush”
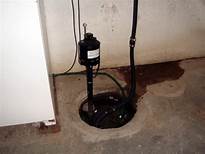 Sump pumps