Month: January 2021

5 Irrigation Plumbing Issues Increasing Your Water Bill + How to Save

residential-irrigation-system

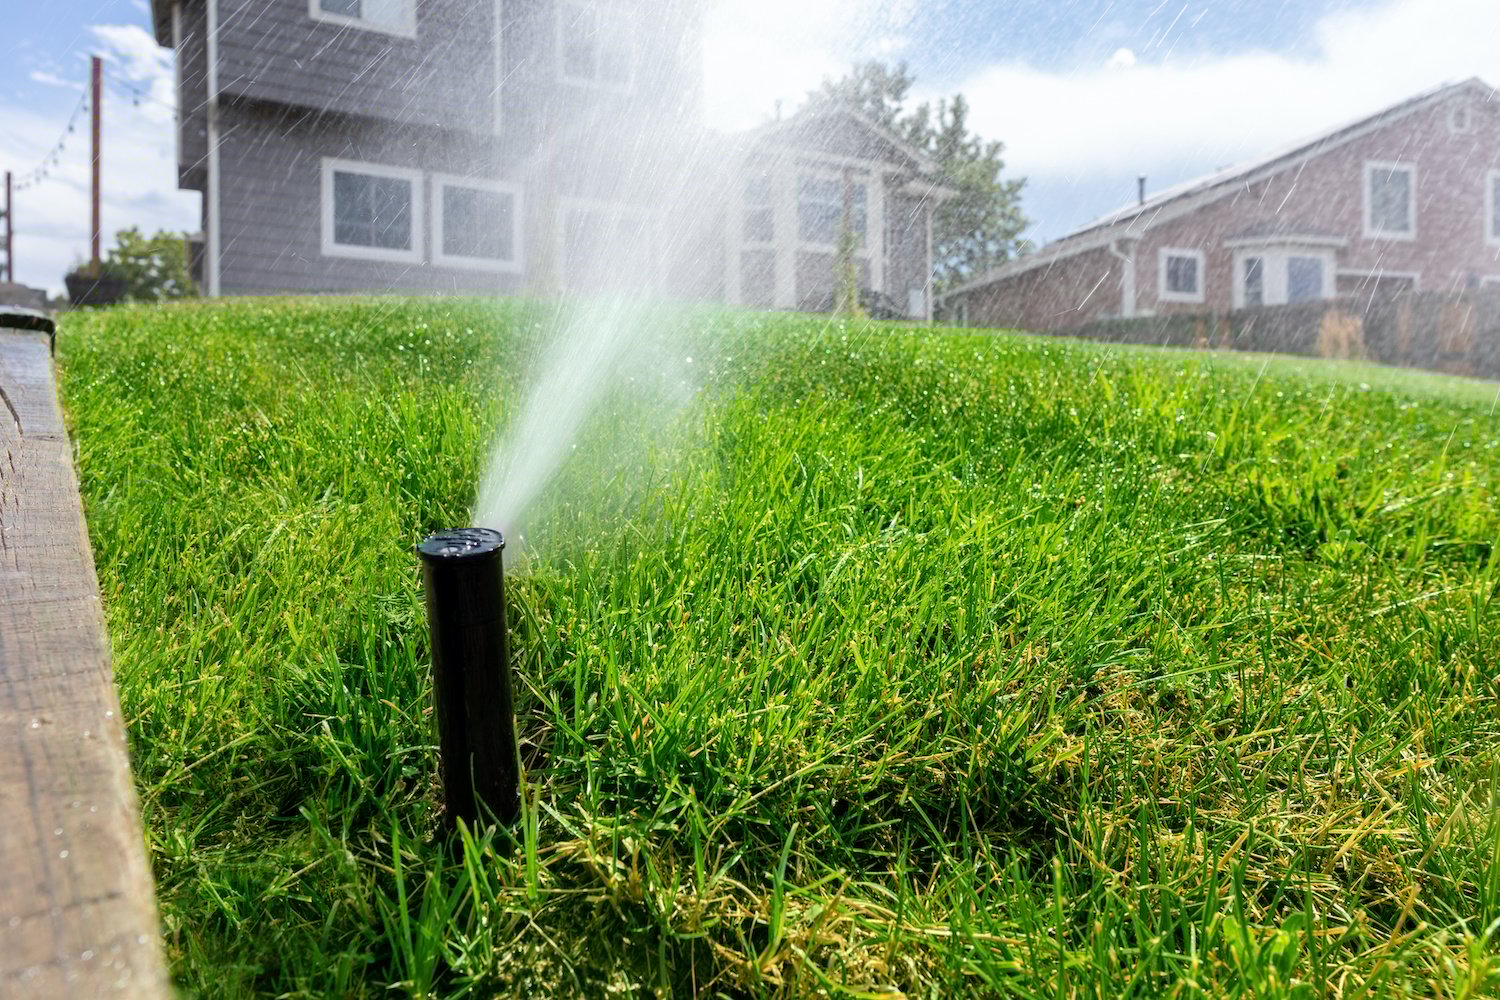
With the right irrigation plumbing system in place, your lawn should be getting uniform watering on a regular basis. A properly installed system is incredibly helpful when it comes to keeping your yard healthy. 

The best part of an effective irrigation system is that you don’t need to drag your hose around and water your grass by hand or constantly adjust your sprinkler attachments. However, as with any plumbing and irrigation system, your yard could be costing you a lot of money by inflating your water bill. 

Plus, a faulty system can diminish the health of your lawn and hurt its appearance. This is why you need to be proactive in detecting and addressing common plumbing problems you can spot in your yard. 

5 Irrigation Plumbing Issues in Your Yard You Need to Address

A major cause for concern when it comes to irrigation problems, aside from your high water bill and poor lawn health, is the impact it can have on the structure of your home itself. Residential plumbing requires consistent monitoring and maintenance to prevent serious damages to your home. 

For example, let’s say you sprung an irrigation leak near the foundation of your home. This leak, when left unchecked, can cause serious structural damage to your property. 

To address a rising water bill and prevent long-term damage to your home, look out for these five irrigation plumbing issues:

1. A Leaking Hose 

Your hose is obviously an essential tool you need to keep your lawn hydrated, as well as manage all kinds of yard maintenance, like clearing debris, cleaning out gutters, and more. Unfortunately, as wear and tear builds up over time, your hose is at risk of ripping and tearing. 

This can cause leaks that can disrupt your outdoor chores while also causing significant water waste. Over time, even small punctures that cause minor leaks can really compound and increase your water bill dramatically. 

Fortunately, fixing a leaking hose is pretty easy. Depending on the severity of the damage, you can embrace the following DIY solutions:

  • Fix small pinholes, which can be caused by sharp objects puncturing the hose, by turning off the water, then applying electrical tape to the hole. Overlap the tape several times around the hose to ensure it is properly sealed for the long term. 

  • When larger tears occur (e.g., your hose is snagged by a bush or the hot summer days cause cracking), you can simply turn off the water, cut the torn section out with garden shears, then attach the cut ends to a hose mender. The mender has two collars that attach to each cut end. Once you tighten the mender, turn off the water to ensure any leak is sealed. 

  • Couplings tend to leak, so when you notice one that is bent or damaged, you can simply replace it with a new hose coupling. Use a hose cutter to remove whichever coupling needs to be replaced, then insert the exposed end of the hose into the new coupling and twist the collar until it’s tight. Turn the water on to test it for any leaks. 

Stay proactive with your hoses. There are plenty of ways to extend the life of your hose, like storing it in your garage to avoid exposure to extreme weather or using a hose cart to keep your hose lightly coiled and easy to transport.  

2. The Pool Heater

Heating your pool is a must in the colder months of the year. Whether you use natural gas or propane, you can expect your home energy costs to increase for obvious reasons. 

Simply put, the more your pool temperature drops, the more energy it takes to raise the temperature to your desired level. This will cost you even more money on energy if you don’t have a pool cover to keep the heat trapped. 

To prevent skyrocketing utility bills, make sure you cover your pool at night or whenever it’s not in use to trap warmth. This way, your pool heater isn’t using a lot of energy to constantly increase the temperature of your pool. You can also adjust your desired temperature to a lower setting to reduce the amount of heat your heater needs to produce.

3. Irrigation Leaks 

Water hose leaks are easy enough to find by simply inspecting your hose, but when you have a leak somewhere within your irrigation plumbing system, it might take you a little longer to find and address the issue. 

The first step in identifying if you have an irrigation leak is to look at your water meter, specifically the low flow indicator to see if it’s moving when it’s not using water. If it is, you definitely have an irrigation leak. 

Next, turn off your main sprinkler valve, then look at your low flow indicator on your meter again. If it keeps moving, your leak is likely inside your home. And if the indicator stopped moving, the leak is coming from your main sprinkler system pipe.

To do a visual inspection, turn the sprinkler system valve on again, then wait a few minutes for the main pipe to refill with water. Turn on one zone using your controller, then go to that zone. You will either hear water running or see it bubbling from the ground and pooling water. 

Inspect the sprinkler head too so you can find out if you need to replace or repair the sprinkler head. This is a simple process that most homeowners can complete on their own. Repeat this inspection process until you find which zone is being impacted by your irrigation leak. 

Once you find the leak and confirm that it’s not just a misaligned sprinkler head, turn off the valve and contact a professional plumber who can help. They can ensure you fix your leak correctly. If you try to do this yourself, you run the risk of not addressing the root cause of the leak. 

4. Lateral Line Leaks 

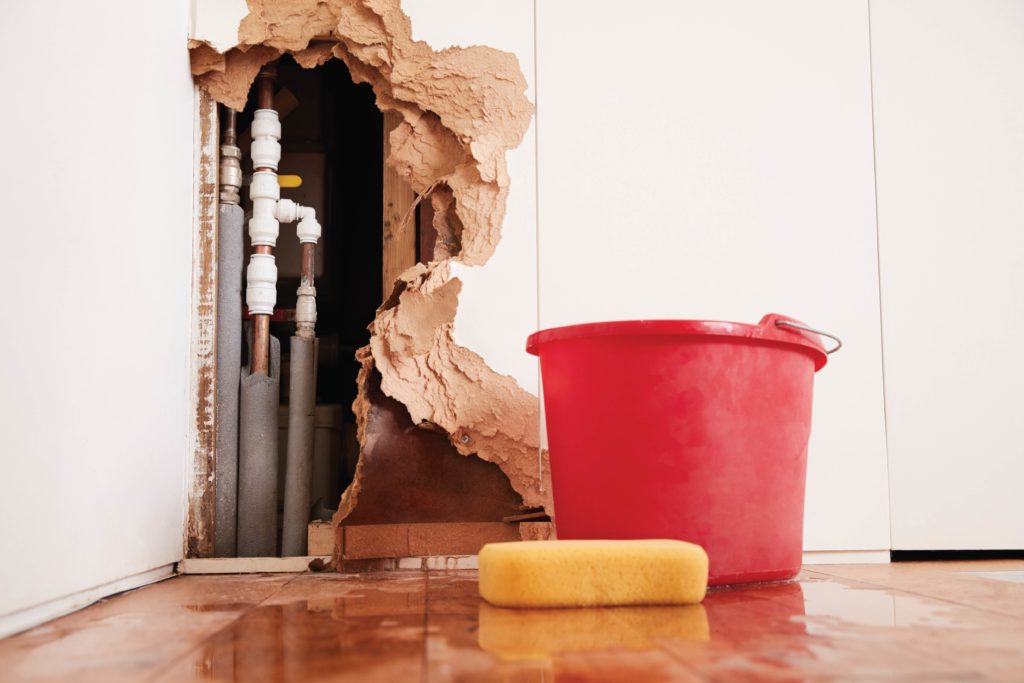
Another common problem that is driving up your utility bill could be your sewer line. Within your sewage system on your property, the lateral line is the pipe that carries the waste from your house to the public sewer main line, which is typically located in the street in your neighborhood.

When a sewage line leak goes undetected, this can lead to significant damage to your property. Over the course of time, that leak can cause sinkholes around your home, on sidewalks, or even in the road. 

There are plenty of ways to detect a lateral line leak. First of all, you can simply find the smell of waste. A broken lateral line means sewage is being distributed underground somewhere. That odor will be detectable if the leak is significant. 

You can also find pools of sewer water on your property, which will present a bad odor. If you’re experiencing drain clogs on a consistent basis, that also indicates a broken sewer pipe. 

In order to determine the exact location of where you need sewer line repair, you should hire a plumbing company that provides residential plumbing leak detection. They can use a camera to navigate the sewer line to locate the leak, then fix the leak accordingly. 

5. Overwatering

Finally, one of the most common problems is overwatering your property, which can be attributed to your sprinkler system. Overwatering can lead to weeds, insects, and diseases that will hurt the health of your lawn. 

The most common signs of overwatering your lawn include:

  • You see water running off your lawn down the street.
  • You see too much thatch, which is a layer of partially decomposed plant material.
  • You notice more bugs hiding in your lawn.
  • You feel a sponginess on the surface of your yard.  
  • Your lawn shows signs of discoloration, which is likely fungi. 
  • You spot an excessive amount of weeds, like crabgrass.

Depending on your sprinkler system, you need to look at several aspects that may cause overwatering. For example, your runtimes may be too long, or you may not have the rain sensor turned on.

Start to adjust the amount of time you run your sprinkler system, then gauge it over the course of a few weeks. It’s best to reduce the amount upfront, then adjust as you see fit. 

More Ways to Save Money on Irrigation 

The faster you identify the aforementioned irrigation issues, the more you can save. And you can be even more proactive and make updates to your current irrigation plumbing system. 

Invest in Pipe Bursting 

This is a newer plumbing technique that incorporates machines that split your existing pipes. It pulls a pipe bursting head through the existing pipe to split it, while pulling the new pipe inside. 

Pipe bursting replaces your existing pipelines without actually removing the old ones. This process is way less destructive to your yard, and it can be used to even upsize your pipelines, which increases the amount of flow capacity in your irrigation system.

Invest in Trenchless Pipe Lining

You can adopt this trenchless approach to upgrade your current systems in a way that doesn’t damage your yard. The trenchless pipe lining process is fast, so you don’t have to worry about downtime. 

Plus, the new pipe lining is smooth and comes with an extended lifespan. Depending on the plumbing company you hire, the resin that is applied as a new pipe liner can come with a guarantee of at least 50 years. 

As you can see, some irrigation plumbing issues can be addressed quickly and on your own. But others are far more complicated and involved, which requires plumbing experts. You can also invest in updating your current irrigation systems using pipe bursting and trenchless pipe lining, saving you big on preventative maintenance over the long term.

Trenchless Pipe Lining: The Ultimate Sewer Repair Solution

This post first appeared on https://www.expresssewer.com

How to Tell When it’s Time for a New Toilet

The toilet is the most heavily depended-upon plumbing fixture in the home. In fact, it wouldn’t be an exaggeration to call it the most essential fixture. Because its performance is usually so reliable, it’s easy to assume that your toilet will last forever. However, like everything else, toilets have a finite useful life – and it’s to your great advantage to recognize the warning signs that indicate it’s time for a new one in order to prevent a very unpleasant surprise.

While our team of state-certified master plumbers at Adams and Son Plumbing can handle any plumbing emergency (or plumergencies, as we call them), we prefer to help people keep their pipes and fixtures in good repair to avoid unnecessary expense – not to mention unsanitary messes and water damage!

The Toilet is the Workhorse of the House

Not to be crude, but residential toilets get a heavy-duty workout on a daily basis. According to statistics, the average person flushes the toilet five times a day – although this seems like an underestimate. While most homes have more than one toilet, the use that each fixture gets takes its toll over time. Toilets can last up to 50 years under typical conditions, but the main factors in determining how long a toilet will last is how many people use it and how often it is flushed. A large household can expect to replace at least one toilet far sooner than the half-century mark.

Also take into account changing lifestyle patterns. As working from home becomes – and perhaps remains – more prevalent, adults are no longer out of the house for eight hours a day. Same for schoolchildren who are learning remotely. Greater demand results in greater wear-and-tear on a toilet.

When to Put the Workhorse Out to Pasture

Detecting when a toilet nears the end of its useful life can be difficult. Being a relatively uncomplicated fixture, basic repairs and part replacements may be successfully performed even by people with very rudimentary DIY skills. Many feel confident in their ability to replace a worn-out flapper valve – the most common cause of a toilet tank that fills spontaneously – or replacing the “guts” – which includes the flapper valve and the fill valve.

In most cases, these fixes will solve the problem, and your toilet will continue to perform dependably for the next few years. But look out for signs that it’s time to put the workhorse out to pasture! We acknowledge our colleagues at Talmich Plumbing and Heating for the following helpful information.

There are cracks in the tank – A puddle that forms around the toilet’s base can indicate cracks in the tank. You can start with your own inspection. Examine both the inside and outside of the tank. The location of the crack determines whether a repair will suffice. If it’s below the water line, you may need a toilet tank replacement. At that point, most homeowners replace the entire toilet, as it is more cost-effective. Keep in mind that tank cracks aren’t always visible – especially if it’s a hairline crack. If you can’t find a visible crack, call a plumber to perform a thorough inspection.

The toilet leaks – Unlike the pooling water that tips you off to a cracked tank, toilet leaks aren’t easy to detect. A leak may go unnoticed for several months. While you may not see the water itself, look for a sudden increase in your water bill. As our blog post – “Is Your Toilet Causing Your Water Bill to Overflow?” – covers, an undetected leak can run up your water bill and damage the surrounding floor and/or subfloor – as well as waste a valuable resource. Depending upon the source of the leak, the water may also be contaminated, creating a health hazard. Again, replacing the toilet is the more cost-effective remedy.

The toilet clogs frequently – Assuming that young members of your household aren’t flushing toys (or worse, Orbeez water beads) down the toilet, making frequent use of the plunger is another trouble sign. Before blaming the toilet, however, be sure you’re not flushing items that shouldn’t be flushed – such as baby wipes, tissues, paper towels, cotton swabs, feminine hygiene products, etc.

Our blog post – “It’s 4 0’Clog! Here Are The Top 4 Causes of Clogged Toilets” – covers other possible causes of toilet clogs. Tree leaves, sticks and animal nests can block your plumbing vents and prevent them from funneling air into your plumbing system, resulting in toilet clogs and low-pressure flushing. Tree roots are another factor, as they can block or reduce water flow, cause overflow of sewer contents or damage pipes. Blocked sewer lines are also a possible cause – as well as a major health concern, since they contain bacteria and many other toxic substances.

In addition, first-generation models of low-flush toilets tend to clog, as they have too little water pressure to clear waste into the drains. Ultimately, the only way to determine the cause of frequent clogs is to call a plumber.

The toilet requires repair frequently – As mentioned earlier, your toilet is not a complicated fixture, but it still consists of several parts. Most toilets don’t need every part replaced at the same time. However, you should consider the cost of parts and your time. If you’re spending at least one weekend a month performing some DIY task – or frequently calling a plumber – replacement is more cost-effective, and will give you a trouble-free fixture that you can rely on for many years.

Your toilet is old and not water-efficient – Although toilets have a near-human lifespan, consider replacing an old model that doesn’t use water efficiently. According to the Energy Policy Act of 1992, toilets installed after 1994 are required to have a flush volume of 1.6 gallons per flush (gpf). Many older toilets still in use today have flush volumes of 3.5 gpf and up to 5.0 gpf. If saving money and water are important to you, replacing your old, water-guzzling water closet is recommended. Look for an EPA WaterSense-labelled toilet, which can save you more than $110 every year in water costs – adding up to $2,200 over the life of the toilet. Which leads to our next section.

What to Look for in a New Toilet

One major advantage of being able to recognize a worn-out toilet is the luxury of time in shopping for a new model. If you don’t have to replace your toilet in an emergency situation, you can decide the style and features that best suit your bathroom – and your personal preferences for comfort. Atlanta real estate agent Rosanne Dorfman provides the following list of what to look for in a new toilet.

Consider water use – Different toilet models come with different flush options. As previously mentioned, today’s standard toilets use a maximum of 1.6 gallons per flush. Low-flush toilets may use as little as 1.28 gallons. Although often more expensive to install and maintain than traditional toilet fixtures, low-flush models can also save you a significant amount of money over time. As the bathroom is the most-frequently used room in the home, and the toilet the biggest water user, choosing a new toilet with care will pay off in the long run.

One-piece or two-piece – If the toilet and tank are fused together without any joints, the toilet is known as a one-piece (or single-piece) toilet. If the toilet and tank are separate and joined using fittings, it is known as a two-piece (or coupled) toilet. Because a one-piece model is easier to clean, it’s recommended for families with young children. It’s also more sleek and stylish, making it a good choice for those upgrading their bathroom during remodeling. For this reason, it’s also somewhat more expensive than the traditional two-piece model.

Measure the size before you buy – The hole over which the toilet will be mounted and the distance from the wall to the center of the hole is called the “rough-in.” This distance is 10, 12 or 14 inches. Take the rough-in measurement before you head out to buy a new toilet to ensure it will fit.

DIY or Hire a Plumber?

Some people have hands-on experience in remodeling and renovating homes, and may feel comfortable and confident in their ability to replace a toilet. However, this is not a job for those who feel inspired by home renovation TV shows or YouTube videos. Most plumbing repairs and replacements need to be performed by a professional. Even if you have DIY experience, you may encounter unanticipated problems that could result in damage or uncover a situation requiring more extensive repair than you’d expected.

When you need a reliable and professional plumber, look no further than Adams and Son Plumbing. We respond quickly and efficiently, preventing further damage and future repairs. Plus, we are one of the few companies that send a state-certified master plumber every time. View our full list of services, or contact us to request an appointment. We look forward to serving you!

The post How to Tell When it’s Time for a New Toilet appeared first on Adams and Son Plumbing Services.

How to Avoid Hair Clogs in Your Drain

Nothing is worse than standing in ankle-deep, dirty water thanks to a pesky hair clog in your shower drain. No matter what you do, you just can’t keep the hair from clumping together and causing your drains to slow to a painful crawl. Before you grab a razor and begin taking drastic measures, there are plenty of steps you can take to prevent against hair clogs in your drains and eliminate them effectively when they do occur. Find out what you can do to fight against hair clogs in your drains by reading the blog below!

Hair Clog Prevention for Your Drains

The best way to stop any problem from happening is taking precautionary measures to mitigate its likelihood. Our expert plumbing professionals have seen it all, and we know the best techniques to use in order to prevent against hair clogs in your drains. Some easy prevention measures include:

  • Drain Cover Installation: Purchase a drain screen from any hardware or home goods store and place one in every shower or tub in your home. There are even underneath drain screens specifically designed to trap hair.
  • Remove Hair from Sinks & Showers: Before taking a shower or bath, brush the excess hair off your head to prevent any loose hairs from falling on the tub floor. Keep an eye out for any hair you see and wipe it away from the drain.
  • Flush Your Drains: This takes a bit of family coordination to accomplish. Simply close all bathtub and shower drains and sink drains, fill each tub or sink with warm water, and have someone standing next to each drain and toilet in the home. At the same time, everyone should open their drains and flush the toilets to flush all the drains at once.

These three prevention methods can keep you from pulling your hair out over clogged drains in the home. However, even the most careful individuals can still fall victim to slow-moving drains caused by hair clogs. Luckily, there are actions you can take for safe removal without having to call in a professional.

Removing Hair Clogs from Your Drains

drain claning

Sometimes prevention just doesn’t do the trick. When a clog takes control of your home’s drains, try the following DIY removal tricks:

  • Grab a Plunger: Plungers aren’t just great for clogged toilets — you can also use them to suck up hair and other debris by placing them securely over your drain and plunging away!
  • Use Natural Solutions: Harsh chemical solutions designed for drain clog removal can do more harm than good. Instead, use natural methods such as pouring boiling water down the drain or a mixture of ¾ cup baking soda and ½ cup vinegar followed by boiling water.
  • Use Your Hands: If you have a drain screen installed, you’ll need to periodically remove any debris they catch to prevent clogs. Grab a pair of gloves or get your hands dirty to pull out the hair manually and remove the clog.

These tried-and-true methods can help you avoid scheduling an appointment with your local plumber. But, even if your drain clog can’t be fixed through DIY tricks, Len The Plumber has the professional team you need to get the job done once and for all.

When to Contact a Plumbing Professional

If you’ve tried every trick in the book and you’re still not getting the relief you need from clogged drains in your home, Len The Plumber has your back. Our team is specially trained to use the most sophisticated, long-lasting drain removal techniques to provide you with reliable, functional plumbing in your home.

Contact our team to schedule drain clog removal today!

This post first appeared on https://lentheplumber.com

My House’s Plumbing Is Nothing but PVC Pipe. Can I Install a Whole-House Filter On My House?

question-mark-badgeSo you’ve taken a peek into the world of whole-house water filters, but you’re wondering… can I even benefit from this?

Let’s say you have an older home that has nothing PVC pipe and you don’t know if this system is usable in your home.

The answer is yes. You can still have a whole-house water filtration system despite having a home full of PVC pipe. We know that PVC pipes are chosen because they’re inexpensive and durable, but they do have their limitations. While a PVC pipe can’t be used with hot water applications, it can be used with a water filter. Contact us if you’d like to learn more. We specialize in water filtration system installation in Orlando, FL.

The Benefits of a Whole-House Water Filter

Are you wondering why you want a whole-house water filter? Here are a few reasons why you should consider installing one:

Safe Drinking Water

You want safe drinking water more than anything else. The worst thing that could possibly happen to your home is risking the health and safety of you and your family members. Installing a water filter will help cleanse the water provided throughout your entire home. This means you won’t have to worry about the quality of your home’s drinking water. This brings you peace of mind as well as the ability to save money–no more plastic water bottle store runs!

Cost Savings

Having a clean water system is going to help you save money on your plumbing services. Are you wondering how? It’s because clean and clear pipes flow better and bring you water faster than a clogged up plumbing system. This is why it’s a great idea to install a water softener. It’s going to help you save money while you’re improving your home.

Environmental Help

The world is changing every single day and we’re sure that you want to do your part. Living in Orlando means that you probably witness the environmental impact on our environment firsthand. If you want to do your part to reduce your home’s carbon footprint, then I think it’s a great idea to start with this type of water filtration system.

Soothed Skin and Hair

Have you noticed that your skin and hair feel a little dryer than normal lately? It’s because of things like poor water quality. If you’d like to improve the water quality in your home, then the best place to start is with a water filter. Water filters remove the sediments in hard water that causes these problems.

Improved Water Quality

We spoke about safe drinking water above, but it’s also important that you have high water quality for your home too. A home with poor water quality is going to see a lot more trouble over time. This is going to include the build-up of limescale in your pipes, hard water, and slow-moving plumbing as well. Improved water quality helps your home’s plumbing run more effectively and provides great peace of mind.

Looking to clean up the water in your home?  We’re here to perform the work that you need.

Contact Modern Plumbing, Inc. today to schedule an appointment with our team.

This post first appeared on https://www.modernpi.com

4 General Heating Tips Everyone Can Use

Many homeowners are in an awkward spot right now. Winter is going to be over soon, and we’ve had a pretty tumultuous heating season. We’ve been spending more time at home as well, which means you’re probably starting to notice the weird quirks of your heating system. If you’ve been looking for some professional advice as to how you can better treat your heating system before it gets repaired this season, then we can help.

Maintenance and repairs for heating in Wayne, NJ are going to be the most important thing you can do for your system. Though, if nothing is wrong and you’re just looking for an extra boost, we can help. We’ve listed four general tips for heaters in our area that could help you maximize the comfort levels and minimize the bills.

Let’s see if our advice can help you squeeze a little extra out of your heating system.

1: Don’t Forget the Air Filter

Your heater comes with an air filter that’s invaluable to the functionality and efficiency of the system. While it helps your air quality, it’s not entirely designed for your own personal comfort. It’s actually designed to help filter contaminants out of the air that heads into your heating system, so your unit doesn’t constantly get bombarded by dust, debris, pet dander, pollen, and anything else. In fact, those interior components of your heater are so sensitive that they would start breaking down at a rapid pace without the help of your air filter. If you don’t replace this filter every one to three months at least, your system will struggle to take in air and it will run inefficiently.

2. Check and Compare Your Bills

Do you have a neighbor that you keep in touch with? Perhaps you have happy hour zoom calls to pass the time during this pandemic. A good topic to bring up, if you’re looking to invest in the efficiency and effectiveness of your heater, is monthly heating bill. Since you’re both in the same area and pay relatively similar prices for natural gas or electricity, it’s beneficial to compare the prices that you both pay. Are you paying for way more energy or fuel than your neighbor? Then that’s a pretty clear sign you’re suffering from an inefficient heating system.

3. Maintenance Is Always Worth It

Did you skip maintenance this year? Or perhaps you didn’t know that maintenance was a thing? Well, it is, and it’s going to give your heater the extra boost it needs to stay in tip-top shape. Call our team today to see what benefits our maintenance plan provides, and get your heater up to snuff.

4. Stay Vigilant

This might seem like a vague point, but we worded it like that on purpose. There are many sounds, smells, and other alarming clues your heater could give off when it starts struggling. It would take a hundred blog posts for us to list all the little things that could go wrong with your heating system, so the best advice we could give homeowners is to stay vigilant. Keep an ear out for noises, pay attention to bad odors, and call our team if you’re confused about anything.

MarGo Plumbing Heating Cooling Inc. has your back. Give us a call today!

This post first appeared on https://margoplumbing.com

Low vs. High Pressure Shower Heads: How to Choose the Best Type

shower-head-types

Shower heads are one of those appliances that people tend to overlook and approach as an afterthought.

But when it comes time to complete a home improvement project in your bathroom, the shower often comes up as a good place to start the upgrade. After all, with so many shower head types to choose from, the process of finding the best type to fit your preferences can be tricky.

That’s why it’s important to take the time to make the right decision. 

Why Choosing the Right Shower Head Matters

Those standard spigots you saw decades ago seem like a relic of the past when you look at all the different options available today. But before you start shopping, you need to understand the impact shower head types might have on your lifestyle and your wallet. 

First of all, you want to make sure you get the shower experience you want. For example, you might prefer a handheld head because you want a convenient option for washing your children, bathing your dogs, and cleaning the tub.

Or perhaps you want a head that saves you big on your water bill. For those who like the finer things in life, massage and other spray patterns are available with certain types of shower heads. 

Another aspect most people tend to overlook is how your shower head affects your health. An unfortunate truth often ignored is the fact that shower heads are a perfect environment for pathogenic bacteria and harmful microbes.

Of course, risk of infection is small to nonexistent, but frequent exposure to contaminated water cascading onto your face and body is something you can easily avoid. Make sure you plan for how you will clean your shower head. 

Additionally, you also need to consider the cost. Think beyond the price tag of the shower head itself — look at the impact it will have on your water bill. Some outdated shower heads drain your wallet (pun intended) by using up to 10 gallons of water per minute when it’s fully opened. Fortunately, newer shower heads can save you big by using about two or three gallons per minute, thanks to their design. 

Ultimately, the total cost of ownership of your shower head comes down to the levels of water pressure it uses. 

Low Pressure Shower Heads vs. High Pressure Shower Heads: The Pros and Cons 

This topic is likely your primary concern when you’re shopping for the best shower head for your home. Ultimately, your decision comes down to what you want to prioritize — the overall shower experience or your water bill.

Pros and Cons of Low Pressure Shower Heads

A 2016 study found that showers are the second largest source of indoor water use, accounting for about 19 percent of total use per capita per day. It’s no wonder that people turn to low flow shower heads to cut back on their water bills. 

The major advantage of using lower pressure shower heads is obvious: Since the head allows smaller amounts of water to flow through it as compared to other heads, the restricted flow ultimately reduces your water use. 

The pros are pretty clear. Low pressure shower heads help with the following:

  • Managing water waste and cutting back on your total water bill. 
  • Reducing your electric bill by using less electricity to warm less water being used. 
  • Decreasing the amount of emissions by saving on energy use. 

There are some downsides as well. These include the following:

  • You will experience a time lag, meaning when you adjust the temperature, it takes longer for that change to come through the head. 
  • Your water will be cooler because low flow heads combine water droplets flowing out with the air, making the water cool quickly, as compared to traditional shower heads. 

Simply put, a low pressure shower head can cut costs and provide an environmental benefit, but the experience can be frustrating, especially if you prefer consistent, strong water flows after dealing with poor water pressure in the past. 

Pros and Cons of High Pressure Shower Heads

These types of shower heads are useful for increasing water pressure if you find your current head ineffective. Many people prefer a shower experience that delivers high levels of water pressure, especially if they opt for high end heads that include a massage setting. 

The advantages of using high pressure shower heads are as follows:

  • You get a better experience if you prefer a strong water flow. 
  • You’re able to improve temperature control, reducing the lag between turning the knob and actually feeling the water get hotter or colder.
  • You typically get more options for spray patterns, like a gentle mist, powerful stream, or a pulsating massage. 

However, the cons of using these heads mostly boil down to cost.

  • You might see an increase in your water bill as you use more water. 
  • In turn, your electric bill can increase too as you use more energy to heat your water. 

Now that you know the pros and cons of using different levels of water pressure with your shower heads, you’re ready to explore your options. 

The Types of Low and High Pressure Shower Heads 

Picking the right shower head with the best water pressure comes down to your personal preference. Here are the most common types of shower heads.

Handheld Shower Head

These kinds are attached to the shower elbow through a hose. The head itself can detach from the holder, so the user can extend it off of the wall. Handheld shower heads are especially helpful for cleaning your shower enclosure and bathing your kids and pets. 

Some of these come with a lot of extra features, like various spray patterns and massage jets. And many hand held heads can be mounted to sliding bars, making it easy to adjust it to various heights. 

Dual Shower Head

Can’t decide between a hand held option or a fixed type? Want the best of both worlds? The dual shower head is your perfect choice. 

Typically, these systems offer both a hand held head and a fixed head that is stationary. Dual shower heads include a diverter valve to effectively control water flow. A two way diverter valve will switch flow between the two heads, and a three way diverter valve allows you to choose which individual head to use at one time or to use both heads simultaneously. 

Single Spray Shower Head

This type is self-explanatory. It’s a fixed shower head that provides one spray setting, often referred to as a full body spray.

A single spray shower head is the best option for you if you want simplicity. 

LED Shower Head

These share the same functionality as the rest of these shower heads. The only difference is that they use LED lights to color the water, which can be relaxing and uplight your mood. 

Most LED shower heads come with a variety of color options, but some are single color or offer a random color sequence. Another cool feature — some models use water temperature to adjust the color of the lights. 

Rain Shower Head 

With this option, you get wide coverage, thanks to the extended width of the head itself. Most rain shower heads are at least six inches wide, making you feel like you’re underneath a rain cloud. 

These are mounted on the wall, but some can be installed in the ceiling of the shower enclosure. The water flow is evenly distributed, resulting in a lower pressure with a wide coverage. These are best if you have plenty of water pressure in your home so the head can effectively distribute flow evenly. 

When you know your preference for water pressure, finding the best type of shower head is simple. Keep in mind that shower head installation is often simple, but you need to make sure that it’s done correctly.

If your recent DIY home projects have not gone well, it might be worth hiring a professional. This way, you avoid common installation mistakes, which can lead to costly repairs and fixes. 

Dealing With Common Plumbing Problems

This post first appeared on https://www.expresssewer.com

What to Do When A Pipe Bursts in Your Home

burst pipe

Winter temps in the Mid-Atlantic yo-yo between freezing conditions and mild days. But a burst pipe in winter is no child’s play. Here’s what to do when you discover a burst pipe in your home.

1. Turn off the main water valve.

The quickest way to stop the water damage from a burst pipe is to stop the source of the water. The main value is often found in the basement or under the kitchen sink.

2. Drain the pipes.

It’s important to get the remaining water out of the pipes by flushing each toilet and running the cold-water side of the faucets dry.

3. Turn off the hot water heater.

After the system is shut down, go back and bleed the hot water from all the faucets in the home.

4. Turn off your home’s electricity.

Depending on where the leak occurred, water may have come in contact with electrical outlets or even your fuse box.

5. Find which pipe burst.

Large breaks might be obvious, while smaller broken pipes can be more difficult to locate. Looks for bulging ceilings, pooling water on the floor or water under the sink. If you have found the source of the leak right away and water is still leaking, try containing it with a large bucket.

6. Assess the size of the break and call a professional plumber.

Some burst pipes result in small cracks that can be repaired using commercial tape of a chemical bonding agent. But homeowners should be careful because a burst pipe inadequately repaired can cause even more damage. It is recommended to hire a professional to take care of repairing or replacing burst pipes.

7. Document damage.

Water can be one of the most destructive forces to a home. As soon as you can, take pictures of the damage and use it in filing an insurance claim.

8. Clean up the water damage to avoid mold growth.

Depending on the size of the leak, you may need to hire a professional cleanup service who will use commercial wet-dry vacs and heavy-duty fans to dry saturated carpets and drywall.

Preventing pipes from freezing by adding insulation to unheated areas, weatherizing outdoor hoses, hose bibs and sprinkler systems are great steps to take to prevent water from expanding inside pipes and causing cracks or breaks. If you need a professional plumber in an emergency, you can count on Len the Plumber for same day service, 7 days a week.

This post first appeared on https://lentheplumber.com

Water Heaters – Tankless vs Traditional Tank Model

Water Heaters – Tankless vs Traditional Tank Model

Even though a water heater can be expensive, you should view this as an investment. A typical water heater should last around 15 years. When it is time for you to replace your water heater, there are several major factors that you need to consider. These include efficiency, cost, and longevity. One of the major decision points that you will need to address is deciding between a tank or a tankless water heater. By taking a look at the pros and cons, you can make the right decision for your home.

The Pros and Cons of a Tank Water Heater

The vast majority of homes of a tank water heater. This is an insulated tank that will hold somewhere between 30 to 50 gallons of water. They usually use electricity or natural gas as their fuel source. Some of the advantages of a traditional water heater include:

  • They tend to have a lower initial cost
  • They are easier to operate, reducing maintenance costs
  • If something goes wrong, the repair bills tend to be lower than a tankless water heater

On the other hand, your utility bills will probably be higher with a traditional water heater.

The Pros and Cons of a Tankless Water Heater

A tankless heater is also called an “on-demand” water heater and it doesn’t have as many parts as a traditional water heater. As a result, a tankless water heater should last longer than a traditional water heater, providing 20 to 30 years of useful life. Some of the other advantages of a tankless water heater include:

  • A tankless water heater should help you save money on your utility bills
  • It will not take up as much space in your home as a tank water heater
  • There is hot water immediately after the faucet is turned on

At the same time, tankless water heaters will cost a bit more money and they might not have the same capacity as a traditional water heater.

For Help with Your Water Heater, Contact the Professionals at A to Z Statewide Plumbing Today!

Choosing the right water heater for your home is a major decision. Make sure that you get the opinion of a trained expert from A to Z Statewide Plumbing! Contact us today at 954-981-2133 for help with your water heater!

Trending Topics Right Now

Aaron Atkins

Delivering exceptional customer service is first and foremost, but, when he is not focused on supplying your home or business with the highest level of customer support, Aaron prefers to lace up the running shoes and pound pavement for hours on end. Originally hailing from the snowbelt of Pennsylvania, Aaron currently resides in sunny South Florida with his wife and three children.

This post first appeared on http://www.atozstatewideplumbing.com

The Most Common Contaminants in Household Water

water-hands“Do I need to have a water treatment system installed for my house?” It’s a question you may have asked yourself, as many other homeowners have. The tricky part about answering the question is there is no such thing as a “universal water treatment system” that removes all possible contaminants from the freshwater sent to a house. Some water treatment systems are more broad in scope than others, but it’s important to know what’s actually in your water so experts like our team will know the best way to treat it.

To find out what’s in your water requires scheduling water testing with us. Below we’ve listed the most common types of contaminants that we may find based on these tests:

Hard water minerals

One of the main concerns we look for in household water is hardness level. This is a measure of the amount of hard water minerals suspended in the water. These minerals include magnesium, gypsum, and a range of calcites. Although not harmful to drink, they can inflict damage to plumbing and appliances and make it difficult to wash and keep clean. A water softener in Glendale, AZ is the best way to counteract hard water.

Heavy metals

No, we don’t mean the rock music style. These are metals with an atomic number greater than 20 that can enter the water supply through the soil. They include arsenic, cadmium, chromium, copper, nickel, lead, and mercury. Your eyes probably widened a bit when you saw lead, because this is one of the major worries with municipal water supplies and is particularly harmful for children to drink. The toxicity of the different heavy metals ranges, but it’s best to have as few as possible of any of them, and there are different water filters and purifiers (such as the reverse osmosis system) that can eliminate them.

Hydrogen sulfide

Have you ever noticed an unpleasant “rotten egg” smell coming from your household water? Not a nice thing to have in your home. This is the smell of hydrogen sulfide, one of several sulfides that can get into the water supply. It isn’t harmful, but it’s definitely something you want to get rid of.

Biological contaminants

This group includes all types of microbes and microbiological contaminants, such as bacteria, viruses, and protozoans. These can lead directly to serious illnesses, as well as nuisances such as bad taste and odors from the water. There are a number of water treatment systems that deal directly with these biological hazards.

Chemicals

Many types of chemicals in the soil can end up seeping down into the freshwater system, and some can even originate in water treatment plants. Among the chemicals found in freshwater are chlorine (a byproduct of chemical treatments), chloramines, bleach, pesticides, herbicides, and synthetic pharmaceuticals. 

Sediment

This is good, old-fashioned dirt. It may not be the most sinister-sounding item on this list, but you certainly don’t want it in your water. 

We have the tools to provide your family with fresh, safe, and good-tasting water. Make an appointment for water testing today to get started.

Trust to The Trusted Plumber in Glendale, AZ and the surrounding areas.

This post first appeared on https://www.thetrustedplumber.com

How Your Home Plumbing System Works

Every house in a developed country, no matter where they are or the size, is going to have basic plumbing. The plumbing may seem like the most complex part of a house, but if you understand how the plumbing system works, you will realize how straightforward plumbing can be. Besides, understanding a basic plumbing system will help you in the future when you need to describe an issue to a professional plumber. 


Relevant: Beginner’s Guide to Plumbing Codes

So, let’s not waste any time. Here is the gist of how your home plumbing system works: 


The Main Parts

When you look at a diagram of a typical plumbing setup, you will see that there are only two sections: the half of the system that brings water in (known as the water supply), and the other part of the plumbing system that expels waste water from your home (known as the drain-waste system). That’s it. 


Of course, it can be a bit more complicated in design than a simple in-and-out. We will explain both parts of the plumbing system in more detail. 


The Water Supply System

As the name suggests, the water supply is the intake of water into the household. Water circulates from the main valve. Depending on the source of the water—city or well—the main valve switch is either located in front of the house, buried under the street, or somewhere close by. The water supply is pressurized so that it can reach every section of your house, no matter how many floors it must ascend. 


Those with city-sourced water have a main pipe, a large line that runs parallel to the street. For those with wells, there will be a pump in your home that pressurizes the water when needed. 


Beside the water meter (or somewhere close), there is a shutoff valve for the whole system in your house. In the event that you have a burst pipe or some other issue, you can use the shutoff valve to shut down the system and prevent more water for entering the pipelines. 


Another section of the water supply system is the line that leads to the water heater. Some houses, apartments, and condos (typically newer construction) use something called a tankless water heater, since they are much more energy efficient. However, both a traditional tank heat and tankless heater need that supply line. 


The main concern with the water supply system is cleaning and having sufficient pressure to reach every water fixture. You need the water supply system to function properly. Otherwise, you might have an issue with taking a shower or flushing a toilet. 


The Drain-Waste System 

Once you have used water, it goes down a drain. At this point, the water is no longer considered fresh. Now, it is waste, and it must be redirected away from your home. Gravity takes over now. 


You will see that drain-waste pipes are angled down to let gravity do its job. Because of this, the drain-waste system is much more complicated than the water supply system. There are added features, such as traps, vents, and other additions to make the drain-waste pipes much more effective. For example, there is something called the P-trap, which captures solid items that fell down drains. There are also switchbacks and vents that stop noxious sewage fumes from rising back into your home. 


You might also note the vent atop your roof. That, too, is part of the drain-waste system. 


Drain-waste piping is much wider than water supply pipes. That is because the drain-waste system is carrying more than water through the lines. Larger pipes prevent blockages from forming. 


Cold vs. Hot Water Supply

Now, where does the hot water from your shower come from? The water that flows into your household is usually cold. Whenever a sink is turned on or someone is taking a shower, cold water rushes into the supply line, using a centralized line that moves between the floors of your home. If you need hot water, the cold water is fed into the hot water heater—or a reserve is drawn—and is shuttled up short, straight piping. 


The reason hot water only travels through short pipe connections is because of heat transference and loss. If it used the same routes as cold water, you would have to wait twice as long for warm water. 


Identifying Issues Within Your Home’s Plumbing System

There will come a time when the water in your home doesn’t flow properly. This is typically caused by a blocked pipe or similar issue. In that case, you should consider discussing the issue with a professional plumber, since they will have the correct tools. However, depending on where the problem is occurring and when, you may be able to identify the issue more quickly. 


Here are some common problems to consider: 


  • Cracks in the foundation
  • Sewage blockage
  • Septic waste in the yard
  • Insect and rodent problems 
  • Mold 
  • Slow or gurgling drains


Wrapping Up

You should now know that there are two main parts to every plumbing system: the water supply and the drain-waste system. Understanding the functions of these two systems, as well as the common issues involved, can help you describe problems more accurately to the plumber. You should also be able to take better care of your plumbing system now that you see how everything operates. 


The post How Your Home Plumbing System Works appeared first on The Irish Plumber.

+1-877-959-3534