Every year you’ve been worried about the state of your failing air conditioner and your problematic and unsafe gas furnace. You probably know that both systems need to be replaced, but that’s such a huge investment that you’re weary. And plus, replacing two systems at the same time sounds so complicated and costly that it’s probably out of your comfort zone, right?
Well, not exactly. Let’s talk about a system that could be absolutely perfect for your situation. It’s finally time we got around to talking about heat pumps in Cedar Grove.
Heat pumps are heating and cooling systems that work pretty much all year round. They’re a great replacement for a central AC system and they’re also a wonderful replacement for your furnace. Want to know how they work and why you should consider investing in them now? Well, keep reading to find out!
How Does a Heat Pump Work?
Imagine your central air conditioner. It works by running refrigerant from an evaporator coil to a condenser coil, essentially evaporating and condensing over and over again. As it does this, it changes from liquid to gas and vice versa, drawing heat in with it as a byproduct of the evaporation process. Then, when it condenses outside, it disperses the heat where you won’t feel it. This is basically how any air conditioner works, and it’s the central difference between an AC system and a fan.
A heat pump works almost identically to your central air conditioner with one huge difference. There’s a reversing valve that can be trigger with a switch, which is designed to reverse the flow of refrigerant in your system. This means the refrigerant is going to evaporate outside and draw in heat from the atmosphere. Then, it’s going to condense inside and disperse the heat into your indoor air where you can feel it. This essentially transforms your air conditioner into a heater at will.
Why Choose a Heat Pump?
This is a good question. Heat pumps aren’t for everyone, and they’re definitely going to be more expensive than just replacing a simple gas furnace or a central air conditioner. But, they’re hyper efficient and will last for a long time. Here are a few reasons to go with a heat pump:
Two birds with one stone. The easiest reason to invest in a heat pump is the fact that it will replace both your heater and your air conditioner for one lower price.
High efficiency. These systems run on electricity and are extremely energy efficient.
Perfect for all seasons. We can sometimes have temperature swings in our autumns and springs that require help. This makes a heat pump perfect because it really helps during those interim seasons where temperatures aren’t so extreme.
How Are Your Air Ducts Looking?
If you’d like to invest in a heat pump but you don’t have the ductwork for this kind of system, then don’t worry. Ductless heat pumps are absolutely available for your home and we can set them up. These work identically to normal heat pumps except utilizing air handlers instead of a centralized system and ductwork.
Your water heater is one of the hardest working appliances in your home. You might not even realize this, but your water heater is always working dutifully behind the scenes. It accounts for nearly 17% of the energy usage across your entire home. Once you’re aware of the structural importance of your water heater, it’s easy to see why it is important to care for it.
We’re prepared to help you perfect your water heater services in Orlando, FL. Today, we’re going to discuss the perfect temperature you want to have it set to.
The Optimal Temperature for a Water Heater
The ideal temperature for a water heater isn’t straightforward. It’s actually a fluctuating number depending on your home. Let’s go through the factors that will help you determine the right temperature setting for yours needs.
Your Health: If you or any of your family members are immunocompromised, you should consider setting your water heater to a higher temperature. Bacteria growth can occur in your tank at 120° and, while this is safe for most people, it might not be safe for you if you’re immunocompromised.
The Number of People in Your Home: How many people do you have in your home? If you live alone or with one other person, it’s pretty unlikely that you’ll run out of hot water if you keep your tank at 120°. If you have a larger family who all shower, do laundry, or run water around the same time, you might want to up your thermostat setting. A higher thermostat on your water heater helps make sure that you have hot water for everyone in your home.
The Type of People In Your Home: Do you have kids? There’s a chance that your little ones could scald themselves if the water is too hot. You might want to choose a temperature of 120° if you have kids.
Your Dishwasher: Does your dishwasher have a booster heater to run warm water through the unit? If the answer is no, then you might want to up the internal temperature of your water heater to 140°.
These are the general guidelines. If you still have a question that wasn’t answered above, you should schedule an appointment with our team. We can look at your home individually and answer any questions you have.
Other Ways To Improve Your Water Heater Efficiency
If you’re choosing the optimal temperature for efficiency for your water heater, you might want to consider other efficiency tips. Here are a few:
Insulate your Water Heater: If you have a tank water heater, this reduces your standby heat loss.
Go Low-Flow: Replacing your showerheads and faucets with low-flow versions of these appliances will help you consume less hot water and save money.
Go Tankless: Tank water heaters are great, but tankless water heaters make efficiency a priority. If you’re really concerned with your efficiency, then it’s time for you to go tankless. We have system suggestions! Contact our team to talk about your home, your needs, and your options.
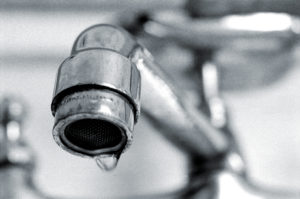
Plumbing leaks come in many different forms and sizes, with the faucet leak being the most common. Allowing your faucet to slowly drip day after day can lead to a bigger plumbing nightmare that can be avoided altogether. Here is what’s causing that troublesome leak in your bathroom or kitchen:
Damaged & Worn Parts
Do you have a steady drip coming from your faucet that makes you want to rip it right off the sink? All signs point to the washer within the faucet that will need to be replaced. However, if you have a compression faucet, sometimes the seals can become damaged as it is constantly holding back the water pressure while the faucet is closed. For those with cartridge faucets, the cartridge itself or the moving parts (O-rings, inlet and outlet seals) may also need to be replaced.
High Water Pressure
Does your faucet leak during specific times of the day, like at night or when no other plumbing fixture is being used? This could mean that your water pressure is too high, and it becomes a problem when no other faucets or plumbing fixtures are being used in your home (or throughout the neighborhood). Small leaks can start in your faucet, eventually leading to pinhole leaks in the piping, worsening over time. Consider calling a plumber to have your water pressure evaluated and restored to a proper level.
Cracks in the Plumbing
When a plumbing pipe has a crack or the fitting is loose, not only will it leak here, but also at the faucet that is closest to the leak. If you notice that your faucet has a slow but steady leak, inspect the piping underneath the sink. Check to see if there are any small cracks, holes, or loose fittings where the pipes connect. The leak could also be behind the walls, so make sure you have your plumbing inspected by a professional plumber if you’re unsure.
Why Should You Care About Leaky Faucets, Anyway?
Homeowners often vastly underestimate the importance of even a single leaky faucet in the home. Putting aside the possibility of a leaky faucet suggesting some other plumbing issue, a single leaky faucet could be as much as 10% of your water bill.
And that’s just the beginning of the problem. Sinks aren’t designed for a slow, steady drip of water, and a leak can cause all sorts of strange things to happen, especially if your water is hard enough that the drip starts leaving mineral stains and buildup where it’s flowing. This can leave you with a difficult mess to clean up, damaged sealants, or even damage necessitating a sink replacement.
Finally, those homeowners mindful of the environment should know that household leaks totaled up can reach staggering numbers, wasting thousands upon thousands of gallons of water over the course of a year; enough to fill the bath hundreds of times.
Trust Len The Plumber for Faucet Leaks
When you discover a faucet leak in your home, make sure you have it repaired immediately – before it develops into a headache you don’t need to have. Reach out to the team at Len The Plumber, and rest easy in the knowledge that we won’t just fix your leak; we’ll figure out why it happened and fix the problem down to the root.
We are a participant in the Amazon Services LLC Associates Program, an affiliate advertising program designed to provide a means for us to earn fees by linking to Amazon.com and affiliated sites.
Did you just see some mold in your home? Do you want to remove it with something you already have? As you look in your cabinet for something — anything — that will take care of the problem right now, you might want to ask yourself: “Does Lysol kill mold?”
The answer is yes — mostly. Lysol is one thing that can kill mold. Whether the mold is in your bathroom or on your carpet, you can use it to remove the problem.
How Does Lysol Kill Mold?
Not all products from Lysol will kill mold. However, the Lysol Mold and Mildew Remover contains bleach, so it can get rid of mold. The bleach can help remove mold from non-porous surfaces, such as tile.
Unfortunately, it’s not as effective on wood or drywall. And because the mold spores can seep into those porous materials, removing mold is more difficult.
Still, using the Lysol Mold and Mildew Remover is a great option for some things. You can use it whenever you see signs of mold, or you can incorporate it into your normal cleaning routine.
So, Can I Use Lysol to Kill Mold?
While the regular Lysol isn’t effective at killing mold, you can use the mold remover. But you need to catch the mold early because the remover can’t restore the damage.
If the mold gets bad enough to where it causes visible changes, then you will need to replace the damaged item or area. While you may be able to remove the mold on the outside, it’s already hurt the object in question.
How to Use Lysol to Kill Mold?
If you find that the mold is new and you can get rid of it, you’ll be able to use the cleaner. Here are the steps you can follow to remove the mold.
Spray on the surface
You can spray the Lysol all over the area with the mold, and you may want to cover the surrounding area. That way, you can tackle any mold spores that aren’t visible yet.
Lysol is especially useful for mold in your bathroom, whether it’s on your shower head or the tile. But you can also use the cleaner in other areas of your house.
Either way, make sure you spray a generous amount of the cleaner on the surface or object. That way, the bleach will be able to remove the mold.
Let it sit
You may wonder, does Lysol kill mold instantly? Unfortunately, you will need to give Lysol about 10 minutes to work.
If the object or surface is in a common area, be sure to keep kids and pets away. You may want to consider moving an object with mold outside to clean it.
Another option is to use Lysol when your kids are at school. Then, you can clean your home well and not worry about safety.
Clean the object or surface
After 10 minutes or a little longer, grab a paper towel or sponge. Use whichever item you select to wipe the Lysol off the surface.
You should be able to see a clean surface from the beginning. If there’s still some mold left, consider doing another round of cleaning so that the remaining spores don’t duplicate.
While and after you clean the surface, make sure to open a window to help ventilate the space. That way, the bleach won’t be as overwhelming.
How Long Does It Take Lysol to Kill Mold?
It can take Lysol anywhere from 10 minutes to half an hour to kill the mold. You’ll need to have a safe, clear space around the mold while you clean it so that you and others will stay safe.
Make sure no one interferes with the surface while you let the Lysol sit on it. When the time is up, you can check on the results.
Can You Use Lysol in a Carpet Cleaner to Kill Mold?
Along with the bathroom, your home’s carpeting is another great place to use Lysol to kill mold. Consider how you can create a homemade carpet cleaner.
Add hot water to a spray bottle.
Mix in one cup of Lysol.
Spray the mixture on the area with mold.
Let it sit for 25 minutes.
Use a vacuum to clean everything up.
As with tile and other surfaces, you may not always be able to remove mold from carpeting. However, Lysol can be an excellent option if you want to try.
What is the mixture for Lysol to kill mold in the carpet?
As stated above, start with one cup, but the water measurement isn’t exact, so you may need to experiment.
If it doesn’t work on the first round, you may need to add more Lysol. On the other hand, don’t add too much, or you could end up bleaching the carpet.
Other Ways to Remove Mold
Along with the question, “Does Lysol kill mold?” you may wonder what else you can use. While Lysol can be an excellent choice, it may not always work.
And you might not have the Mold and Mildew Remover on hand. In that case, you can try a few other products and homemade mixtures.
Clorox
Clorox is a competitor of Lysol, so it makes sense you can use it as well. If you need to remove mold quickly, such as before going to work, you may want to use Clorox.
Using Clorox to remove mold only takes about four minutes before you can clean it off. On the other hand, you’ll need about 10 minutes when using Lysol.
Some Lysol products don’t contain bleach. While that may make them less effective, they’re also safer to use without gloves and on softer surfaces, like carpet.
Both brands can work well, so consider what you have on hand. Then, you can remove the mold before it gets worse.
Baking soda and vinegar
If you want to use something homemade, you can combine baking soda with vinegar. Both ingredients can keep mold from developing quickly, and they can get rid of any smells.
Unfortunately, this method takes a lot of time, but it can clean mold off your carpet. You will need to pour vinegar over the area and let it soak for an hour.
Then, you should use hot water to rinse the spot. After that, combine baking soda and water so that you have a thick paste.
You will need to put that on the area with mold and let it sit for an hour. Finally, you can use a vacuum to suck up the paste and, hopefully, the mold.
Water and dish detergent
If you have a mild case of mold, you can use dish detergent and plain water. Pour hot water into a bucket or container that you can take to the carpet or other surface.
Next, add a tablespoon of the dish detergent. Adding the soap to the water can keep you from having too many bubbles.
Use a shop vac or rug shampoo machine to spread the mixture over the carpet. This should only take a few minutes to work. If you need to clean a different surface, you can do so with a spray bottle, and you can let it sit before removing the mold.
How to Prevent Mold
Does Lysol kill mold? Sure, it can kill mold. But do you really want to deal with a cycle of mold growth and killing it?
Fortunately, you can take steps to keep mold from growing back in the same place or a new spot. Then, you won’t have to worry about cleaning it each time.
Keep it dry
Mold growth occurs more often in wet environments. If you can keep your home dry, you can significantly reduce the chances of mold.
Make sure you dry off any surface after a spill. Close all of your windows before it rains. And try not to take water or other liquids into rooms without ventilation.
Whenever you shower, turn on a fan in the bathroom to soak up the steam. While you do need some moisture, you should manage the levels. Cleaning and drying surfaces is a good way to do that.
Circulate fresh air
Another great way to help with the moisture is to let fresh air come into your home. Letting in the fresh air can have a couple of benefits.
Help dry out damp areas
Provide more oxygen
Of course, drying wet areas will help with mold growth. However, getting more oxygen can help you breathe better and feel better. You don’t need to open the windows for more than a few minutes a day to see results.
Maintain humidity levels
Opening your windows may also help you regulate your home’s humidity levels. Of course, having too much humidity makes it easier for mold to grow.
You can control the humidity levels by having an HVAC professional install fans in the attic, bathroom, and other rooms. If you already have fans, start to use them.
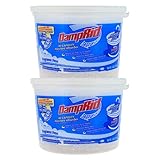
Another option to consider is using dehumidifiers that you plug into a wall outlet. That way, you can remove them when your home gets too dry.
DampRid Hi-Capacity Moisture Absorber Bucket attracts and traps excess moisture, eliminating musty odors from damp…
The hi-capacity design features a unique Moisture Lock spill resistor technology with a sealed safety cover for a mess…
Ideal for larger spaces like basements, garages, where stagnant air and excess moisture is a problem.
Clean regularly
You may not always be able to avoid mold growth. But cleaning your home regularly will allow you to catch mold more quickly.
If you can catch mold in its early stages, it will be much easier to remove. Then, you won’t have to replace the carpet or any other part of your home.
Grow plants indoors
If you like to grow plants, look for some that can live indoors. The plants can get rid of volatile organic compounds (VOCs), making it easier for mold to grow.
Plus, plants can improve your indoor air quality overall. If mold is annoying and affects your health, adding plants throughout the home may help.
Keeping Clean
If you have signs of mold, you may wonder, “Does Lysol kill mold?” Lysol is easy to find, and you may already have it in your home.
While it can be an effective option, you need to use it properly. And if it doesn’t work, you can consider some alternatives. Then, you can get rid of the mold and prevent future growth.
Last update on 2021-05-28 at 10:52 / Affiliate links / Images from Amazon Product Advertising API
There are some peculiar things going on with your water heater and you’re questioning what’s going on.
We know that you’re not waking up in the morning with the first thought on your mind being your water heater. If we’re being realistic, you might not think about your water heater at all in a day.
We want to put it at the forefront of your mind today, though. Most of the problems with your water heater start long before you notice them. Today, we’re going to hip you to some signs that your water heater in Glendale, AZ might give you trouble.
Troubling Signs for Your Water Heater
Here are some signs that your water heater is about to give you a headache. If you notice any of this going on, it’s important to schedule an appointment with our team members.
You Don’t Have Enough Hot Water
You run out of hot water every time you need it. It’s as if your water heater is quitting halfway through the job. This points to a severe capacity issue. This will worsen until you barely have any hot water in your home. We can fix this for you.
Leaks
You hear a sizzling sound from your water heater because there’s hot water leaking out of the system. A leaking water heater is a problem because it’s going to be hard for you to get comfortable water temperatures. It’s also going to be a problem because of potential water damage. Don’t risk serious home damage or internal failure with your water heater due to leaks.
Water Temperature Is Inconsistent
Do you stand in the shower and get scorched out of nowhere by the temperature of the water? What about the opposite: you’re lathering up under a warm stream of water it suddenly goes cold? Both are extreme issues that point to a water heater problem. We’ll look at your thermostat and make sure it’s set up to work well. Then we’ll assess your capacity needs.
You Hear Odd Sounds
The funny thing about water heaters is that they can start to make noise when they’re having trouble. It’s as if they’re literally trying to reach out and speak to you. Watch out for some unusual noises like cracking, rumbling, screeching, banging, and more.
Odd sounds are bad no matter what they are. You should report this problem to a professional no matter what it is. We can guarantee this problem will snowball into a bigger issue and we’d like to prevent that.
Reduced Water Flow
When you hop into the shower and lather up, you notice that the shower doesn’t really act like a shower anymore. It feels more like a watering can is being poured over the top of your head.
Reduced water flow is a clear sign that the water heater is struggling capacity-wise. The water heater may have a build-up of sediment at the bottom. If this gets extreme, you’ll notice that your water heater’s capacity is greatly reduced. We’re prepared to help correct this.
Trust The Trusted Plumber. Schedule an appointment with us today for your water heater repair needs.
Ottawa homes are as unique as the families that reside within them, but most Ottawa homes are going to experience the same plumbing issues. Clogged drains are incredibly common, and there are several ways clogs can happen. Blockages aren’t always serious, but sometimes you are going to need to call in a professional plumber for help.
Below, we have a list of reasons why Ottawa resident’s drains get clogged, followed with ways to solve those clogs. Learning how to prevent clogs or how to fix them easily can help save you time and money.
Common Reasons Ottawa Drains Get Clogged and Their Solutions
Clogs will often consist of a number of things instead of one problem, but most often consist of the following substances:
Now let’s go into detail about these things that clogs drains and ways to solve the issue.
1. Soap
The residue from soap, fittingly called “soap scum,” will accumulate in the shower, bathroom, and laundry drains. The residue will constrict the diameter of the pipeline, making it more difficult for waste water to pass through. Then, other materials stick to the soap scum, clogging the pipe further.
To stop soap scum, try swapping to soap-free solutions. You can also use pressure cleaning to remove built up soap from pipes.
2. Oil, Grease, and Fat
Like soap scum, a mixture of grease, oil, and fat pose a serious threat to the plumbing system. Simply running hot water while pouring grease down the kitchen sink isn’t going to help. Over time, the oils and fats will solidify along the pipe, clogging it.
Throw away any and all grease. You can do this by wiping up small amounts with a paper towel. Larger amounts should be poured into a jar or can then tossed into the garbage.
3. Hair
Whether it’s human hair, animal fur, or even something stringy, like dental floss, the risk for clogging is the same. Stringy things can knot up and combine with other substances, such as oils, grease, and soup. Stubborn clogs often contain dense tangles of hair, especially in sinks, tubs, and sinks.
To prevent hair from clogging drains, make sure you are using a drain guard. This will stop hair from going down the drain. Clean it regularly.
If you believe hair is congesting the drain, a plunger works well. You can also try a mixture of vinegar and baking soda to clean scum from the drain. If the clog is stubborn, get a plumber’s snake to dislodge it.
4. Dirt
Many homeowners think that they can wash dirt down the drain without any problems. The bad news is that dirt builds up, especially when mixed with soap scum, grease, oil, and food particles.
Try to rinse mud and dirt from your skin with a hose outside or brush it off into a garbage bin before washing your hands.
When a clog is made of dirt and other substances, the best solution is using an auger, drain cleaner, or plunging. Each one is effective.
5. Wipes and Diapers
The only things that should ever be flushed down a toilet is human waste and toilet paper. Anything else, such as wipes and baby diapers, are far too dense and will cause blockages. Even quilted toilet paper will cause clogs when used excessively.
Dispose of wipes and diapers in the trash can. If you accidentally flush either of these items, you may have to plunge it loose.
6. Mineral Build-Up
Is the water hard where you live? Then the possibility of your drains getting clogged by excess minerals is high. Those built up minerals will congest the pipes, similar to soap scum and oils.
The best way to circumvent mineral build-up is to install a water softener. If build-up has already set in, a professional plumber will be able to descale them.
7. Food Waste
For those with garbage disposals installed in the kitchen sink, food waste clogs are all the more prevalent. You wouldn’t think so, but the reality is that people overestimated the power of the garburator. Bones, coffee grounds, and tea leaves should never be ground up with the garbage disposal, since they don’t break down well.
Call in a professional to detach the garbage disposal, inspect and clean it regularly. Also, try to avoid putting too much food waste down the drain, even if you have a powerful garbage disposal.
8. Feminine Products
Feminine hygiene products are far too thick and absorbent to go down a drain. They aren’t made to break down like toilet paper, either. Tampons are often the culprit, because they can swell beyond their initial size. Never flush them.
Clogs caused by flushed feminine products can sometimes be removed by a plunger or auger, but the thicker the clog, the more necessary a call to the plumber becomes.
9. Tree Roots
One tiny crack with running water is going to draw in tree roots like moths to light. Once the roots get inside the pipe, they will grow, becoming more and more of an obstruction.
There is little you can do to prevent trees from seeking out water. The best prevention and solution is to call in a professional. Have the plumber survey your pipes for blockages. Should they find one, they will be able to fix the problem, though that sometimes means expensive excavation.
10. Accidentally Flushed Objects
Small objects sometimes accidentally fall into the toilet bowl or down the sink when the guard isn’t in place, especially if we’re talking about children’s toys. Those small objects could get stuck in the line and cause clogging.
Try to educate your children not to play near the sink and toilet. Also, try not to flush anything that isn’t human waste or toilet paper. Protect any openings to the drain with guards and plugs.
Should a small object get lodged in the drain pipe, you may need to call in a professional. They will have the right tools to dislodge the item. Plunging may not be effective.
Final Thoughts on Clogged Drains
Clogged drains are incredibly common, but they can also be easily fixed. Knowing the causes can help you keep an eye out for problems before they worsen. As soon as you hear gurgling or find that there is some backup, it is time to try some of the solutions we have listed. If most fixtures in your house are acting up, however, that could mean the problem has already outgrown plunging. You will need a professional plumber that offers drain services to help.
West Park, FL, May 21, 2021 – A to Z Statewide Plumbing is proud to announce that it has earned the home service industry’s coveted Angi Super Service Award (SSA). This award honors service professionals who have maintained exceptional service ratings and reviews on Angi in 2020.
“Despite the enormous challenges facing our service pros throughout 2020, our Angi Super Service Award winners continued to provide exceptional customer service,” said Founder Angie Hicks. “These outstanding businesses have helped homeowners not only maintain their homes, but also evolve them into safe and comfortable spaces that can handle all the mess of life, work, school and entertainment under one roof. Our homeowners’ consistent positive reviews make it clear: these are the best pros in our network.”
Angi Super Service Award 2020 winners have met strict eligibility requirements, which include maintaining an exceptional rating in overall grade, recent grade and review period grade. The SSA winners must be in good standing with Angi and undergo additional screening.
“The staff at A to Z Statewide Plumbing is committed to excellence in customer service even during pandemic stated office manager: – Aaron Atkins.
A to Z Statewide Plumbing has been listed on Angi since 2007. This is the seventh year A to Z Statewide Plumbing has received this honor.
Service company ratings are updated continually on Angi as new, verified consumer reviews are submitted. Companies are rated in multiple fields ranging from price to professionalism to punctuality.
For over two decades Angi has been a trusted name for connecting consumers to top-rated service professionals. Angi provides unique tools and support designed to improve the local service experience for both consumers and service professionals.
###
In business since 1981, A to Z Statewide Plumbing knows A to Z about plumbing and is dedicated to providing their customers with quality service at competitive prices. Our highly trained technicians will service all of your plumbing and septic system needs backed by our unparalleled guarantee.
A to Z Statewide Plumbing provides service to residences, high-rise condominiums, restaurants, and institutional buildings – from simply replacing a faucet washer to re-piping an entire building’s water supply system. Our skilled plumbers are mobilized in fully-equipped service vehicles to ensure convenience and reduce wasted time.
Many people can’t live without their dishwashers. They run them every day so they don’t have to spend time at the end of a long day elbow deep in sudsy water. Just like with any appliance, something can go awry with your dishwasher.
If your dishwasher drain in Toronto isn’t draining all the way, it can result in time-consuming and costly repairs. You can be without your dishwasher for days. However, a dishwasher not draining properly is a common problem plumber runs into and something you can attempt to remedy before calling in a professional.
In this guide, we’ll go over the various reasons why your dishwasher isn’t draining and ways you can fix the problem.
Your Garbage Disposal Is Clogged
A garbage disposal mounts underneath your sink. It’s designed to gather solid food waste into its grinding chamber. When the disposal is turned on, the spinning disc turns quickly, forcing the food against the outer wall.
The food is then pulverized into small pieces. Those bits get flushed with water through small holes in the chamber wall.
Your dishwasher has a drain hose, and it empties into the drain of your garbage disposal. If the garbage disposal contains food that hasn’t been ground up, it can result in the dishwasher not draining properly. Run your garbage disposal to see if that helps your dishwasher drain again.
A good habit to implement is leaving your water on and letting the garbage disposal run 10 to 15 seconds after all the food has rinsed out. This will help clear out any remaining food particles in the P-trap.
Garbage disposals are good for clearing out food waste, but there are some things you shouldn’t put down your garbage disposal. This includes:
Potato peels
Fibrous or tough food scraps
Oil
Grease
Pits
Hard objects
If your dishwasher won’t drain even after you run your garbage disposal, there can be another issue.
Check Your Sink’s Air Gap
A sink or dishwasher air gap is an important part of your kitchen’s plumbing. It’s a small cylinder that’s close to your kitchen sink’s faucet, and it has a few holes in it. Dirty water sometimes drains back into your dishwasher, and the air gap prevents that.
As your dishwasher pumps out dirty water, it goes through a drain line and then into the dishwasher air gap. It protects you and anyone in your home from the contaminated water inside of your dishwasher. You don’t want the dirty water mixing with the clean water.
Sometime’s air gaps aren’t on the counter or even in your house at all. There may be a high loop underneath your sink that connects through a garbage disposal. It serves the same purpose as an air gap.
While the air gap is supposed to flush out dirty water, it can sometimes get clogged with food particles and other debris. This can result in your dishwasher not draining properly.
To check if this is the cause of your problems, remove it by twisting the sink air gap counterclockwise. Check it for any debris and remove it if necessary. You can clean it with a stiff brush. After you do that, run your dishwasher and see if that’s fixed the issue.
Clean up Detergent
Dishwasher detergent has to clean a lot. It has to remove baked or dried foods from dishes while leaving your glasses film and spot-free. Finding a quality detergent that does all of those things can be difficult.
You also have to use high-quality detergents in your dishwasher. Low-quality ones can result in clogs in your dishwasher drain.
They need to cut through all of the leftover food particles without producing any suds. Using regular dishwashing liquid can create so many suds that your dishwasher doesn’t drain properly.
Thinking about substituting laundry detergent when you’re out of dishwasher detergent? That can cause the same issue.
If your dishwasher is clogged due to detergent, follow these steps to clean it out:
Put towels on the ground around the base of your dishwasher
Remove the bottom dish tray
Scoop out the dirty water with a plastic cup and dump it into a bucket
Sop up the remaining water with towels
Run your dishwasher again with the correct detergent
All detergents aren’t created equal. If you’re in a bind and need to run your dishwasher, don’t use anything else. You’ll end up causing more issues and have to clean up a big mess.
Clean Out the Drain Basket
On the bottom of the inside of your dishwasher is a drain basket. The cover of it looks like a basket that’s upside down. It’s usually held in its place with a few screws or it snaps off.
If the bottom of your dishwasher doesn’t look like that, look at your owner’s manual. You’ll want to make sure you access the drain basket the right way without damaging anything.
To clean it out, you’ll start off by removing the cover. You can check for any food or debris buildup in the basket underneath. You can use a spoon or your hand to remove it.
Put the cover back on and run your dishwasher once it’s cleaned out. If you notice there’s a lot of food in the basket, pre-rinse your dishes more before you put them in your dishwasher. Some modern dishwashers are better equipped to pulverize food into smaller pieces, but not all of them.
There May Be Issues With Your Drain Hose
The drain hose is the ribbed, lightweight hose that connects the drain pump to the air gap or garbage disposal. If there are issues with it, it can result in your dishwasher struggling to properly drain.
Check It for Kinks
If the drain hose is kinked, it won’t properly drain. Something heavy or large could’ve been shoved under the sink, getting in the way of the hose. Look under your sink to see if that’s the problem.
If you do find that it is kinked, attempt to straighten it out yourself. A common problem is that once a drain hose is kinked, it’ll kink again in the same spot. You may consider replacing the hose if that continues to happen.
Replace Your Drain Hose
Replacing your dishwasher hose isn’t a difficult thing to fix yourself, but you can call residential plumbing services in Toronto if you’re not comfortable. To do it yourself, you can expect to do the following steps:
Unplug your dishwasher
Slide it out
Disconnect the old drain hose from the pump and garbage disposal/air gap
Attach the new drain hose the same way
Review the owner’s manual to make sure you bought the right one
A qualified plumbing service can replace your drain hose for you at an affordable rate and in no time at all. Don’t hesitate to contact us if you have any questions.
Check for Clogs
The dishwasher’s drain hose can become clogged with debris or food sludge. To thoroughly check it for a clog, you’ll have to remove the lower front panel of your dishwasher. Then, you’ll need to find the place where the hose attaches to the dishwasher’s drain pump.
The next step is to unplug the dishwasher. Put towels underneath the dishwasher before removing the lower front panel. You might have to take out a few screws, but most front panels snap off.
Disconnect the drain hose from the pump. You can review the proper way to do that in your owner’s manual.
Blow through the hose to check for clogs. If no air passes through, you likely have a clog. If the clog is close to the end of the drain hose, you can try to take it out with a thin object like a pencil.
If it’s not at that end, you’ll then have to remove the other side of the hose to check that end. The clog may be stuck deeper into the hose. At that point, you’d likely have to replace the entire hose.
Don’t try to clean it out with a plumber’s snake. Dishwasher hoses can be punctured.
Call a Licensed Plumber
Your dishwasher failing to drain properly can be a result of one of the above issues and fixed yourself. If you’ve tried some of the above options and it still isn’t draining, it’s time to call a plumber. It could be a result of a faulty timer, motherboard, or pump.
Contact Anta Plumbing and Drain in Toronto
While there may be some plumbing problems you can remedy on your own, don’t hesitate to contact a residential plumbing service. Figuring out why your dishwasher drain in Toronto isn’t draining can be a difficult task, especially if you’re not well versed in your kitchen’s plumbing.
Anta Plumbing and Drain is here to help. We can assist you with your plumbing emergencies 24 hours a day, seven days a week. Contact us today.
We are a participant in the Amazon Services LLC Associates Program, an affiliate advertising program designed to provide a means for us to earn fees by linking to Amazon.com and affiliated sites.
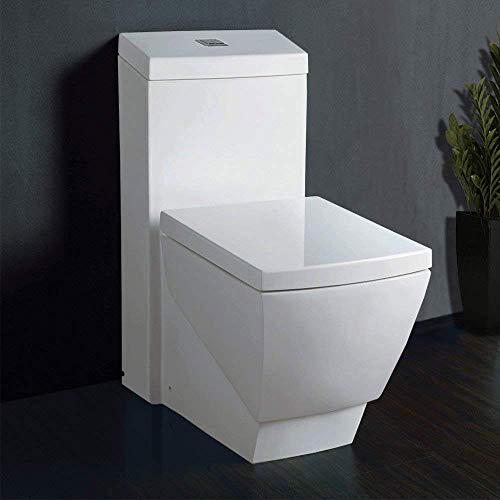
Do you feel like you have to do contortions to sit on your bathroom toilet? Perhaps you need to switch to a corner toilet for your small bathroom.
Corner toilets are what they sound like because they fit right in the corner. You can use them to save space so that you can be comfortable in the room. That way, you can do your business without stress.
The Best Corner Toilets
Finding the best corner toilet for your small bathroom can be difficult. While there are many toilets on the market, many of them are too big for your space.
Luckily, there are a few options you can choose from when toilet shopping. Here are a few toilets you can put in a corner.
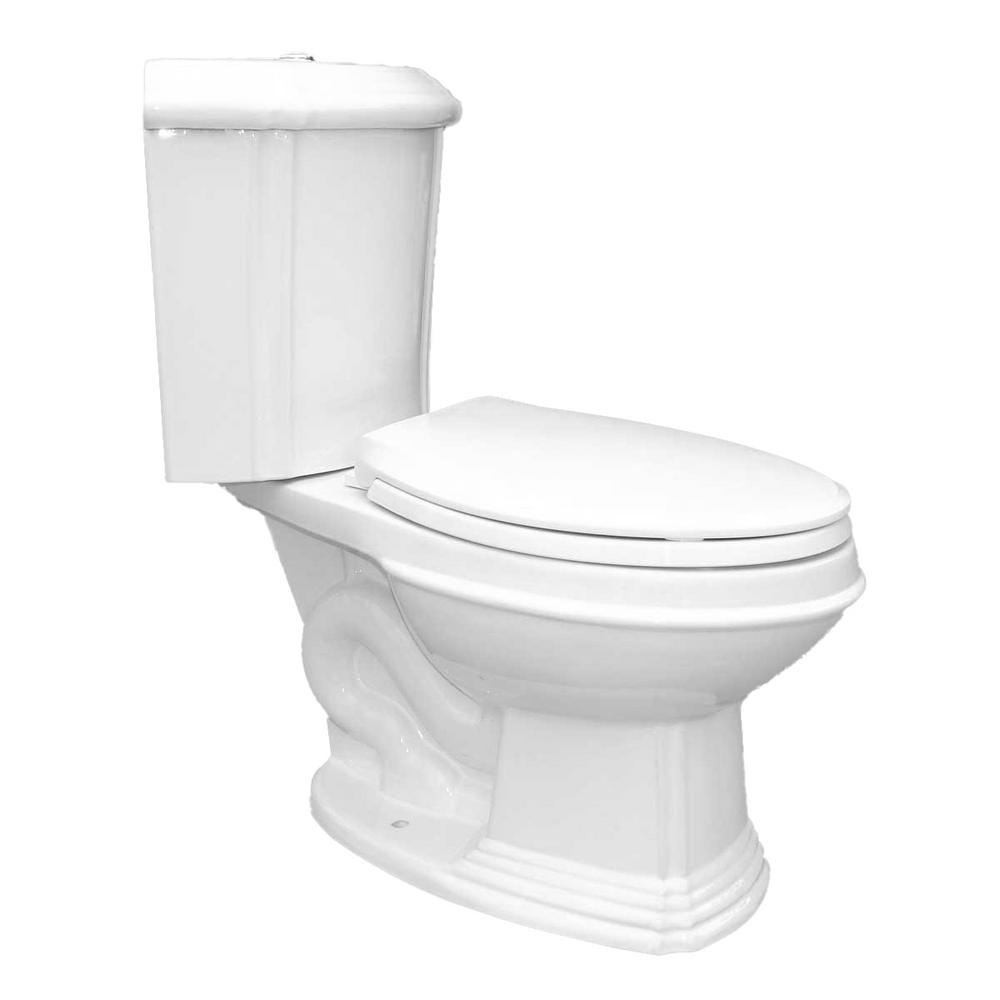
Sheffield Corner 2-Piece
The Sheffield Corner 2-Piece toilet, available from The Home Depot, features an elongated bowl, so it’s still comfortable to use. However, the triangular tank can fit in the corner to help you save space in your bathroom.
It has a special finish that makes it resistant to stains and scratches. The color can match your existing bathroom fixtures, so you don’t have to replace everything. And you can choose between two flush options.
A lighter flush uses 0.8 gallons, and a stronger flush uses 1.6 gallons of water. With the lighter flush, you can save thousands of gallons each year.
The seat height is 16 inches, and it requires 12 inches of rough-in space. Unfortunately, you’ll need to buy floor bolts and bolt covers separately.
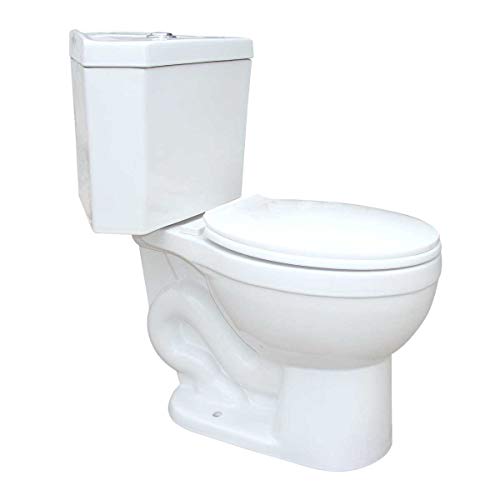
Troyt Compact Corner Bathroom Toilet
Another great corner toilet comes from Troyt and is available on Amazon. The Compact Corner Bathroom Toilet is a two-piece toilet with a round toilet bowl. Its seat height is just under 15 inches.
This toilet complies with Watersense and ANSI, and it uses a dual flush system. You can use 0.8 or 1.6 gallons of water with each flush, which is great if you want to save water.
The triangular tank fits perfectly in a corner, and you’ll need 12 inches of rough-in space. Once you install it, the heavy-duty porcelain can resist scratches and stains.
It’s a great toilet for small bathrooms, and it only needs 30 inches from the corner to fit. However, you will need to supply your own bolts, bolt covers, and wax rings.
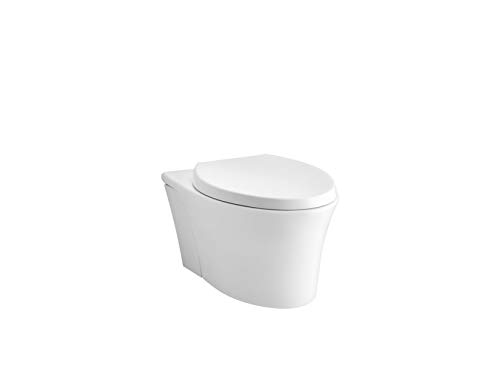
Kohler Veil Wall-Hung Toilet Bowl
If you don’t like the look of a corner toilet tank, consider the Kohler Veil wall-hung toilet bowl. This toilet is one piece, and it hangs right on the wall to save even more space than some other models.
You can use the toilet with an in-wall tank system, so it can work as well as any other toilet. And the mounting hardware isn’t visible after installation, so it looks clean and polished.
It features a compact, longer toilet bowl that takes up the same space as a rounder bowl. The seat is comfortable to use, and you can choose the best installation height for you.
Like other corner toilets, this one uses a dual flush, with 0.8 and 1.6-gallon flushes available. That way, you can save water, but the toilet will still be efficient.
WoodBridge Dual Flush Toilet
The WoodBridge Dual Flush Toilet is more of a traditional toilet, but it does have an angular design. That design makes it a good option for a medium-sized bathroom where you still want to save space.
It measures 28 inches deep, so it’s smaller than most toilets. You can put it near a corner so that you still have legroom on each side, but it isn’t as easy to sit on as a corner toilet.
Still, you can choose between flushing 1 and 1.6 gallons of water at a time. The toilet works well for both liquids and solids. It’s easy to clean and features a modern design.
This toilet has a quiet flush, but it’s still powerful enough for both flush modes. You get everything you need in the box so that you can install the toilet easily.
Horow Small Toilet
Another traditional toilet to consider for use in a corner is the Horow Small Toilet. It’s a one-piece toilet, and it’s smaller and more compact than other toilets.
That makes it great for smaller bathrooms, even though it doesn’t fit right into the corner. Like other toilets, this one uses a dual flush system, and the two options are 0.8 and 1.28 gallons.
It can flush well without clogging or making a ton of noise. And the white color means the toilet can look good in any bathroom, even with your existing fixtures.
If you have a window ledge in the bathroom and can install the toilet near it, you can save even more space. But the window ledge still offers some legroom on both sides.
How to Choose a Corner Toilet
Fortunately, choosing a corner toilet is similar to selecting a regular one. But there are some special considerations you should make so that you can choose a toilet that fits your bathroom and needs.
Here are a few factors to think about when comparing corner toilets.
Bathroom size
First, you need to figure out how big your overall bathroom is. It’s also important to look at the shape of the bathroom, especially if it’s not a square or rectangle.
If the bathroom is really small or has an odd shape, you may want to look for a smaller corner toilet. But if the bathroom is a bit bigger, you’ll have more choices for toilets.
Another thing to consider about the size is how much space you have when you open the door. That way, you can make sure the toilet won’t interfere with your ability to get in and out.
Bathroom design
Similarly to the size, you should consider where in the bathroom you will need to install the toilet. Think about where the drain hole is and if you can realistically put the toilet there.
Consider if you’ll have enough space for a bigger toilet tank or if you may need a tankless option. Then, you can still fit the toilet and sit comfortably on it.
You might also need to consider the angles of the corners. If a corner isn’t exactly 90 degrees, installing a corner tank may not be the best option.
Energy efficiency
No matter what toilet you decide to use, you need to make sure that it meets energy efficiency standards. In the United States, federal standards require using no more than 1.6 gallons of water per flush.
Fortunately, most corner toilets fit these requirements. However, you may also want to check with your state or local government.
Some areas may have lower maximums. If that’s the case, you’ll need to find a corner toilet that doesn’t exceed that restriction.
Either way, looking for a more efficient toilet is a good thing. While it might be hard to find one that uses less than 1.6 gallons of water, doing so can help you save a lot of water each year.
Flush type
You may also want to decide between single and dual flush toilets. Both offer pros and cons, so consider which you prefer.
For example, a single flush toilet is easy to use, but a dual flush toilet lets you use less water when you don’t need it. That way, you can choose the best option for each flush.
Many corner toilets offer dual flush systems, so you can save water. But some people might want a single flush toilet. Consider what you’re used to using to help make this decision.
Plumbing location
When shopping for corner toilets, consider if getting one is practical. Determine where the plumbing is and where in the bathroom you can install a toilet.
This is especially important when you have a bathroom that used to be a bedroom or closet. The space may not have the plumbing you need in the spot you want.
While you can hire a plumber to help, determine if that’s worth it. If not, you may need to adjust where you put the toilet. You may need an even smaller option so that everything fits in the bathroom.
Budget
Of course, you should also think about how much you can afford to spend on a toilet. Corner toilets can vary in cost, so you can find some that are more affordable.
However, you need to have a budget in mind for this project. That way, you can limit your search to corner toilets you can afford.
You can also use a budget to determine which features are the most important, such as the size or shape. If you have a smaller budget, you may need to compromise, and you can use your preferences to help.
Other Ways to Save Space in the Bathroom
If you can’t find a corner toilet that you like or that suits your needs, you can still save space in a small bathroom. Whether you’re redoing a full or half bath, there are a few options to consider.
You can use one or more of these options, either instead of a corner toilet or along with one. That way, you can make the most of the smallest bathroom you have.
Corner shower
If you’re trying to save space in a small full bath, consider installing a corner shower. The shower should have space for you to stand up and for the water to run out of the showerhead.
However, you don’t need much more space than that. Switching from a bigger shower to a corner model can free up a lot of space for a big toilet or general legroom.
As long as your existing shower has the head near a corner, the switch can work. You may need to hire a professional to help install the shower so that it will work well and be easy to use.
Corner sink
In a full or half bath, you can use a corner sink to save space. The sink works similarly to a corner toilet in that it has a triangular design to fit against two walls.
You can still use the sink as normal, so you can wash your hands or face in the bathroom. Then, you don’t have to give up on a bigger toilet.
If you want to maximize space in a bathroom but can’t find a good small toilet, the sink is a great alternative. Most sinks don’t need a ton of space, so you can make good use of the bathroom.
Smaller sink
Whether you get a corner sink or not, switching to a smaller sink is easy enough. In most cases, you don’t need a ton of counter space on the side of your bathroom sink.
This is a great switch for a half bath or powder room since you’ll only need space for soap. But you can also make the swap in a full bath. You can get some shelves to store your toiletries without wasting space.
It can sit along any wall, and the sink bowl doesn’t have to be too small to be usable.
Sliding door
If your bathroom is along the side of a hallway, you can look into getting a sliding door. When you open the door, it will move to the side, which is why you need space on either side.
However, you don’t need space within the bathroom to use this type of door. You can install a lock on it like any other door, so you can maintain your privacy.
Then, you’ll be able to use every inch of the bathroom for your toilet, sink, and shower.
Wall mirror
Adding a mirror to your bathroom won’t save space, but it can make the room feel bigger. If you use a corner toilet, sink, and shower a mirror is great.
Not only can it add some space, or make it feel like that, but you can use the mirror when you get ready. That way, you can make sure you look and feel good before starting your day.
When You Gotta Go
If you struggle to move in and out of your bathroom, consider switching to a corner toilet. That way, you can save space without sacrificing comfort.
Be sure to consider your bathroom size and design so that you can choose the best toilet for you. And if the room is still too small, you can add a corner sink or shower to help.
Last update on 2021-05-18 at 16:23 / Affiliate links / Images from Amazon Product Advertising API
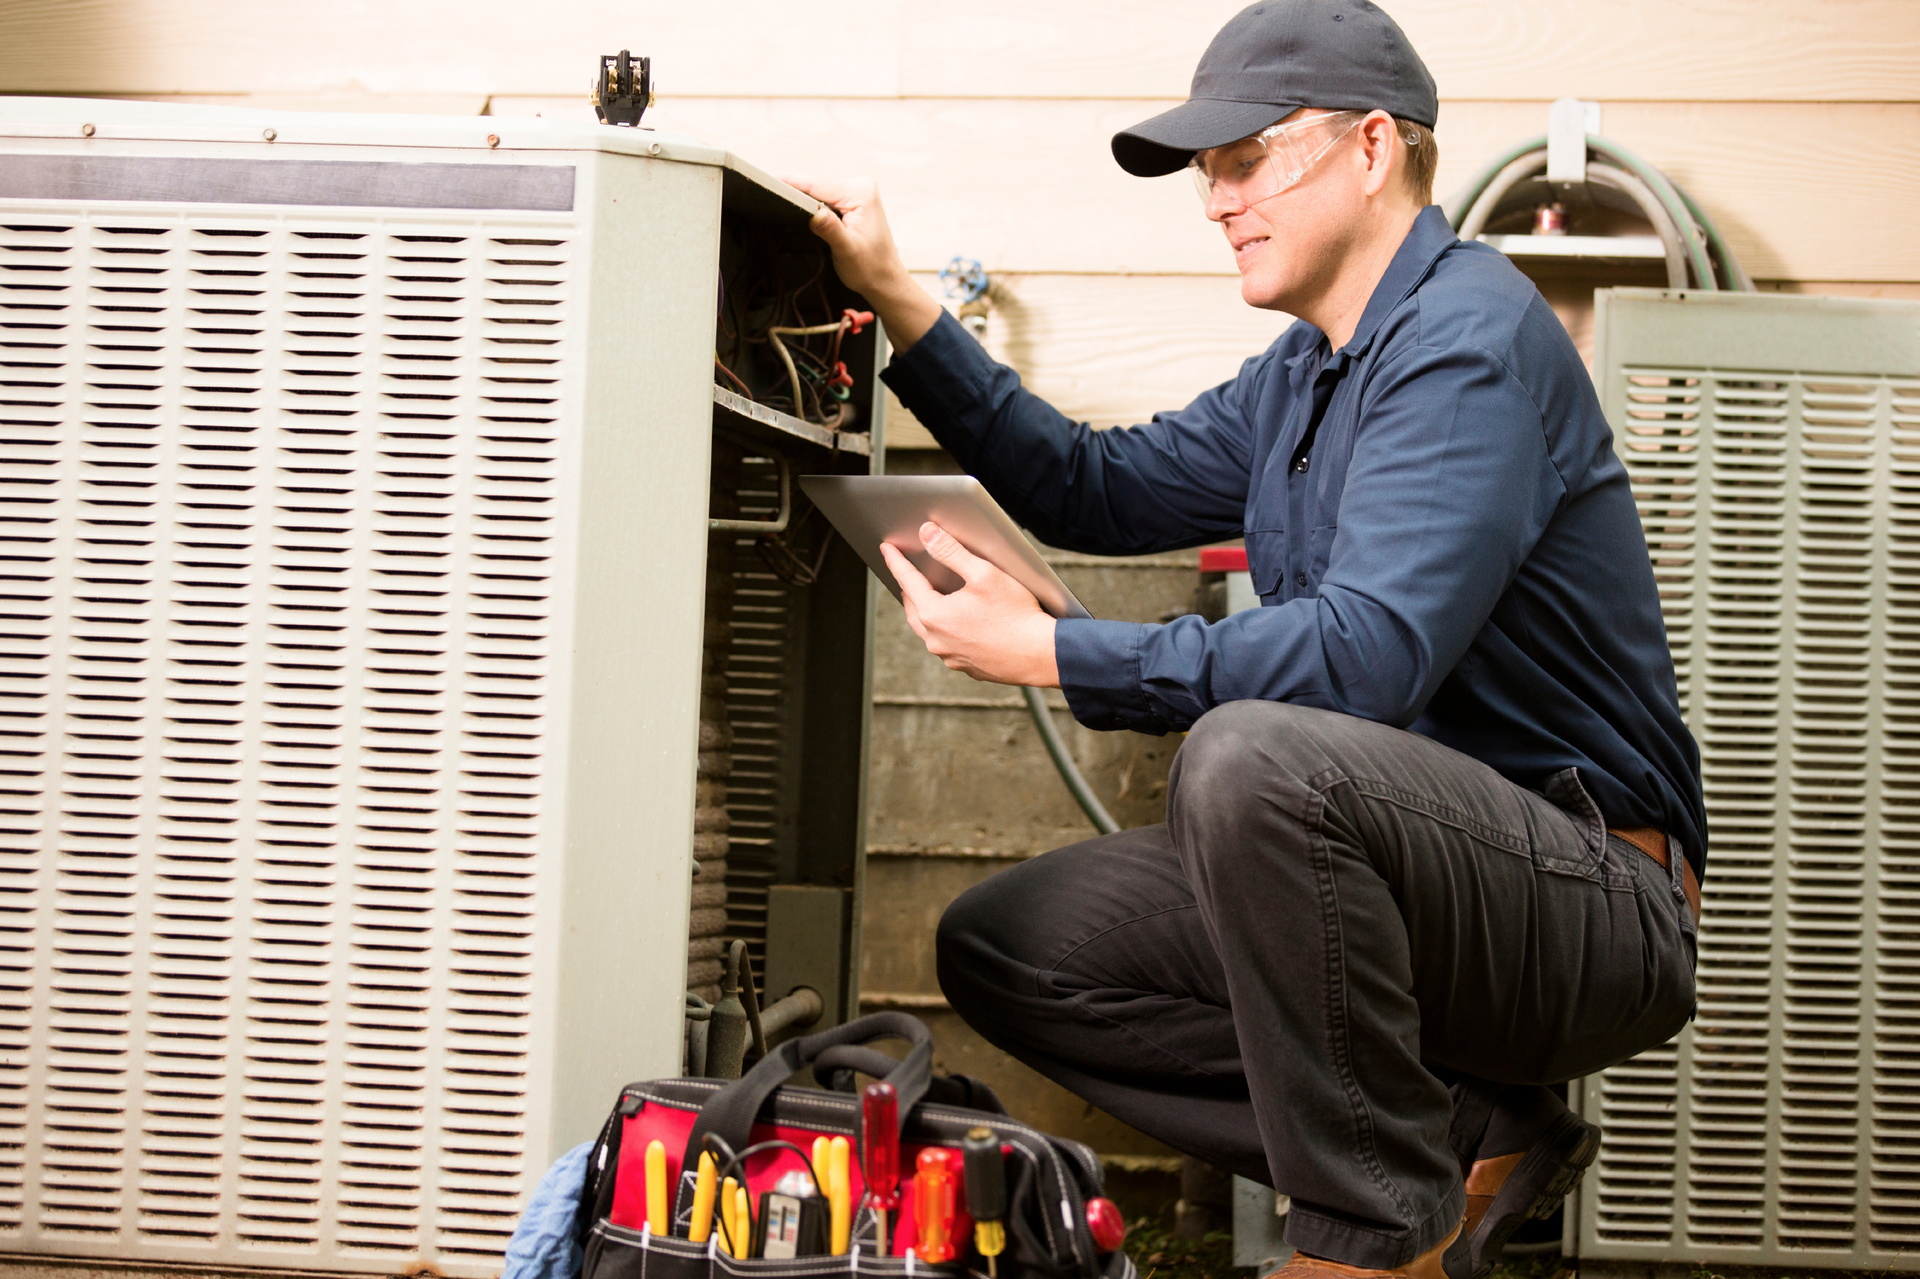
We’ve all been there. It’s late at night, your air conditioner is starting to freak out, and you’re frantically searching online for the root of the problem. You’re breezing through blog post after blog post, noticing that things are just stressing you out even more and you don’t know what’s a rare issue, or what’s a more common one that you’re likely experiencing. We don’t envy you.
However, we do want to help you. It’s very likely that your air conditioner is suffering from one of the most common problems we see that we’ve listed below. Sure, your system could be in a unique position where it’s suffering from a rare issue, but that will still require a professional to address it anyways. So, when it comes to air conditioning in Roseland, NJ, you’re better off calling for professional help when you can.
In the meantime, here are some of the common problems that we see in air conditioners.
A Refrigerant Leak
Refrigerant leaks can be apparent through a lot of problems. The reason why we’re mentioning it is because it shows up in many forms but is always a problem that requires professional help. Your AC could be running poorly, costing more, and making strange noises that all signal to it leaking refrigerant. There’s a very high chance that this is the culprit behind your dissatisfaction with your AC.
Clogged Air Filter
Your air filter needs to be changed out every 1-3 months depending on how heavily you use your AC. The longer you wait between air filter changes, the more likely you are to experience problems that come from this. Your system could start overheating or consuming more energy as it struggles to get fresh air from the intake duct.
Electrical Problem
Our air conditioners consume a lot of energy, which is why they need to be appropriately set up to our home electrical systems. If you’re noticing that the system keeps shutting off, it’s making a buzzing noise, or it’s constantly tripping the circuits in your home, then you need to call for professional help. You’re likely dealing with an electrical issue.
Efficiency Issues
Your AC should be able to cool your home at a reasonable cost. If you’re seeing an uptick in your monthly energy bills, then there could be something wrong that needs to be repaired. Don’t let this high cost for comfort be the new normal!
Lukewarm Air
On a hot day, if you’re putting your hand near the air vents and only feeling lukewarm or even warm air, then something is clearly wrong. A variety of problems could be causing this, but all of these issues need to be addressed by a professional.
Short Cycling
Short cycling is when your air conditioner runs in short, frequent cycles that cause it to inadequately cool your home and suck up too much energy. If you’re noticing this, then you need to call for help. This is a serious problem that could lead to an early breakdown if you’re not careful.
Complete Breakdown
Lastly, if your air conditioner just isn’t working at all, then it needs to be fixed. There is a long list of problems that could have caused this, but we promise we’ll locate the exact issue and fix the root of the problem.


 There are some peculiar things going on with your water heater and you’re questioning what’s going on.