How to Install a Bidet Attachment in 9 Simple Steps

How to Install a Bidet Attachment in 9 Simple Steps

We are a participant in the Amazon Services LLC Associates Program, an affiliate advertising program designed to provide a means for us to earn fees by linking to Amazon.com and affiliated sites.

Learning how to install a bidet attachment is a fantastic way to save money. Not only do you save money by installing it yourself, but modern bidet attachments use very little water, so they remain cost-effective to use.

Furthermore, you may never have to repurchase toilet paper, and if you have a big family, you know all too well how much you go through every week.

The bidet found popularity in the 1600s, especially in Europe. However, the refreshing cleaning device failed to ignite bottoms in America, though our growing awareness of the environment may change that.

So, if you want a hyper-clean bottom and would like to save money simultaneously, you may wish to learn how to install a bidet attachment.

How to Install a Bidet Attachment

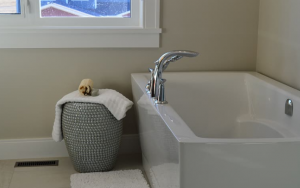
A bothroom with stone and marble that is worth taking the time to learn how to install a bidet attachment

Unlike a free-standing bidet, which can be challenging to fit, a bidet attachment is a job you can complete within a couple of hours on the weekend.

Most bidet attachment kits supply the main elements needed to complete the job, though you may also need a few essential tools.

A bidet attachment fits the existing seat. After fitting the T-valve adaptor, you re-attach the water supply and connect the hose to the bidet attachment and T-adaptor. Once you place the toilet seat back in position, you can start to use the bidet for a deep-down clean!

Some basic equipment

Don’t feel intimidated when you learn how to install a bidet attachment because they come with full instructions. Furthermore, the kit supplies most of the parts you need to complete the job.

The kit arrives with a 7/8 inch connection T-adaptor, a toilet bidet seat mounting attachment, and a length of flexible water hose. However, you might need to stock up on some basic bits and pieces to complete the job successfully.

What you need

A good quality wrench proves vital to complete the job. Ensure you use the appropriate size as forcing the issue with an ill-fitting wrench may damage the system and cause water leaks.

Plumbers tape seals the water connections and provides an excellent seal. If you don’t use the tape, you may find that water drips from the pipes and valves, and then you have to start all over again.

A range of screwdrivers helps you to fix the bidet attachment and toilet seat into position. Don’t use old battered screwdrivers because you run the risk of ruining the heads of the screws, and the last thing you want is a loose loo seat!

What Is a Bidet Attachment?

Buy at Walmart.com

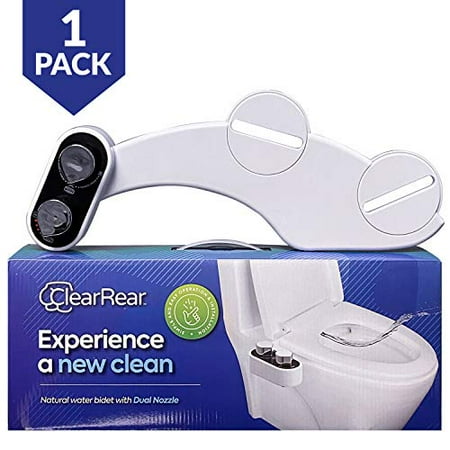
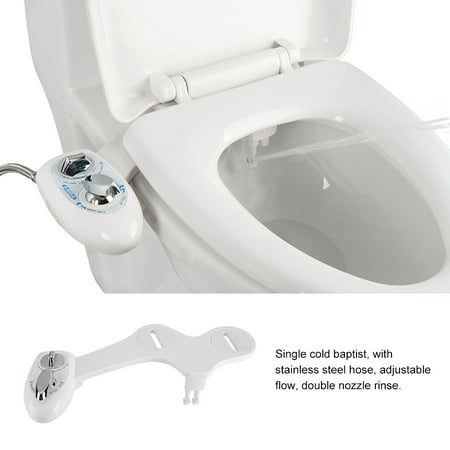
A bidet attachment consists of a fixture that goes at the toilet seat’s backside and contains a nozzle facing your rear end.

Usually, a small control unit allows you to turn the device on and control water flow. Some units use dual nozzle systems for front and back use, while others will enable the user to control the water’s direction.

How does a bidet work?

A bidet forms a hygienic alternative to using toilet paper. It works by directing a stream of water through nozzles to clean your nether regions after contemplating on the loo.

The bidet uses water directly from the main water supply. Consequently, the water remains clean and sanitary. Furthermore, most bidets use self-cleaning nozzles, but it’s a good idea to clean them when you undertake your regular toilet cleaning chores.

From a hygienic perspective, a bidet provides you with a deep-down clean. Toilet paper tends to extend the problem of waste rather than eradicate it, leading to unhealthy and unsanitary conditions.

However, a bidet uses water to remove the offending waste so that it doesn’t come into contact with any other parts of your body.

The benefits of using a bidet attachment
When you learn how to install a bidet attachment, you may discover some fantastic benefits of using the system.

When you use a bidet, you don’t need to use toilet paper. Consequently, the process proves environmentally friendly because you’re not flushing copious amounts of paper into the drainage system.

Furthermore, the risk of blockages, clogging, and the resulting repairs lessen significantly when you use a bidet.

Recommended Read: 10 Plumbing Fails You Need to See

Health benefits

Using a bidet is healthy and hygienic when compared to using toilet paper. It leaves your behind feeling cleaner, fresher, and healthier.

Some people find toilet paper uncomfortable to use and may develop a rash or sore skin from using paper. When you consider toilet paper, it consists of nothing more than dry paper, which may irritate the skin. Anyone who suffers from irritable bowel syndrome knows all too well the pitfalls of constant toilet paper usage.

Washing your behind with water is a gentler alternative to rubbing the sensitive area with dry paper!

A bidet is gentle on the skin, and the flush of water after using the loo leaves you feeling refreshed and squeaky clean.

Save money

Money is tighter than ever, given our current worldwide circumstances, so using a bidet cuts out the toilet paper bill. Furthermore, a bidet attachment uses less water than a conventional stand-alone bidet, so it may save you money on your water bills.

Stand-alone bidet systems cost more to buy and install than a bidet attachment. Imagine all that expensive plumbing and groundwork to install a bidet. For many of us, such a cost is out of the question.

However, when you learn how to install a bidet attachment, it is easy to achieve and cost-effective.

How to Install a Bidet Attachment Explained

We understand that using a bidet is cost-effective and leads to a healthy, clean derriere.


When you buy a bidet attachment, it arrives with detailed instructions to guide you through the process, but the unit’s fitting proves more manageable than you may think.

Step 1

Begin by shutting off the water supply for the toilet and flush the toilet to empty it. The last thing you want is toilet water gushing all over you as you work!

Step 2

Use your spanners to disconnect the hose attachment from the bottom of the toilet tank.

However, take care not to strip the connections when unscrewing them and don’t apply too much force. Make sure to use the appropriately sized spanner and lubricate the area with a bit of WD40 if necessary.

Step 3

Use good quality screwdrivers to remove the toilet seat. Be careful not to damage the screw heads as you need to replace them afterward. Ensure the head of your screwdriver remains true to shape to avoid ruining the screws.

Before you move on, wipe the area down to ensure everything stays clean and free from water.

Step 4

It’s time to fit the T-vale adaptor to the bottom of the toilet bowl. Take your time with this step and use your wrench gently because you don’t want to overtighten the screw and risk threading them. Apply a little of the plumber’s tape to the screws to achieve a good seal.

Recommended Read: What Are the Main Toilet Parts & How to Properly Assemble Them?

Step 5

When you re-attach the water hose from the water hook up to the T-adaptor’s bottom, you may need to use a washer or additional plumber’s tape to prevent leakage. Take your time and use the spanner gently without forcing the bolts into place.

Step 6

Take the flexible hose supplied with the kit and attach it to the T-adapter. You may use a little plumber’s tape on the joints to ensure a successful seal but take care not to overtighten the fittings. Attach the other end of the hose to the bidet water attachment and set it aside.

Step 7

You may find a piece of rubber inside your kit, which you attach to the underside of the seat mounting. Use the grooves on the underside as a guide for the correct placement of the rubber.

Now, line the unit up with the toilet seat screw holes and lay the bidet flat on top of the toilet.

Step 8

Place the toilet seat on top of the bidet attachment and ensure the holes line up before inserting the toilet screws. Take time to ensure perfect alignment and tighten the fixings once you feel satisfied with the positioning.

You need to ensure the fixings stay tight. If not, you may find yourself sliding off the toilet when you use it, and that’s not a good look!

Step 9

Now it’s time for the big reveal! Turn on the water. At this stage, ruin your fingers around each joint to ensure no water leakage. If you find water dripping from a joint, you may need to tighten the fixing further to form a tight seal.

A job well done

Learning how to install a bidet attachment is easy when you follow each step and take your time. Don’t rush the job, and ensure you use good quality tools as you work. The plumber’s tape is an invaluable tool because it helps seal the joints to lessen leakage risk.

Troubleshooting

Once you complete the job, it’s time to run the system through its paces. However, if you come across any issues, you must attend to them immediately.

Leaks

If you discover any leaks, you may need to tighten the joints. In some cases, you may need to turn the water off and re-do the offending joint, primarily if you haven’t used plumber’s tape. In a worst-case scenario, you may need to install washers into the joints to prevent leaks.

Water pressure

If the water pressure proves too high when you use the bidet, you’ll know all about it! Consequently, if you don’t want a bum power wash, you may need to adjust the water pressure.

The controls on the unit help you to adjust the strength of the water jet. Alternatively, you can adjust the water on/off connection to half to reduce the flow’s power.

How to Install a Bidet Attachment Explored

You don’t have to learn complex plumbing to know how to install a bidet attachment. Most units arrive with the items needed to fit your new bidet, and with some essential tools at hand, you can make short work of the job.

A bidet offers a hygienic, money-saving alternative to using toilet paper. If you suffer from bowel conditions, irritable skin, or eczema, using toilet paper may be a challenge and exacerbate the condition.

Recommended Read: Best Bio Bidet for You: Finding the Perfect Machine to Get You Clean

Consequently, using a bidet may help to alleviate these ailments and make using the loo a better experience.

Make sure to have some plumber’s tape, a set of screwdrivers, and wrenches at hand. Furthermore, you must always follow the manufacturer’s instructions when learning how to install a bidet attachment.

You can adjust the water pressure for a comfortable experience and bask in the knowledge that you fitted the bidet yourself!

Have you ever tried a bidet? Did it change your outlook on bathroom hygiene? Share your experience in the comments below.

Sean Kerr lives in Cardiff, Wales, and is a published author with over 10 novels to his name so far and still counting. As well as writing his next bestseller, Sean also runs a successful jewelry-making business and sells his creations online.

This post first appeared on http://www.theplumbinginfo.com
7 Signs You Need a Backwater Valve Installation

Have you ever found leaks in your home? Have you ever dealt with a flooded basement? If you have, I can assure you that it’s Toronto’s sewer system flooding over.

Over the years, Toronto has faced severe weather conditions. There have been up to $80 million worth of property damages due to rainfall and storms. A backwater valve installation is the best solution.

You may be wondering why you need a backwater valve. This is a very useful contraption that closes off any sewer water from coming back into your home. The backwater valve blocks the sewage of the city from invading your basement.

The best safety measure you could take for your family and home is to install a backwater valve as soon as possible.

Here are some signs you need a backwater valve installation.

1. You Have a Basement

If you have a floor under street level, you’re bound to deal with flooding. Whenever there are heavy rainfall, the city sewer system floods, pushing back sewage into your home’s sewer system.

Many older homes with basements don’t have a backwater valve installed. Not only are these basements prone to flooding, but they are prone to sewage.

A basement flooding has serious complications. The moisture of the sewage can seep into your walls and break down the structure of your home.

There is also a health concern with the countless number of bacteria, mold, and fungus found in the sewer water. These can negatively impact your respiratory health.

You should install a backwater valve for the safety of your home and your health.

2. It Rains in Your Area

Have you ever been through a rainstorm, or dealt with melting snow?

With the effects of global warming, the weather in Toronto has become harsher over the years.

Many environmental factors can ruin your property and your home’s water supply. Heavy rainfall, snowfall, and melting snow can cause flooding of your drains.

Water damage due to weather is the leading cause of an increase in property maintenance costs.

Since climate change is worsening every year, you should be prepared for the worst weather conditions.

3. You Have Cracks in Your Walls

A lot of older houses wear down over the years.

If your home has gaps or cracks in the walls, these shouldn’t be ignored.

Gaps and cracks are indicators of poor structure and can cause irreparable damages to your home when it rains. Any signs of moisture in your basement can penetrate your walls and cause mildew and mold growth.

It’s best to install a backwater valve to prevent any moisture from accumulating in your basement. If your house has cracks and spots, take precautions to protect them from degradation.

4. Your Neighbors Have Backwater Valves

Assume that your neighbors have backwater valves installed under their homes.

If your neighbors are protecting their homes from excess sewer water, where is all of that water going? It’s going straight to your house.

Like your neighbors, you should be taking precautions as a homeowner in Toronto.

A backwater valve installation is the only way you can prevent your neighbors’ sewage and the city’s sewage, from damaging your home every time it rains.

5. Flood Damages Are Expensive

Although much of your home’s water damage is from the city’s sewer, most of it isn’t covered by Toronto.

Even most home insurance companies don’t take care of water damage costs.

This means that whenever the city sewage comes back into your drain, you’ll have to pay for the repairs out of your pocket.

The only way to avoid spending thousands of dollars on rebuilding your basement is to invest in a backwater valve installation.

6. The City Covers Your Backwater Valve Installation Price

Yup, you read that correctly. The city of Toronto provides ample funding for your home’s backwater valve installation.

Why would you risk the integrity of your home and health, when the city has you covered?

The city of Toronto recently developed a basement flooding protection subsidy program that provides up to $3,400 per property. This covers the installation flood protection gear, including a backwater valve, sump pump, pipe severance, and pipe capping.

The city’s subsidy program covers up to 80% of the invoice, reaching a maximum of $1,250 for the backwater valve installation. The backwater valve installation price is very low when you use a Toronto plumber who is licensed with the city.

7. Anta Plumbing Has Backwater Valve Installation

Are you ready to install a Backwater valve? Do you need help on how to start?

Luckily, here at Anta Plumbing Company, we offer the best backwater valve installation.

You can’t install a backwater valve on your own. For coverage from the city’s subsidy plan, you need a licensed plumbing company to help you with your backwater valve installation.

We have certified professionals who can ensure your home’s protection from harsh weather. Anta Plumbing provides a competitive backwater valve installation price, a permit for the installation, and guidance with the city’s basement flooding protection subsidy program.

If you’re located in Vaughan, there are different requirements for subsidy eligibility. Make sure you hire a Toronto licensed plumber to install your backwater valve.

Get Started Today

Now that you know the consequences of basement flooding, you should start on your plan to install a backwater valve.

If you found any of these signs in your home and you live in Ontario, connect with our team today!

Anta Plumbing Company is a City of Toronto Licenses Plumbing Company with the best deals on backwater valve installation, sump pump installation, and other plumbing services.

We have locations in Ajax, King City, Toronto, Milton, Hamilton, Oakville, and all throughout Ontario.

The post 7 Signs You Need a Backwater Valve Installation first appeared on Anta Plumbing Blog. This post first appeared on https://blog.antaplumbing.com

Trouble with Your Outside Faucets?

Outside faucets are super handy. They’re necessary for gardening projects, and with the temperatures warming up in our area, you don’t want to run inside every time your plants require water. They’re fun for the family, with the help of sprinklers and pools to escape the summer heat. Overall, no home is complete without the addition of an outside faucet for easy access to water.
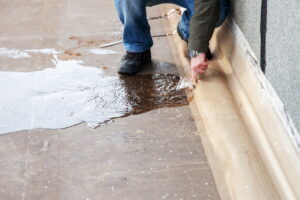
However, if your outside faucets are running into trouble, they can be very obnoxious to deal with. We’re going to try and do some troubleshooting and give you some explicit directions when it’s finally time to call a plumber in Clifton, NJ.

Don’t panic, outside faucet systems are relatively simple. While they might endure more weathering and problems that come from being outdoors, they’re still a plumbing system. We’ll always be able to help you with your plumbing.

The Problem of Rust

Outside faucets rust more easily than indoor ones. Rust occurs when your metal plumbing appliance comes in contact with water and oxygen, which is plentiful in our atmosphere. Here in New Jersey, we get all four seasons as well, which means your outdoor faucets are also contracting and expanding season after season, icing up, developing cracks, and also rusting.

Sometimes when your outdoor faucet cracks due to ice expanding and rupturing the metal, there’s an increase in exposure to air and water since there’s more surface area of your appliance to rust. Basically, all of these problems work together to make it a harsh environment for your outdoor faucet.

Repairs and Replacement Services

If your outdoor faucet is becoming unusable, that’s not good. It could be due to rust, problems with the physical integrity of the appliance, or more. Here are a few problems you could be running into, and we’ll mention whether or not you need repairs or replacement.

When to Repair Your Outdoor Faucet

  • Poor water pressure. Water pressure can usually be a problem with your plumbing system itself. Before replacing the whole unit, we’d rather take a look as a plumber to see if we can’t locate the problem and fix it.
  • Rust-colored water. If you’ve got rusty-colored water coming from your pipe, this could be from built-up sediment, corrosion, rust, or something else. Our team can take a look.
  • The hose or other attachment is broken. While this might seem like a devastating problem, the fact is that the most exposed parts like hoses and faucet heads are the ones that break first. Your system still might work fine with a new head or hose.
  • It’s leaking. Leaks happen, and unless they’re in a bad spot, they can be patched up easily.

When to Replace Your Outdoor Faucet

  • It’s rusted through. If your whole outdoor faucet is rusted through, there are really no repairs we can make that would salvage it. You’re almost always better off with a whole unit replacement.
  • It’s not providing any water. This often drives a lot of homeowners to forget about their outdoor faucets because they don’t produce water. Unfortunately, then it’s just a waste of space. Call our team to have it replaced.

The professional plumbers at MarGo Plumbing Heating Cooling Inc. have your back. Call us today!

This post first appeared on https://margoplumbing.com

How to Spot a Slab Leak

wasting water - water leaking from hole in a hoseIf you’ve heard of slab leaks, then you know that this is a huge issue. Leaks might happen in your home underneath your sink or even in your kitchen, but a slab leak is something that’s going to stop the entire operation of your home. A slab leak can happen to the best of us. If you think that this is something that’s occurring in your home, then it’s important to spot this problem and get a professional out to your home fast.

Our professionals are prepared to handle your slab leak in Orlando, FL. If you’d like to keep your home in impeccable shape, we’re going to be the team on your front lines. We’re going to help you spot a slab leak in your home today.

5 Signs You Might Have a Slab Leak

Here are the signs that you might have a slab leak in your home:

1.      Hot Spots

One of the most noticeable signs of a slab leak is hot spots on your floor. If you’re walking around your home and notice that a couple particular spots make your feet feel toasty, it’s actually a problem. Hot spots are a sign that there’s hot water leaking underneath your floorboards. What you’re feeling is the concrete underneath your home getting warm enough to warm your floor. This means things are getting severe and you should schedule an appointment with us.

2.      The Sound of Running Water

Do you always hear the sound of running water in your home? Don’t think that this is just a benign, odd occurrence. It’s a problem. The sound of running water is just that. Turn off all the fixtures in your home. If you still hear the sound of water moving around underneath your floors or within your walls, then you have a slab leak.

3.      Damaged Flooring

Is your flooring damaged or wet? This is a clear sign of a slab leak. If no one has spilled anything, then it’s a slab leak becoming a mounting issue. We’ll help you work through this.

4.      Cracking

Have you noticed cracking in your floors or walls? Cracking is a problem. It’s a symptom of the pressure that a slab leak can put on different parts of your home. Cracking will only worsen with time if you’re not addressing it with care. We’re going to help you with what you need.

Bonus: Doming in your floor. If leaks go on for long enough, it can start to warp your floors, walls, or ceilings. This will manifest as domes.

5.      High Water Bills

This is a sign that can be a little more subtle. If you notice that your water bills is climbing up each month, then make sure you take note of this. Water bills that keep creeping up are a sign that something is wrong. If the leaps in price become severe and persistent, then it’s a pretty clear sign that you’re having a slab leak. We’re here to sniff out the problem and help you solve them.

Contact Modern Plumbing Industries, Inc. today to schedule an appointment with our team members.

This post first appeared on https://www.modernpi.com

Do Tankless Water Heaters Have Any Drawbacks?

tankless water heaterIf you’re asking this question, it means you’re likely looking at water heaters in Surprise, AZ as a replacement for your old one. If this is the first time you’ve considered a tankless water heater, we understand why you have plenty of questions and maybe a touch of skepticism. After all, many installers talk up the huge benefits of going with a tankless water heater—we certainly have
But any reputable plumbing contractor will tell you that a tankless water heater isn’t the right installation for every home and every situation. Sometimes the right storage tank water heater will do a great job for a household. 

Tankless water heaters do have several drawbacks that may affect your decision to purchase one. Some of these won’t apply to your house, or the benefits will far outweigh them. Make sure you work with our professionals to help you with the choice so you have the best water heater for your home. 

The price

This is simple: tankless water heaters are more expensive units than conventional storage tank water heaters. Because of their high energy efficiency and extended service lives, tankless systems can pay back their cost over only a few years. However, the initial price may not match your current budget plans. Talk to our technicians about the long-term savings and your best options.

Efficiency concerns in larger homes

A tankless water heater is best suited for small and medium-sized households. This is because, although they won’t run out of hot water, they can be overwhelmed if multiple hot water taps are on at the same time. If your household has multiple showers running in the morning or you have several hot water-appliances that must run simultaneously, it may cut into a tankless water heater’s efficiency. One solution is to install more than one tankless water heater for a larger house, but this also affects the budget. 

Hard water concerns

If a home has hard water, it may have a negative effect on a tankless water heater. Hard water in general is harmful to any type of water heater, but even a small amount of mineral deposits inside a tankless unit will harm water flow. For homes with hard water that don’t already have a water softener installed, it may be necessary to include a water softener installation along with the new tankless water heater.

Slower hot water delivery

A storage tank water heater has a supply of hot water ready to send to the taps. A tankless water heater must heat up water when the taps come on, so there is usually a longer delay from when the tap turns on until the water reaches it. 

Temperature fluctuations

The water temperature coming from a tankless water heater has more fluctuations than from storage tank water heaters. You might feel an initial rush of hot water, only to have it lose temperature and quickly heat up again. Most people soon become used to this, but it is technically a drawback.

Find out more about the ideal new water heater for your house. Just Trust The Trusted Plumber!

This post first appeared on https://www.thetrustedplumber.com

Video Camera Inspection – How Often and What to Expect

Video camera inspection for plumbing issues

If you want to make sure that your plumbing system works well, then it is important to have it thoroughly inspected on a regular basis. That is where a plumbing video camera inspection can be helpful.  A relatively new plumbing service, it is important for you to know how this works and what to expect.

How Does a Plumbing Video Camera Inspection Work?

Because it can be hard to identify leaks in underground pipes, plumbing video camera inspection technology has been introduced. This is one of the most effective ways that you can detect leaks that might be present in your home.

Using a waterproof camera, a trained technician can snake the camera through pipes and sewer systems. An expert will insert the camera into the pipe and control the camera, checking every square inch of your plumbing system. Using a screen, the plumber will be able to see turns and corners perfectly. The video can be streamed live and recorded for future use.

What Should You Expect?

Using a plumbing video camera inspection, you can detect leaks that would otherwise be overlooked. You should expect your technician to keep you updated every step of the way and thoroughly review the footage with you. Then, if there are any issues that are identified, your plumber should provide you with a list of recommendations.

For example, if there is a leak present, your plumber should be able to show you the leak on the camera. Then, your technician should explain to you why the leak is present, the potential damage that might be present, and what the easiest way to fix the leak should be.

Contact A To Z Statewide Plumbing for a Video Camera Inspection!

If you want to make sure that your plumbing system works well, then you should invest in an annual plumbing video camera inspection. At A To Z Statewide Plumbing, we work hard to provide you with access to the latest technology in our field because we believe this allows us to provide you with the best service possible. Contact us today at 954-981-2133 for help with your video camera inspection! We will help you make sure that your plumbing system is working well!

Trending Topics Right Now

This post first appeared on http://www.atozstatewideplumbing.com

How Much Does It Cost to Construct a New Bathroom?

bathtubWe spent more time at home than ever before last year. We know that during this time you probably started noticing all the small things about your home. Did your home’s bathroom become a focus in your home? If so, then it might be time for you to invest in bathroom plumbing services in Orlando, FL.
We know what the main thing is that holds you back from constructing a new bathroom—the cost. We’re going to break down the cost of the average bathroom plumbing today. We can help you finance this work, and we’ll make sure that it’s as affordable as possible too.

The Cost

So let’s speak frankly about the cost of bathroom plumbing services.

On average, adding on to a bathroom or reconstructing a bathroom is going to run you around $2,000 to $10,000. The average cost is about $5,000. The cost range largely depends on what you need done. If you want a new deluxe shower, bath, toilet, and new sinks, it’s going to creep up closer to that $10,000 price point. Less work is going to be a lot more affordable too.

Our team members are here to help you find the most cost-effective way to perform this work. We want to help you find exactly what you need without breaking the bank. It’s possible and our team members are here to help you reach this reality.

The Benefits of Constructing a New Bathroom

So let’s talk about why constructing a new bathroom is worthwhile:

Comfort

One of the biggest benefits is comfort or ease of use in your bathroom. While older bathrooms have their own charm and character, they can fall flat when it comes to actually using this space. Having a newer bathroom with a large tub with jets, a shower with great water pressure and intuitive design, and large sinks is much easier to use than an old rickety bathroom.

Cost Savings

Those leaky faucets and inefficient showerheads really do add up. You’re going to be flushing money down your drain. Upgrading to new, energy-efficient appliances is a great way to help. Yes, your investing money upfront, but it’s going to benefit you.

Resale Value

It’s important to invest in your home’s future. If you’re ever thinking about selling your home, then having a great bathroom is important. Buyers want up-to-date, efficient appliances and fixtures. We can help you find the best of the best for your home.

Why Choose an Expert?

When we talk about bathrooms with homeowners, we start to hear a lot about DIY work. While this is definitely something that’s possible, we really wouldn’t recommend it for an upgrade.

Finding the right people to perform your work is just as important as finding the right appliances and fixtures. This is because you want long-lasting service. Trust us when we say that this is important. Just because you could do something yourself doesn’t mean you should. Our experts know how to give you fast, effective work.

Contact Modern Plumbing Industries, Inc. today to schedule an appointment with our professionals.

This post first appeared on https://www.modernpi.com

Your Air Filter Could’ve Caused a Furnace Breakdown

If you’re one of those homeowners counting your blessings because temperatures are finally starting to warm up, then congratulations! You made it! However, it’s important not to get ahead of ourselves because before we know it, another heating season is going to be upon us.
The smartest move now would be to look back and see what exactly went wrong with your heater. Why was your furnace acting the way it did? How close was it to actually breaking down? The truth might not be what you want to hear.

Sometimes a clogged air filter can cause so much strife in a furnace that you’ll be pushed into either a breakdown or expensive furnace repair in Wayne, NJ. We’ll go over why this component can cause so much trouble, and talk about why it’s so important to clean out your air filter and keep things running smoothly.

What Happens When Your Filter Clogs?

Every forced-air heater like a furnace or heat pump comes with an air filter. This component is designed to keep any contaminants like dust and debris from entering inside the system and causing damage to sensitive (and expensive) parts. While this does help your indoor air quality and make your home a bit cleaner, it’s main focus is to protect the interior of your furnace.

When the air filter gets clogged, it will start stifling the system. This can cause a number of issues that will lead to a breakdown if you’re not careful.

  • Increased fuel consumption. A clogged air filter will cause your furnace to start operating inefficiently. It will work harder to produce the same level of heat that it has in the past, which will consume more fuel and cost you more money.
  • Stress on the system. Certain components will start to get stressed as the system works harder for less heat. A clogged air filter will compound this stress the more clogged it gets, so be careful and change out the filter when you can.
  • Poor airflow. If no air can get into the system, how is that air supposed to be heated and sent back into your home? A clogged air filter will inhibit airflow and cause your stifling furnace to struggle sending air through your vents.
  • Contaminants damaging the system. When your air filter gets too clogged, it won’t be able to do its job properly. The contaminants that it’s trying to protect your furnace’s sensitive components from will sneak inside and do damage that will require repairs.
  • Overheating. One of the worst things that can happen to your furnace is overheating. Especially if you’ve got a gas furnace, this is always bad and can sometimes become a safety hazard. Luckily, furnaces will automatically shut down if they overheat, but this is a problem that needs to be addressed.

Basically, neglecting your air filter is going to eventually lead to a broken furnace. When you replace your air filter on a regular basis, you ensure that a certain set of problems doesn’t occur to your furnace.

Contact MarGo Plumbing Heating Cooling Inc. if you need help with your furnace.

This post first appeared on https://margoplumbing.com

How To Check Your Outdoor Hose Bibb For Leaks

We’re happy to report that warm weather is ahead, and we can (hopefully) put this past winter behind us. If you’re planning on doing some spring cleaning outside this month, you’ll more than likely need to turn your outdoor faucet (commonly known as a hose bibb) back on.

The winter weather temperatures may have caused some models of hose bibbs to crack. If the problem isn’t caught early enough, all that water leaking from your outdoor faucet can result in water damage and allow for mold to potentially grow inside your home – not to mention all the wasted water and energy!

Follow These Steps Before Turning On Your Water

Steps To Check Your Hose Bibb

Follow these simple steps to see if your hose bibb was damaged this past winter:

  1. Place your thumb over the spigot. If you have small thumbs, you may want to use your whole hand to cover the opening.
  2. Turn the water on.
  3. If you can hold the water in, with your hand or thumb, that means there is a crack somewhere in the piping and water is leaking out.
  4. However, if you feel a lot of pressure and you can’t hold back the water, you should be fine!

Hose Bibb Repair & Replacement

If your hose bibb is leaking, either visibly or based on our thumb test, you’ll likely need a professional to locate the source of the problem and resolve it. This can mean repair of specific components of your hose bibb or the pipes leading to it, or it could mean needing to replace the entire structure. You may have to choose between repairing and replacing your hose bibb, depending on the severity of the damage. Repairing costs less, but may leave worn components in place where they will fail in subsequent winters.

To learn more or schedule a visit, contact Len the Plumber at (800) 950-4619(800) 950-4619 or schedule online.

What to Do If Your Hose Bibb Is Still Leaking

At Len The Plumber, we’ve seen all too often what can happen to outdoor faucets affected by cold winters, and the problem doesn’t always reveal itself until spring. A leaky hose bibb or cracked supply line can result in damage to your home and also an increase in your water bill.

If you suspect that you have a water leak, give us a call today to diagnose the problem. We can even install a frost-proof outdoor hose faucet and our technician will teach you how to properly winterize your new fixture.

We’re here to provide you with same day service, seven days a week – and remember, there’s never an extra charge for evening or weekend service. 

This post first appeared on https://lentheplumber.com

Here’s How You May Be Wasting Water and Not Know It

faucet-drippingNo homeowner sets out to wastewater on purpose. There’s no reward in that! The problem is that it’s easy to unintentionally wastewater and then continue to let it happen. You’re probably using more water than you need to right now and be unaware of it. Even higher bills may not alert you, because if the problem has been going on long enough, the bill will always be high!

When it comes to household plumbing in Surprise, AZ, we’re the experts. We’ve often helped our customers enjoy better plumbing and save water, so we know about the many ways households can wastewater. We’re going to look at seven ways you may be wasting water and what you can do about it.

ONE: Overlong showers

Yes, you’ve heard this one. We want to repeat it, because cutting down on the time spent running water in the shower can make an enormous difference in monthly water consumption. We recommend you time your showers. If they are over five mins, even if it doesn’t seem long to you, it’s still too long. 

TWO: Unfixed leaks

Hidden leaks is the source of one trillion gallons of water going to waste across the country each year. Of course, it’s difficult to notice a leak that’s hidden, but you can watch for signs. If you suspect hidden leaks or you’ve never had your house checked for them, call our plumbers for leak detection services.

THREE: Running the dishwasher that’s not full

Did you know that using the dishwasher to handle cleaning the dishes uses less water than washing them by hand? It’s true—but only if the washer is used to the fullest, i.e. when it’s full. Running a half-loaded dishwasher is wasteful. (We also recommend using the “light” setting on the dishwasher to help reduce consumption.)

FOUR: Running a half-full laundry load

This is similar to the washing machine mistake. You’ll conserve water if you only run the washing machine when it’s loaded to maximum capacity. You may also wish to install a new washing machine with water-saving features if your current one is more than ten years old. (Look for the WaterSense label.)

FIVE: Keeping an old toilet

The standard toilet, depending on its age, uses from 2–6 gallons per flush. New low-flow toilet models use less than 1½ gallons per flush. Making the change from an old toilet to a low-flush one will have a big impact on water use in your house because the toilet accounts for the highest amount of indoor water consumption. We install low-flow models and are happy to help you with the upgrade.

SIX: Running the water while you brush your teeth

We don’t know why people often have the faucet running during their teeth-brushing regimen, but it’s common. Try to break this habit, because it does make a difference. 

SEVEN: Unnecessary toilet flushes

Please don’t use your toilet as a trash can! It’s only for human waste and toilet paper. Using it to dispose of other items not only wastes water, it risks creating clogs. 

We’re here to help you to save water: new installations, leak detection, and more much more.

You can trust in The Trusted Plumber! Call us for plumbing service in Glendale, AZ and the surrounding areas.

This post first appeared on https://www.thetrustedplumber.com

+1-877-959-3534