Month: September 2021

No Plunger? No Problem: 5 Ways to Unclog Your Toilet Without a Plunger

The world’s most common fears include heights, clowns, enclosed spaces, and needing to unclog a toilet when there isn’t a plunger nearby. It always happens at the most inconvenient time — at your in-laws’ house, during a work meeting, during a holiday, on a date…

We wouldn’t wish the panic of rising water with no solution on anyone. That’s why we’ve detailed the best ways to unclog a toilet without a plunger below.

Water That’s Hot, but Not Boiling

It’s really important to differentiate between the two here. Hot water will unclog the toilet by melting away the blockage. Boiling water can cause toilet bowl ceramic to crack, which is a much more irritating issue to deal with.

Get as big a bucket you can handle and fill it with not-quite-boiling water. The movement of the water combined with the heat will help remove and flush the clog.

Dish Soap

Dish soap is designed to break down grease and other food waste it comes into contact with. Because of this, it’s almost just as effective at breaking down toilet clogs. If you have the time to let it sit and wait, dish soap can help to unclog a toilet.

Squeeze at least a cup of dish soap into the toilet bowl and let it sit for 30 to 40 minutes. After that, check to see if the water has started to lower in the bowl, which is a sign that the soap is working. If the water is lowering, then you can feel comfortable trying to flush!

Epsom Salt

Epsom salt isn’t something that everyone has on hand, but if you do have it lying around, it can work in a pinch. When poured into a bowl, it creates a fizzy chemical reaction that can help unclog and clear drains. Give it about 15 minutes to do its thing before you attempt to flush again.

A Toilet Brush

This is for desperate, last-ditch efforts only. Hold the handle, push the brush into the drain hole, and start to pull your arm back and forth. Don’t get too over-exuberant to the point of harming the toilet, but do get vigorous. This can be kind of gross, so we recommend wearing gloves or old clothes in case of splashing.

Call the Pros at Len The Plumber

If nothing else works, it might just be time to call on the plumbing professionals employed at Len The Plumber. We’re always standing by to answer your call!

This post first appeared on https://lentheplumber.com

6 Tips for Winterizing Your HVAC Systems

With cold winter months just around the corner, your home is gradually transitioning its reliance on its HVAC system. After summer months spent leaning on the air conditioner to maintain a cool home interior, your furnace is about to shake off months of hibernation as you depend on its heating capacity to keep your household warm this summer. Its time to start winterizing your HVAC system.

But these powerful appliances can’t do their jobs without regular maintenance and tuneups to repair existing breakdowns and prevent future malfunctions. A (winter HVAC service) visit can offer perfect timing to get your furnace ready for the winter ahead while also making sure your air conditioner is in good shape heading into months of sitting idle.

Read on for six tips to winterize your HVAC system and support the health and performance of these appliances. Winterizing Your HVAC

Should You Cover Your A/C Unit in the Winter?

Before we outline the different steps you should take to (winterize your A/C unit) and the rest of your HVAC system, it’s important to emphasize the importance of making sure you (prepare your air conditioner for the winter) cold. While many homeowners forget about their A/C unit and figure it’s built to withstand cold weather, failing to give it a little winter prep can lead to avoidable air conditioning problems come spring.

While you’re busy getting your furnace in gear to heat your home in the year ahead, don’t put your air conditioner on the back burner—or you’ll regret it.

6 HVAC Tips for Winter

Before the winter cold strikes, here are six steps every homeowner should take to extend the lifespan and performance of their HVAC appliances:

1. Schedule a furnace tuneup and/or cleaning.

Prevent a furnace breakdown before it strikes in the dead of winter. A furnace tuneup makes sure your appliance is inspected by a trained HVAC technician for signs of wear and imminent breakdown.

The maintenance work performed during a tuneup can reduce the risk of a breakdown in the winter ahead, and it can provide a progress update on the relative health and efficiency of your furnace—which could help alert you to a possible furnace replacement in the future.

2. Clean out your air conditioner.

Outdoor air conditioners can accumulate a lot of debris over the summer. Leaves, dirt, and even twigs and branches can make their way into the appliance, clogging up your radiator and other A/C components.

If your A/C unit is turned off and put away for the winter without cleaning out this debris, it can lead to mechanical trouble the following spring. An HVAC technician can clean off debris most likely to cause problems for your unit, prepping your air conditioner for a winter of dormancy and a problem-free spring.

3. Turn off and cover or remove your A/C unit.

If you’re trying to figure (how to cover an air conditioner), the answer depends on whether you have a freestanding A/C unit or a built-in window air conditioner. Here’s how to winterize each A/C option:

  • Should central A/C units be covered in winter? Ideally, outdoor air conditioners will be wrapped in a custom-fit A/C unit cover. A tarp can also provide necessary protection from the winter elements. Make sure the unit is disconnected from power before securing the tarp or cover.

  • How to winterize an A/C window unit: Ideally, you can winterize a window unit by removing it and closing and sealing the window. If removing the unit is not an option, unplug it from power and cover it with insulation to reduce heat transfer during cold winter weather.

4. Change your air filters.

Air filters on your air conditioner and furnace should be changed at least every 90 days, if not more often. Winterizing is a perfect time to replace all of these filters and get them all on the same schedule, especially since you will already be working with each appliance to get it ready for the winter.

5. Program your thermostat.

Smart thermostat owners should use the winterizing process to change up the heating and cooling schedule for their HVAC system, and to readjust heating and cooling temperature ranges to become more efficient with your heating and cooling expenses. Adjusting to a lower indoor air temperature in cold weather, for example, can lower utilities costs and save wear and tear on your furnace, which will extend its life and delay the cost of a furnace replacement.

6. Schedule an HVAC service appointment for the spring.

While you’re in the process of winterizing your HVAC system, plan ahead by making an appointment to service your A/C unit and furnace again in the spring. This is particularly helpful if you want to make sure your air conditioner is ready to handle the workload of keeping your home cool next summer.

With temperatures steadily dropping, don’t wait until the busy season to see out service for your HVAC system. Contact a local HVAC company today and get professional help in winterizing your appliances.

The post 6 Tips for Winterizing Your HVAC Systems appeared first on Stahl Plumbing, Heating & Air Conditioning.

Private: The Ultimate Plumbing Service Guide to Preparing Your Plumbing System Before a Vacation

All you really want to think about is hitting the road for the big vacation. After all, you’ve been waiting on this for a long time and have a bit of cabin fever with the lack of travel over the past year.

You’ve stopped the mail and the newspaper delivery. You’ve got a kennel reservation for your pets and have a neighbor watching your home. However, everything isn’t quite ready for you to leave.

Before you take that plane, train, or automobile, you need to consider preparing your plumbing system for the breakaway.

Why Do You Need to Prepare Your Plumbing?

It’s a good bet that something, like a water main break or a toilet problem, could happen while you are away. Other modern conveniences in your home from garbage disposals to water heaters can also malfunction while you are gone. Doing a few things before you leave will prevent the unthinkable from happening.

Plus, implementing a few plumbing strategies will help reduce your water and energy costs. You shouldn’t have to pay for things you aren’t using, right?

A lot of what is suggested are things that should be done annually as a part of regular maintenance. Getting ready for a vacation can be a great motivator to get them done.

What to Check Well in Advance of Vacation

People don’t often think about their plumbing until something breaks. Keeping tabs on what needs to be maintained will mean less work you will have to do as the days approach your vacation time.

Preparing to leave during the winter months requires a different approach than vacationing in the summer months.

Vacation Checklist for Summer or Winter

You should inspect your pipes to check for any leaks. Call a plumber to go ahead and get them fixed. A leak occurring while you’re on vacation can cause costly damage. You don’t want that kind of surprise when you return.

Looking for leaks doesn’t just mean scoping out the outdoor faucets or the kitchen sink. Here is a list of things you should check for a final leak inspection:

  • Check your appliances to make sure they aren’t leaking. Look under the refrigerator, dishwasher, and around the washing machine.
  • Be sure to check under the sinks as well as the faucets.
  • Look at all the pipes under the counters. If you see dripping, stains, or other moisture signs, call a plumber to come to repair them.
  • Also, check out the showers and tubs to make sure there isn’t a hidden leak and also look around the toilets. Toilets are a common place for leaks.

You don’t want a toilet to suddenly spring a leak while you’re gone. That would cause extensive damage to the floor and would cause even more damage if the toilet is on the second floor.

Winter Plumbing Preparations

There are additional things you will need to address if you plan to go away for a winter break. This is especially true if you plan to spend the entire winter away.

Wrap Outdoor Faucets

You will need to prepare your outdoor faucets if you are going to be leaving town during the winter. Wrapping your outdoor faucets should be done well in advance of winter or traveling.

Wrap Pipes in Unheated Spaces

Wrapping pipes in unheated spaces of your house is important because a solid freeze can cause a break and you don’t want that to happen, especially while you’re away.

This is a project you can do yourself with a little guidance and instruction. Although wrapping pipes isn’t difficult, it will take some time to make it a weekend project.

You can pick up some pipe insulation and tape or find an install kit at the hardware store. The kits are particularly useful because they come with a thermostat and are mean to help protect pipes in the coldest of temperatures for long periods of time. This is a perfect option if you are planning an extended winter getaway.

Get Your Furnace Inspected

Something else to do well before vacationing during a winter break is to have your furnace serviced. You want to have some clean filters and make sure it’s running correctly.

Schedule to Get Pipes Drained

Those who are planning to leave for the entire winter or an extended winter holiday may want to call a plumber to come to drain the pipes in the house before leaving. Water left in the pipes can cause them to freeze and break. You don’t want that to happen while you are gone.

Be sure to make an appointment to do that well ahead of time. You don’t want to have to complete the task of trying to find a plumber to do the job at the last minute as you are trying to leave.

Get Your Water Heater Serviced

Something else you will want to do well ahead of a trip, particularly a winter trip, is to have a plumb tune-up of your water heater. You want to make sure it is functioning well so that there aren’t any problems while you are away.

The fall is a good time to have a plumber drain it and give it a full inspection.

Doing all these types of things well in advance of your trip will ensure that you won’t come back to problems that have accumulated over your vacation time.

Things to Do Three Days Before Leaving

Check the sump pump or septic tank. Sump pumps are great for keeping basements and crawlspaces dry but it could fail if there is a major rainfall while your away. A few days before a vacation is the right time to make sure it’s working.

Pour a bucket of water into your sump pit and see if it kicks on. Call a plumber if nothing happens.

Septic tanks can also cause unexpected problems. Make sure yours runs well by dumping some RidX Septic Treatment down your toilets and flush. It will help break down muck in your septic tank so it’s doesn’t start overflowing while you are away.

If you have time, it would be good to schedule to have your septic cleaned if it hasn’t been cleaned in at least five years. This isn’t completely necessary but a septic service provider can check it for cracks or other problems while it is being cleaned. That would be one less worry while you’re away.
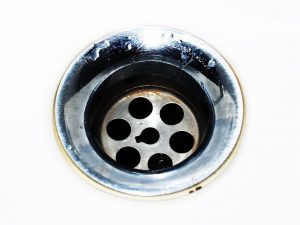
Check your drains

One last thing to do a few days before leaving for vacation is to check your drains. Clogged drains are common. Even though it won’t cause any major problems while you’re away, a clogged drain is something you don’t want to come home to.

Chemicals exist that you can pour down your drain as a preventive measure. Today is the day to do that. Be sure to wash it down with water so chemicals don’t remain in your pipes.

Do a final check for any leaks.

You may not have noticed that one of the faucets is leaking but replacing a gasket will prevent it from continuing, especially if you plan to leave your water on. Look for leaks around the yard as well to make sure everything is in order.

You can always tell you have a water leak in your yard if a spot on the ground is suddenly mushy. Call a plumber if something looks out of line from the normal appearance.

Things to Do Two Days Before Leaving

Those who don’t plan on watering yards or plants while vacationing should take some time to drain the outside hoses and sprinklers. You don’t want a leaky hose or sprinkler to raise our water bills while you are away.

You should also put them away so they don’t get damaged by a hot sun or freeze with colder temperatures.

Some taking an extended trip may want to keep their lawn and plants watered while they are away. There are two ways to handle that. First, make sure timers are set for your irrigation system. You should set any timers for twice a day where plants are watered in the early morning and late afternoon.

Homeowners who want to keep plants and gardens watered but don’t have an irrigation system can buy a soaker hose. Soaker hoses can also be connected to a timer so you won’t have to worry about plants getting too much or too little water.

Clean out the refrigerator.

You aren’t going to want to come home to rotten food. Go through your refrigerator and freeze what you can. Throw away what you can. Take some time to wipe it down and sanitize it too.

Things to Do the Day Before

Check appliances. People don’t think about their appliances when they prepare to go on vacation. Yet, appliances that use water and electricity should be checked before you leave. Make sure the dishwasher, washing machine, and dryer are empty.

It is good to leave the doors open to the machines when you leave the house these machines air out and you don’t come home to mildew. You should also make sure they are turned off unplugged when you leave.

Check garbage disposal

It’s not that a nasty garbage disposal will lead to a disaster while you are away but it will emit a smell that won’t be welcoming when you come home. Pour some white vinegar down it and let it run with water for a few minutes.

Things to Do the Day of Departure

Set your water heater. Setting your water heater to a lesser temperature will save on energy costs. Some water heaters have a vacation mode that you can utilize. If yours doesn’t, you can turn it off completely. That will save you some dollars on energy while you’re gone.

Those who have a gas water heater shouldn’t turn it off completely but can set the temperature lower to conserve energy.

Turn off the main water tap.

It is advisable to turn off the main water to your home while you are away. This will prevent water lines from bursting while you are gone. The best advice is to turn it off at the street because water mains in the yard could spring a leak and pour hundreds of gallons into your yard before you get back.

You can also turn the water off at the house by turning off the main water line. You won’t need to do that if you do it at the street.

A special turn tool is typically used to turn the water off at the street. They can be purchased at any hardware store.

Drain toilets and add antifreeze.

Once you turn off the main water tap, flush the toilets to drain them. This is more important in winter than in summer because it prevents your toilets from freezing and cracking if your furnace stops working.

You will see there remains some water in the toilet. Add some antifreeze to it to prevent it from freezing should the temperatures dip.

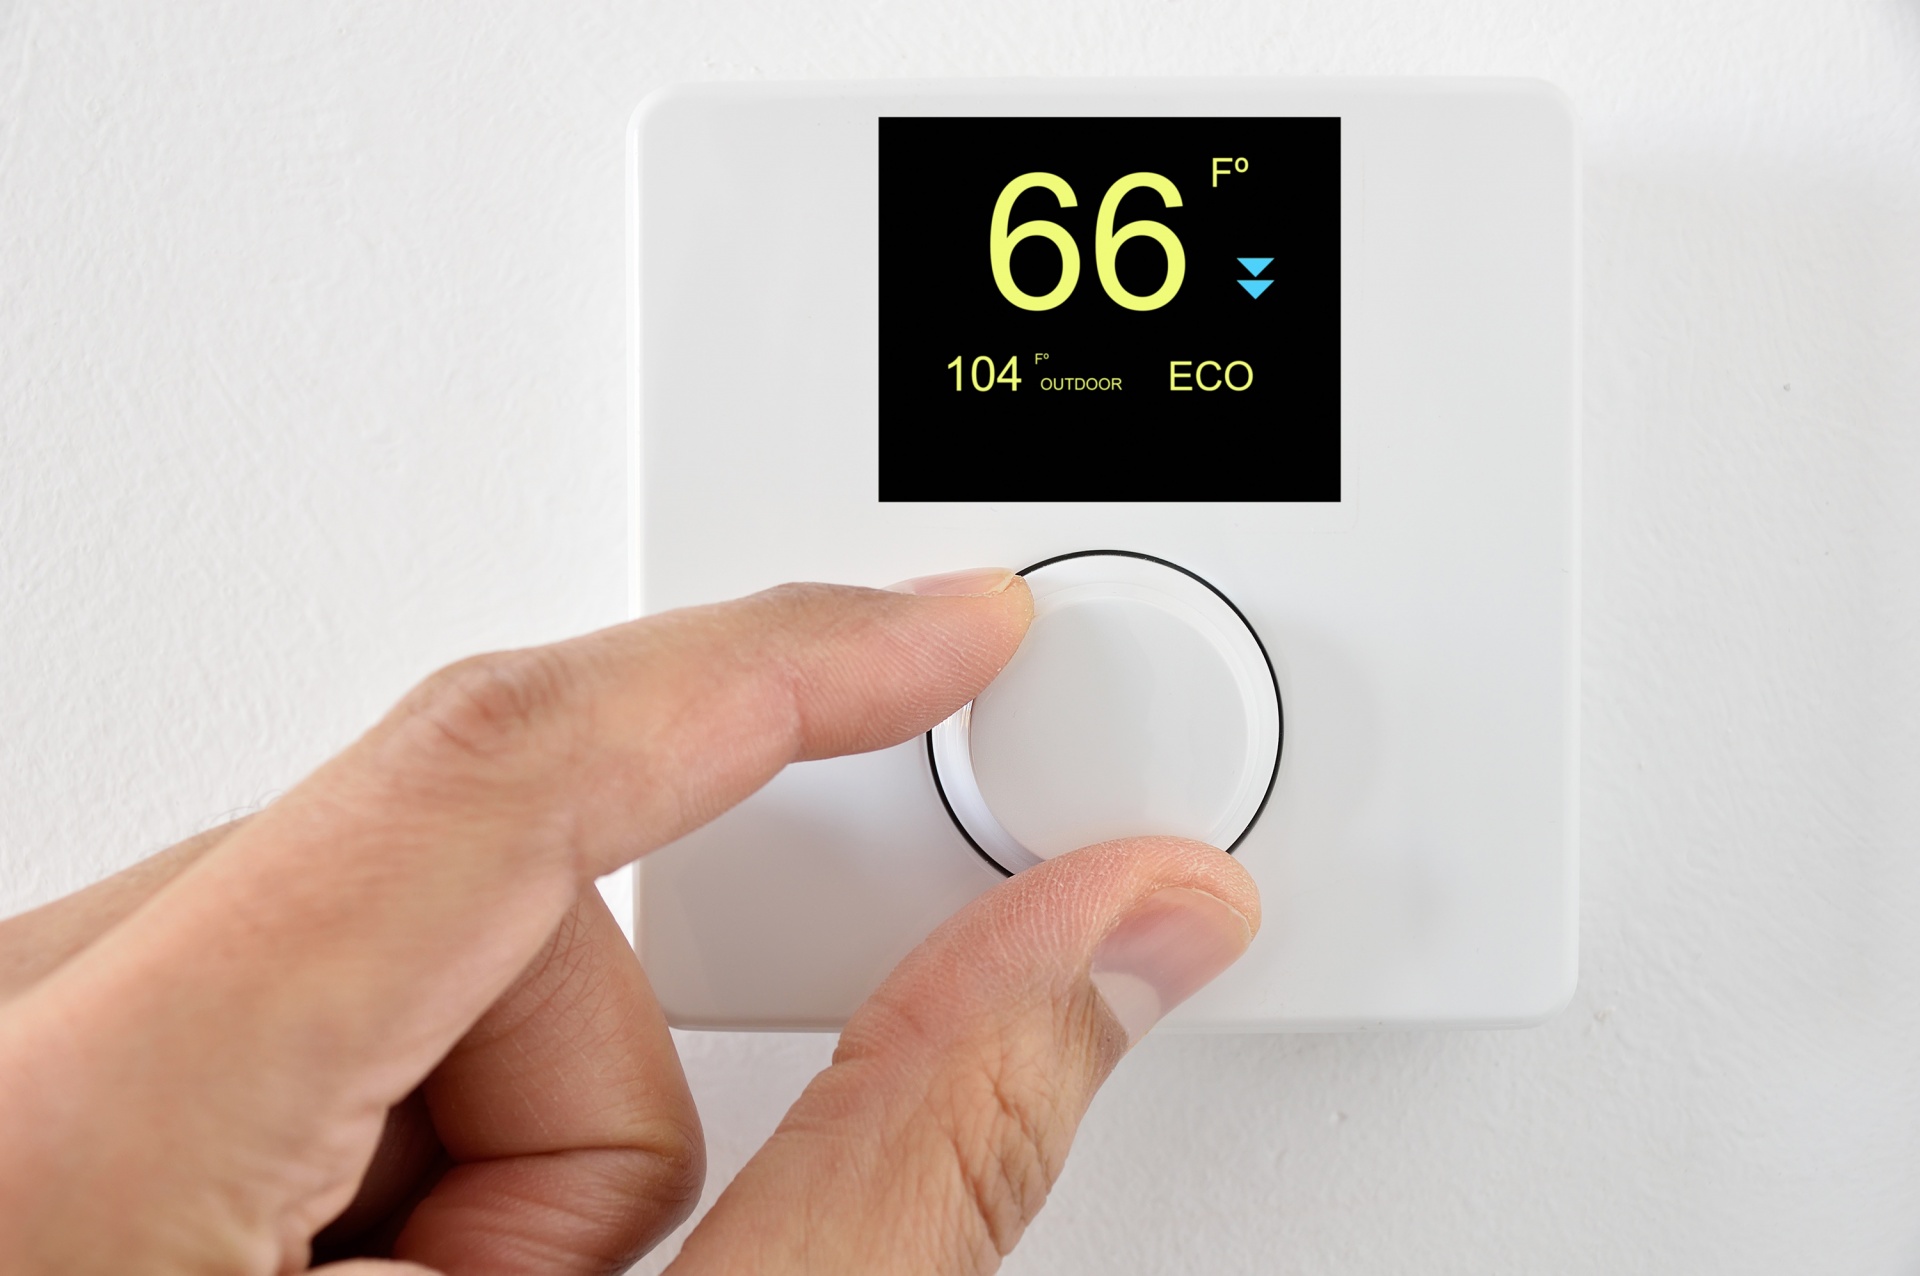
Adjust the thermostat.

The final thing you should do before you leave for your trip is adjust your thermostat. Since no one will be there, you don’t need it to be either cool in the summer or warm in the winter. It should be set to 85 for summer weather and 65 for winter temperatures.

Just don’t turn it off. You want air to circulate while you’re gone. That way moisture won’t produce condensation.

A programmable thermostat is a wonderful device. It would keep it at the vacation temp while you’re away and reset it to your livable temperature while you are traveling home so you walk into a perfectly temped home.

Conclusion

It takes extra time and planning to make sure your plumbing is in order before your vacation. However, you will find that a little bit of investment will save you a lot of headaches later and allows you to have peace of mind while you are living your stress-free vacation days.

The post Private: The Ultimate Plumbing Service Guide to Preparing Your Plumbing System Before a Vacation first appeared on Anta Plumbing Blog. This post first appeared on https://blog.antaplumbing.com

New Hipster Playlist From The Plumbing Info #16

Sean Kavanaugh

Life has taken given me quite a few curve balls but one thing is constant. Plumbing! I started my career in 1993 with T.H. Litvin one of the premier high-rise contractors in the Chicagoland area. From there I moved to Abbott Industries where I had the pleasure of working for the Abbott family as a purchasing agent and project manager. In 1997 my father and I founded Kavanaugh Plumbing Co. We specialized in commercial and industrial plumbing as well as plumbing service. After closing in 2012 I decided to spread my wings and dive into content marketing. in 2019 that ended abruptly and I am now the vice president of Houseal Plumbing a medium sized commercial, industrial and service plumbing company.

This post first appeared on http://www.theplumbinginfo.com

Choose a New Thermostat to Boost Your Comfort

Happy Fall! Now that we’re getting into the chillier months of the year, it’s time to take a look at one of our HVAC components that work front and center in our homes. No, we’re not talking about your heater or your air ducts, we’re talking about the little machine that sits on your wall and allows you to turn the temperature up or down. Your thermostat!

Thermostats do a lot of leg work, contrary to popular belief. They look snazzy and sometimes have cool smart controls, but they’re more than just nifty looking—they provide essential temperature control and regulation for your home. The more high-tech and up-to-date your thermostat is, the better your home comfort will be. This isn’t us just geeking out over technology, we’re trying to inform you about a great upgrade that you could make today!

Next time you call us for heating repair in Livingston, NJ, you might want to upgrade your thermostat as well.

How Your Heater and Your Thermostat Are Related

Let’s say your heater has just run into trouble. It’s making a strange noise, it’s running up your bill, or it’s doing something that makes you uncomfortable. The first step you need to make is to call us for help.

In the meantime, we urge you to check your thermostat for problems. You could have detected the problem in your heater earlier because of the problems that are apparent in your thermostat. For instance, a less effective thermostat will show you that it’s keeping things at a normal temperature, but in reality it’s running your heater too hot and it could lead to huge energy spending and problems down the line.

The truth is that your thermostat and heater are tied together and it’s up to us to make sure that they both work as they should. So while you’re waiting for heater repair, let’s discuss upgrading your thermostat.

Set Your Home Up for Success

Here are just a few ways that we can help ease the burden on your heater by upgrading your thermostat.

  • More accurate temperature readings. A high-tech, more updated model of thermostat will be able to provide you with better temperature readings. It works faster, it’s more reliable, and it’s just not going to fail or break down like your old thermostat would.
  • More convenient usage. Newer thermostats can be run from your smartphone which makes them easier to operate and more convenient for your life.
  • Better energy efficiency. Programmable thermostats can learn your comfort habits and run your heater to lower energy waste while keeping your home comfortable.

Smart or Wi-Fi Thermostats

Convenience isn’t just for your own life, it helps stave off heater repairs because your thermostat is paying more attention to your energy or fuel consumption. This is why we urge homeowners to invest in smart or Wi-Fi thermostats.

Wi-Fi thermostats let you lower the heater usage when you’re not home, so you can give your heater a break and reduce problems from occuring.

Smart thermostats will automatically lower the temperature during the night or when you’re not in need of powerful heat, so your heater gets even more of a break.

Call MarGo Plumbing Heating Cooling Inc. for a new thermostat and heater repair.

The post Choose a New Thermostat to Boost Your Comfort first appeared on MarGo Plumbing Heating Cooling Inc..

This post first appeared on https://margoplumbing.com

Clogged, Blocked, or Slow Moving Drains? Here’s What to Do

drainGetting a great plumbing system requires you to be as proactive as possible. While it’s common for plumbing problems to sneak up on you and cause interupptions, we don’t want this to happen to you repeatedly. This is why we’d like you to take a step back today and understand what’s going on with your plumbing system when this happens.

We specialize in plumbing in Orlando, FL. If you’d like to improve your plumbing, then we’re the ones who can make this happen for you. Today, we’re going to discuss what might be going on in your home if you have clogs, cracks, or slow-moving drains and we’ll explain how to fix these issues.

What’s Going On?

Let’s go through the problems that you might be experiencing and their backstory.

Clogs

Food debris, soap scum, fats, oils, grease, and more all add up. These are the things that create the clogs that cause your sink to bubble.

Blocks

Are you wondering how blocks are different than clogs? Blocks are what we classify as outside problems that have worked their way into your system. These are the tree branches and other things that can interfere with your home’s plumbing system.

Slow Moving Drains

Slow-moving drains are the warning signs that come before clogs. Don’t ignore this issue. It’s your sign to get a professional by your side. 

How Did It Happen?

Okay, now let’s get into how this might have happened. This is the backtracking that we alluded to in the introduction. Figuring out how this happened is the best way to prevent it from ever happening again. Here are a few reasons why you might have issues:

  • FOG: FOG is an acronym that stands for fat, oil, or grease. If you’re letting these substances slide down the drain, it might be fine at first, but it’s eventually going to settle and become an issue for your home. These substances are magnets for clogs and it’s going to create a snowball effect. 
  • No Drain Strainer: The best (and simplest) thing you can do for your plumbing is run out to your local hardware store and get yourself a drain strainer. We’re all fallible. If you make a mistake from time to time, your drain strainer will have your back.
  • Lack of Proper Care or Maintenance: You should be maintaining your home’s plumbing system just like any other home system. Make sure that you have a professional out to your home when you need maintenance or any other plumbing service. 

What Should You Do?

Honestly speaking, the better way to phrase this might be, “what not to do” because the one thing you should do is schedule an appointment with a professional. Your plumbing system is complex and requires professional care. Don’t let someone who doesn’t have years of experience, training, and licensure touch your plumbing system. 

If you’re tempted by the in-store and over-the-counter drain cleaners, this is your warning sign not to go through with what you’re considering. You need professional care. Amateur plumbing efforts are always bad news. We want to help you move around this. 

Contact Modern Plumbing Industries, Inc. today to schedule an appointment with our professionals. 

This post first appeared on https://www.modernpi.com

Sump Pump Switches

UPDATED: July 5, 2017

Sump pump switches are the main link for controlling the sump pump. The main cause for sump pumps to not operate properly is the switch. Without the switch, the pump will not turn on. There are basically three types of switches; vertical, diaphragm, and tethered. There is an electronic switch that we will get into later.

Sump pumps can be found at Home Depot and Lowes! Replacement and maintenance can be costly but with these tips and an adjustment or two, you?ll be able to fix your switch in no time. It?s hydromatic, meaning it has functions like an automatic transmission that was originally developed for cars. They come in different shapes and sizes ranging from mini to giant. There are different kinds of pumps out there too, like a modern Flotec pump, or a Watchdog alarm pump.

The Zoeller Pump Company is another great place to purchase your sump pump. There?s also submersible Utilitech and Myers sump pumps, as well as durable Wayne pumps, you can invest in. Top suction design in Ridgid sump pumps prevents air locking for ultimate reliability. You get to be the controller to determine which sump pump is right for you. To find out what?s best for you and to learn more about sump pump switches, keep reading! This section we will discuss the do?s and don?ts about sump pump switches.

The easiest way to tell if you have a piggyback plug is to look at your plug, is there one cord or two? If there are two cords then you have a piggyback plug. If you have only one cord you may have a vertical switch that is internally wired and permanently connected to your pump.

Piggyback plugs make it very easy to test your pump. Identifying the two cords is easy. The cord that only has the male plug is for the pump and the cord that has both the male and female end is the switch. To test the internal pump, unplug the pump cord from the switch cord. ÿNow plug the pump cord directly into the outlet. If the pump turns on the pump is operating.

Properly installing a switch is vital to proper operation of the pump and protection of your basement. You don?t want bells and alarms going off in your head thinking ?how do I do this?? The last thing we want is for you to be stuck and unsure what to do. Some switches are adjustable and some are not. It is very important that the pump is cycled properly. If a pump short cycles (runs for a short period of time often) this can put unwanted stress on the pump.

Sometimes a switch can be installed too low and the pump can dry run. All submersible pumps are designed to be under water when running. The water acts, as a cooler to make sure the pump does not get excessively hot. Though most pumps have thermal overload switches, overheating a pump is one the quickest ways to shorten its life.

Vertical switches are well suited for most installations because they are easy to install and adjust. Most, if not all vertical switches utilize a piggyback plug. ÿThe vertical switches operation is very simple. The vertical switch consists of a float, some sort of rod, and a switch enclosed in a small housing attached to the pump body or the discharge pipe.

As the water rises in the sump basin, the float rises with the water. At a predetermined height, the float activates a switch and the pump is turned on. As the water level falls the float falls with the water and again the pump is shut off at a predetermined height. Vertical switches are great for small diameter basins. The vertical switches motion is somewhat controlled since it travels on a rod that is affixed to the pump or discharge pipe and does not vary much. The issue with most vertical switches is that they are not well suited for deep basins. This switches cycle is limited to the length of the rod.

Diaphragm switches work well for some installations. ÿMost, if not all diaphragm switches again utilize the piggyback plug. Diaphragm switches operate differently than most other types of sump switches. A diaphragm switch is triggered by pressure. ÿThis type of switch is usually mounted very low on the pump body or on the side of the pump.

As the water level rises in the sump basin, the pressure exerted on the switch is increased. Once the pressure is high enough to compress the bladder contained within the switch, the switch is energized and the pump is turned on. As water is pumped out of the basin the water level falls and thus the pressure falls. Once the pressure on the bladder contained within the switch is low enough, the bladder expands again and the switch is de-energized. These types of switches are great for basins with very little room or basins that are congested. One of the problems with diaphragm switches is adjusting the trigger levels. Diaphragm switches ARE NOT adjustable making it very important to select the correct switch.

This post first appeared on http://www.theplumbinginfo.com

Add Cleaning Your Bathroom Fixtures to Your Beauty Routine

You’ve got your loofah sponge and your deep conditioning hair rinse, but your bathroom fixtures could use a little self-care too. Here are some easy ways to make sure your bathroom fixtures are clean and functioning for their best life.

Head to Your Shower

As you face your shower and let the water stream down on your head, how many of us have actually opened our eyes and looked at how dirty our shower head actually is? Areas with hard water can plainly see the build-up of calcium and other minerals that might be blocking your shower head spray. Not to mention, icky bacteria and mildew that can thrive on your shower head. And if all that hasn’t convinced you of the need to scrub down your shower head, how about the errant spray from the shower head that hits in all the wrong places because the tiny holes have been plugged with gunk?

Okay – ready now?

Shower Head Cleaning Options

  • You can clean your shower head without taking it down. Simply fill a plastic bag with white vinegar and attach it to the shower head using a rubber band. After about an hour, remove the bag and turn on the shower to rinse. Voilà!
  • For really crusty shower heads, use a wrench wrapped in a towel to protect the shower head finish and detach the head from the arm. Dunk the shower head into a mix of 2 cups of vinegar to 4 tablespoons of baking soda and leave it there overnight. Use an old toothbrush to give it a good scrub and a pin to unclog the holes. Rinse and replace.

Down the Drain

Lots of self-care happens over top of your sink. And your sink’s drain pays the price of beauty. Have you noticed water isn’t draining from your sink efficiently? That’s because all that toothpaste, shaving cream, bits of hair and soap scum are settling in your drain. So, while you’re rinsing your pores, your water can’t pour down the drain. Here’s what you can do:

  • Remove any debris in the drain that you can see. Pull up the stopper and clear away hair or chunks of toothpaste that might be blocking water from flowing down the drain. Tougher clogs might need the help of a drain snake. If your drain is blocked and not easily cleared, you may need the help of a professional plumber who can safely clear your drains without damaging your pipes or creating a larger issue by pushing a blockage farther down your system.
  • To help mitigate foul odors coming from your drain, try using hydrogen peroxide or other non-corrosive/natural cleaning products to help break up the bacteria inside your drain. Avoid hard drain cleaners that might temporarily help your drain but do longer-term damage to your pipes.
  • You may also hot water, vinegar, and baking soda to do the trick.

Potty Talk

Despite a bad rap, our toilet bowl is an MVP in our home and should be treated as such. Regular cleaning will reduce odors and increase the longevity of your toilet. Here’s how to give the porcelain god the TLC it deserves:

  • When cleaning out the bowl, reduce the water by pouring a half bucket of water into the bowl. This will allow for your disinfectant to not dilute and more properly sanitize the bowl.
  • Use antibacterial cleaners that contain bleach. Scrub thoroughly and rinse. Use a spray disinfectant on your toilet brush prior to storing.
  • Wipe down the exterior of the toilet with wipes (do not flush) or with a sponge/paper towels and disinfectant.
  • Start with the toilet handle, then work your way down to the seat and exterior.

Clean bathroom fixtures are better for your health and the cleanliness of one of your most-used rooms. A dirty bathroom fixture can make it malfunction; but sometimes bigger plumbing issues are to blame. If your bathroom fixtures are backing up your morning routine, call the experts at Len The Plumber.

Whether you are looking for routine maintenance or need a major repair, our professionals will be able to help you no matter how big or small the problem is. Contact Len The Plumber today by calling (800) 950-4619(800) 950-4619.

This post first appeared on https://lentheplumber.com

What is the best way to clear a drain?

Introduction

There are many ways to clear a drain, but none is as effective or inexpensive as using hot water from the tap. All you need is an old rag and some elbow grease! Simply plunge the rag into the hot water and wrap it tightly around your hand before shoving it down the pipe. If that doesn’t work, break out chemicals, call a plumber or keep reading.


How to clear/clean a clog in your drain.

On most occasions, plunging and using chemical cleaners is enough to fix a clog and clear a drain. But if these tactics don’t work, there might be something more stuck in the pipe. If you find that the plunger does nothing to move water in the pipe or if it doesn’t make any noise when you plunge, then you need to use chemical cleaners.

Hot water with dish soap is another option for clearing a clog in your drain. It won’t cost anything and is often successful with hair and other oily buildup, making it an attractive alternative to chemical cleaners. You can use either an old rag or your handkerchief to scrub the cloth into the clogged area, and then twist and turn it around the drain. While the water is running, it should help the cloth move around more easily since it will be lubricated by the soap. But remember not to leave any chemicals in your drain for an extended period of time – either follow up with hot water or plunging to clear out any chemical residue.

If you find that all of these options are unsuccessful, you might have another problem on your hands.


Relevant: Shower Habits That Affects Your Plumbing


Some people think that if every other option doesn’t work then there’s no hope left for their clogged drain! However, if you want to try one last thing before spending money on professional fixing services, use boiling water and a rag to clear out the drain.

To begin with, fill your pot or saucepan with water and bring it to a rolling boil. Once the water is boiling hot, turn off the stove and gently dip one side of your rag in it. Afterwards, remove your hand from the water so that you don’t burn yourself! To protect your hands further, wrap the wet portion around another clean cloth before placing your hand down into the pipe for protection. While you shouldn’t put yourself at risk by touching any of metal parts in your pipes, this should prevent most injuries.

Before inserting it into the drain, twist and turn both sides around in order to get them completely soaked (it helps if you dunk each side separately). Then quickly put your rag-covered hand down into the drain and give it a twist, turn and pull to remove the clog. You might have to do this several times in order to clear out all debris, but it should work well!

If you find that none of these techniques are effective, then you likely have a more serious problem on your hands than just removing debris from the drain. Even so, this method is an easy way to save money for those who want to try one last thing before hiring larger fixing services. Do be careful when putting hot or boiling water down your pipes since they can corrode at certain points where chemicals gather (especially if you live in an older household)!


Conclusion

We hope that these methods will help you clear a clog in your drain. If none of them work, then it’s time to call a plumber or at the very least break out those chemicals! But if they do work and you manage to fix the issue yourself without having to spend money on professional services, we would be happy for you! In any case, remember not to put hot water down your pipes as this can corrode metal parts over time.


How To Use A Toilet Auger ? Everything You?ll Need To Know

How To Use A Toilet Auger

There isn?t anything more embarrassing than a toilet clog, and many times a plunger just won?t cut the mustard. However, if you?ve read the plumbing info in the past you know we are big fans of keeping a toilet auger around. There are very few toilet clogs we have encountered that can?t be taken care of with minimal effort or stress with a 6ft toilet auger. So before you run to Google your local plumber, invest in a toilet auger first.

Everyone has had that sickening feeling, you flush the toilet, the water quickly rises in the bowl and a range of emotions washes over you in a short time. Will the water pressure push the blockage down the trap before it overflows? Please let the water stop rising or God forbid you?re in a guest?s house. When facing a toilet clog that won?t budge, even after trying the silly cup plunger sitting next to the toilet (Cup plumbers aren?t meant for toilet clogs.), a toilet auger is a much a better bet for the job. A toilet auger is a tool that is designed to funnel itself through a toilet?s trap-way, to remove any obstruction or clog. The great thing about a closet auger is that not only can they clear the water closet trap way they can also remove a clog that has moved past the toilet into the waste line. If you have a 3ft toilet auger you can reach blockages about 2ft into the waste line, if you?ve invested in a 6ft toilet auger (Recommended) you can reach blockages about 5ft into the waste line. Why is a toilet auger so much better than a plunger? Because, many times when using a plunger all you?re doing is pushing the blockage past the toilet into your waste line. A toilet auger is breaking up the blockage so it can flow down the waste line.

If you want to know how to use a toilet auger, you?re going to want to check out if its design is applicable for the clog and toilet?s plumbing structure.

Many augers may either have the following:

You?ll want to know how to use a toilet auger in the event of a severely clogged toilet that is unresponsive, plungers, or other tools. Typically a toilet auger has an extendable flexible shaft with a protective guide tube, is constructed from metal, and has a crank handle at the end.

The length of a toilet auger may vary, so you?ll want to keep in mind the extent of a toilet auger?s reach when attempting to clear a toilet drain. Most toilet augers extend anywhere between 3 to 6 feet in length to remove clogs.

A closed coil head to push through clogs

A closed coil head to push through clogs
An open coil head which hooks onto items
A fixed head goes through narrower drains

Avoid excessive force when pushing the auger cable through, it may risk damaging the toilet or pipes. Use slow controlled motions to feed the auger into the drain, and remove it to prevent accidents. Depending on the design of the toilet auger, it may have the potential to recoil back and cause injury.

If the toilet auger is unsuccessful removing the clog, you may want to call for professional plumbing services to come in and help. It is also helpful to keep some troubleshooting ideas in mind when using a toilet auger to clear a clog. If you want to know how to use a toilet auger, you?ll want to have some patience to get things done right.

Avoid excessive force when pushing the auger cable through, it may risk damaging the toilet or pipes. Use slow controlled motions to feed the auger into the drain, and remove it to prevent accidents. Depending on the design of the toilet auger, it may have the potential to recoil back and cause injury.
If the toilet auger is unsuccessful removing the clog, you may want to call for professional plumbing services to come in and help. It is also helpful to keep some troubleshooting ideas in mind when using a toilet auger to clear a clog. If you want to know how to use a toilet auger, you?ll want to have some patience to get things done right.

Extendable augers allow you to release more of the toilet auger?s cable into the toilet once you have it in position.

If a toilet auger has a steel cable core, it is more resistant to wear and tear and doesn?t leave you feeling like the auger is going to develop a kink or break off when it is in the toilet drain.

Some toilet augers may have interchangeable tips (Very rare) that allow you to switch up as needed to take care of the clog. Sometimes a clog needs to be pulled out instead of getting pushed through.

After assessing the state of your toilet, you will want to break out your auger to tackle the clog. Make sure to keep a bucket close by in case of a mess. Having a bucket at hand is a better way to transport the auger after you use it on the toilet unless you like the idea of a tool dripping dirty water around the bathroom and house.

Set up your toilet auger so that the curved end is facing the direction of the drain. You will also want to give about 6 inches of slack with the cable between the space of the drain and the handle pipe?s end. Keep the auger?s screw taut before continuing.

Utilize An Auger To Remove A Clog

Once you are sure that the auger is positioned in alignment with the drain, you need to push the cable through the toilet while turning it clockwise. Once you find that you can no longer turn the auger cable clockwise, begin pushing the cable forward.

Either you will feel the auger hook onto the clog, or it will push the clog through and break it up.

Keep Your Auger Clean

Once you hit paydirt, and the auger has made contact with the clog, you can remove it from the toilet drain. Feel free to apply the plunger to make sure that there are no residual materials that can cause another obstruction. Flush the toilet for good measure, and to make sure any dislodged clogs are removed.

This post first appeared on http://www.theplumbinginfo.com

+1-877-959-3534