7 Common AC Problems We See

7 Common AC Problems We See

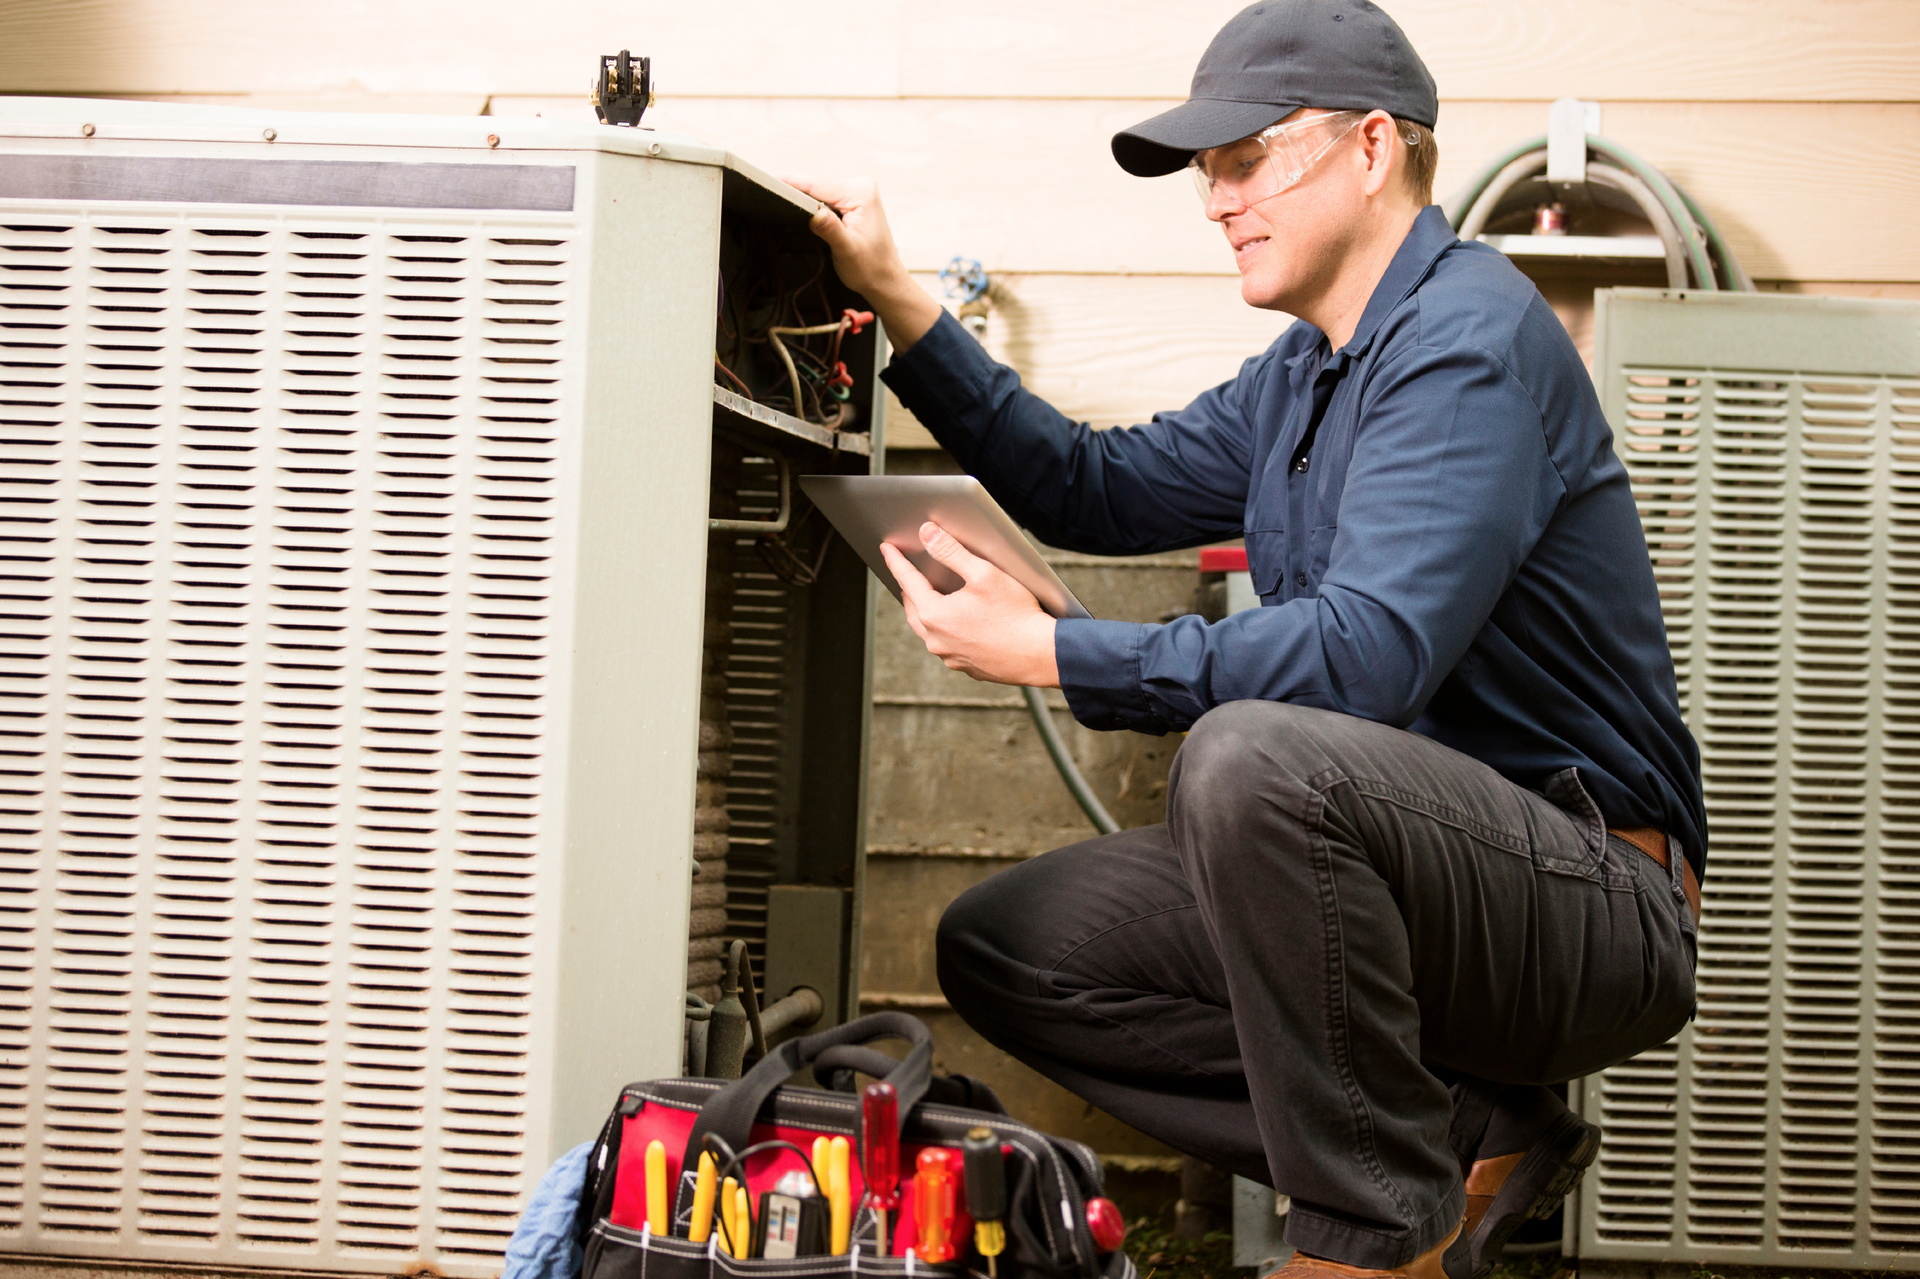
We’ve all been there. It’s late at night, your air conditioner is starting to freak out, and you’re frantically searching online for the root of the problem. You’re breezing through blog post after blog post, noticing that things are just stressing you out even more and you don’t know what’s a rare issue, or what’s a more common one that you’re likely experiencing. We don’t envy you.

However, we do want to help you. It’s very likely that your air conditioner is suffering from one of the most common problems we see that we’ve listed below. Sure, your system could be in a unique position where it’s suffering from a rare issue, but that will still require a professional to address it anyways. So, when it comes to air conditioning in Roseland, NJ, you’re better off calling for professional help when you can.

In the meantime, here are some of the common problems that we see in air conditioners.

A Refrigerant Leak

Refrigerant leaks can be apparent through a lot of problems. The reason why we’re mentioning it is because it shows up in many forms but is always a problem that requires professional help. Your AC could be running poorly, costing more, and making strange noises that all signal to it leaking refrigerant. There’s a very high chance that this is the culprit behind your dissatisfaction with your AC.

Clogged Air Filter

Your air filter needs to be changed out every 1-3 months depending on how heavily you use your AC. The longer you wait between air filter changes, the more likely you are to experience problems that come from this. Your system could start overheating or consuming more energy as it struggles to get fresh air from the intake duct.

Electrical Problem

Our air conditioners consume a lot of energy, which is why they need to be appropriately set up to our home electrical systems. If you’re noticing that the system keeps shutting off, it’s making a buzzing noise, or it’s constantly tripping the circuits in your home, then you need to call for professional help. You’re likely dealing with an electrical issue.

Efficiency Issues

Your AC should be able to cool your home at a reasonable cost. If you’re seeing an uptick in your monthly energy bills, then there could be something wrong that needs to be repaired. Don’t let this high cost for comfort be the new normal!

Lukewarm Air

On a hot day, if you’re putting your hand near the air vents and only feeling lukewarm or even warm air, then something is clearly wrong. A variety of problems could be causing this, but all of these issues need to be addressed by a professional.

Short Cycling

Short cycling is when your air conditioner runs in short, frequent cycles that cause it to inadequately cool your home and suck up too much energy. If you’re noticing this, then you need to call for help. This is a serious problem that could lead to an early breakdown if you’re not careful.

Complete Breakdown

Lastly, if your air conditioner just isn’t working at all, then it needs to be fixed. There is a long list of problems that could have caused this, but we promise we’ll locate the exact issue and fix the root of the problem.

It’s time to fix your AC by calling MarGo Plumbing Heating Cooling Inc. today!

The post 7 Common AC Problems We See first appeared on MarGo Plumbing Heating Cooling Inc..

This post first appeared on https://margoplumbing.com

How Long Do Water Softeners Last?

swirling-drainWhen you buy any type of HVAC system, we know that you’re buying it with the intention of it lasting as long as it possibly can. We know that this applies to your water softener as well. Finding a great water softener and getting it to last is important. It’s also necessary in a place like Orlando. If you’re wondering how long this system can last, then we’re here to answer your question.

We’re experts when it comes to water softeners in Orlando, FL. We’re going to let you know how long your water softener can last and what factors affect the lifespan of this system.

How Long Does It Last?

Let’s get down to the cold, hard facts here. How long do water softeners last? A typical water softening system can last you about 20 years. The operative word here is can. Just because a water softener can last this long doesn’t mean that it will. This is just an estimate. The true length of your water softener depends on a few different factors.

Your Water

How hard is your water? We suffer from our fair share of hard water softener problems in Orlando, and, because of this, your water softener is going to have to work a bit harder. It’s possible for your water softener to last a little longer if you live in an area with softer water, but you can combat this with the correct care.

Your Water Softener

Choosing the right water softener is vital. Choosing the “right” water softener is about so much more than just choosing a system that has a lot of great features. It’s about choosing what’s right for your home in particular. This starts with knowing what you need. What type of contaminants affect your space? We’ll help you determine this and find the right water softener for you as well.

Your Care

Maintenance counts! We find that people who invest in indoor air quality and water care systems seem to overlook the importance of maintenance. Your water softener needs maintenance as well. This routine maintenance makes sure that your water softener is always ready to perform. There’s no point in even having a water softener if it’s not going to serve you when you need it most.

Why Should You Maintain?

Your water softener works by removing mineral deposits (typically calcium and magnesium) along with sodium. This is done through the use of resin beads. There’s an exchange between the “hard” water and the sodium in the softening tank. You need to maintain this to make sure that your water softener is able to do its job.

Over time, the beads do wear down. The beads will become covered in calcium and magnesium. They’re either going to need to be replaced entirely or restored. Make sure that you’re allowing one of our team members to check in with this system annually. It will ensure that you have the best service possible and that your system lasts as long as possible.

Contact Modern Plumbing Industries, Inc. today for your water softener services.

This post first appeared on https://www.modernpi.com

What’s the Lifespan of My Home’s Plumbing?

Your home’s plumbing works hard every day and while some of your products and fixtures may need to be replaced sooner than others, it’s no pipe dream to have your home’s pipes and fixtures perform well for decades. Caring for your home’s plumbing can keep yours running past the average life span. Here’s an idea of how long your home’s plumbing should last.

Pipes: Know What You Have

Knowing the type of plumbing in your home makes a difference in knowing how long you can expect it to last without starting to be compromised. Your home inspection report or your new home’s documents and warranties will give you a good idea about the type of plumbing system you have and when it was installed. You can also pay for a thorough inspection of your plumbing system to get a true status of its viability.

On average supply pipes that are brass, iron or steel can have a viable lifespan of 50-70 years; copper is 70-80 or more years. PVC piping has a shorter lifespan of fewer than 50 years.

Some homes in the Mid-Atlantic build in the 1970s-90s used a briefly popular product called polybutylene piping which was thought to be easier to plumb because it was made from pliable plastic. The product became susceptible to breaking and is often removed from a home as a preventative measure. An inspection can determine if your polybutylene piping is failing.

Hot Water Heaters

Your water heater cranks every day to make sure you get that hot shower in the morning. While the number of people in the home makes a difference in your hot water heater’s workday, here’s a look at how long you can expect before replacing your hot water heater.

Toilets

A malfunctioning toilet can be a major home meltdown. Toilets can last nearly 50 years but that doesn’t mean all its internal components. A toilet operation is fairly simple, but it does contain about a dozen moving parts. It isn’t unusual to have to replace some of the components during the lifespan of the toilet but cracked bowls or issues with successful flushing may mean it’s time for a new toilet.

If your toilet is manufactured before 1994, it might be a good idea to proactively swap it out. Older toilets use more gallons of water than necessary causing your water bill to inflate. A new toilet may offset the cost of that high water bill.

Faucets

Kitchen faucets have evolved with smart technology and touchless technology, but we can all agree a functioning faucet is a major necessity in the kitchen. Over time faucets can create a build-up of mineral deposits from the hard water we use in our homes. A simple cartridge repair can do the trick. But, if you find rust coming from your faucet or consistent leaking, it might be time for a new faucet. A faucet’s useful lifespan can vary depending on manufacturer, but the average is about 12 years.

Sump Pumps

One of your home’s plumbing MVPs is the sump pump. Designed to keep your basement dry in the event of heavy rains, your sump pump’s average lifespan is about 10 years. If you suspect yours is approaching that age, it is best to get it inspected. A non-operating sump pump can put you in a lot of hot water, fast.

Well Pumps

If your home is on a well, your well pump is the most important component to keep your water running. A well pump can last 8-15 years, depending on your water usage, number of people living in the house, sediment levels, and your area water levels.

Putting off plumbing repairs or replacement is never a good idea. Failed plumbing can lead to major home damage meaning that small replacement job just turned into a major insurance nightmare. At Len The Plumber, our expertise helps you know whether your plumbing issue is one that can be repaired or if replacement is the best solution.

This post first appeared on https://lentheplumber.com

How to Tell if Your Pipes are Corroding

Unless a plumbing problem is obvious – like a clogged toilet or leaking water heater – it tends to go unnoticed. This, of course, is not a good thing. Undetected plumbing issues lead to damage of whatever comes into contact with the resulting water leak – such as drywall, subflooring, flooring, foundation slabs, etc. Obviously, being able to recognize the early signs of trouble can help prevent more extensive damage and the expense involved in repairs.

As we covered in our blog post – “Why Are My Pipes Leaking?” – corroding pipes are a common cause of leaks, as the inside of pipe walls may corrode or rust over time. This happens faster if you have hard water, a high pH level (acidity) or particularly high water pressure. As pipes corrode, they can’t handle the pressure or force of water flowing through them. Eventually, that pressure and force may create a leak in a particularly corroded section.

Telltale Signs of Corrosion to Look For

So how can you tell if your pipes are corroding? Because most of your house’s pipes are out of sight, they’re usually out of mind, but keep on the lookout for the following, courtesy of the good people at SageWater:

Low water pressure Low water pressure is an indicator of severely corroded pipes. As corrosion builds up inside the pipe, water flow is drastically reduced to faucets, showerheads and more.

Drain backups Corrosion of your drain, waste, and vent (DWV) pipes can cause major blockages and even complete structural failure. Slow-draining water, odors and backups are all symptoms of a corroded DWV piping system.

Extreme fluctuations in hot water temperature Hot water pipes corrode faster than cold water pipes. Due to the corrosion in these pipes, debris collects in the anti-scalding components of sinks, tub, or shower valves, causing excessive fluctuations in hot water temperature.

Discolored water Brown- or red-tinted water is a sign that your pipes are corroding. As the interior of the pipes rust, metal flakes off the pipe, causing the water to become discolored.

Chronic leaks As pipes begin to fail, leaks can occur more frequently. Repairing one leak without investigating the cause (as may be the case with a DIY repair) will not address the greater issue over the long run.

Noisy plumbing Your plumbing system should operate quietly. Clanking, clicks, thuds and groans from your piping system are caused by variances in pressure or temperature – which raise a big red flag that something’s wrong.

Some visible signs of corrosion – Look at your exposed piping for evidence – for example, a bluish-green tint on copper pipes. Also, rust-colored powder on your pipes, discoloration of any kind, flaking, and dimpling all indicate corrosion.

What Causes Pipe Corrosion?

There are many factors that cause corrosion. It is true that older pipes are prone to corrosion, but even newer pipes can corrode, and do so quickly. E.R. Services Plumbing provides the following most common reasons:

Low pH – If the pH of your water is acidic or neutral, it can cause copper pipes to corrode quickly. A value of 7 represents neutral pH. Values that are below 7 denote the acidic nature of water, and those above 7 denote alkalinity. An alkaline water pH will form a copper oxide film on the inside of copper pipes, which minimizes corrosion. However, if the pH value is neutral or acidic, it will cause your copper pipes to corrode quickly because the copper oxide coat dissolves – which can cause pinhole leaks. Keep reading to learn more about copper pipe corrosion.

Oxidation and water temperature – Your water system is constantly being replenished with oxygenated water. That means air has been dissolved into the water, comprised of approximately 30% oxygen and 70% nitrogen. Nitrogen is non-corrosive, but oxygen corrodes metal through a process called oxidation. This is when the metal converts to oxide (rust), and the metal thins and weakens as more of it rusts. As corrosion continues, rust accumulates inside the pipes. Rust is not smooth, and the nooks and crannies in this uneven surface attract and capture impurities in the water, causing build-up inside the pipes. Eventually, the metal thins, becoming vulnerable to pinhole leaks and breakage.

It is also crucial to understand that the process of oxidation increases when the water temperature is high – which is why hot water lines corrode faster.

Too high-water velocity – In a closed-loop piping system, erosion corrosion can occur because of flow obstacles, such as excess solder. Improperly soldered joints are more prone to corrosion.

Chemical drain cleaners – Drain cleaners might solve your problem instantly, but they can cause extensive damage to your pipes. Make sure you don’t get into a habit of using drain cleaners to clear your blockages, because they do more harm to your pipes in the long run.

A Few Words About Copper Pipes

Most homes in the United States have copper pipes, which have been in use since 1963 for plumbing systems and domestic water supplies. However, copper pipes are vulnerable to corrosion. There are three types of copper pitting corrosion:

Type I – This type of corrosion occurs if you have hard to moderately hard water (where the pH is between 7 to 7.8). Cold water lines are more prone to this type of corrosion.

Type II – This type of corrosion occurs if the water pH is below 7.2 and the hot water temperature is over 140-degree F.

Type III – This type of corrosion occurs in cold water where the pH value exceeds 8. Corrosion of this type might not cause pipe breakage, but it can result in discoloration, byproduct releases and pipe blockage issues.

A Few Words About Galvanized Pipes

Galvanized pipes are steel pipes that have been dipped in a protective zinc coating to prevent corrosion and rust. This type of piping was commonly installed in homes built before 1960. When it was invented, galvanized pipe was an alternative to lead pipe for water supply lines. However, minerals present in the water react with the pipe, resulting in mineral buildup. This, in turn, results in corrosion.

A Few Words About Polybutylene Pipes

Polybutylene is an inexpensive, flexible plastic that was used for residential piping from 1978 to 1995. However, it’s extremely vulnerable to rupturing (which ultimately led to a class action lawsuit), and therefore is no longer accepted by U.S. building codes. If your pipes are white plastic and include the letters “PB” in the printed label, you have polybutylene pipes. We recommend replacing them immediately.

The Take-Home Message

Now that you know the telltale signs, being observant won’t prevent your plumbing pipes from corroding, but you’ll be able to contact us when you see (or hear) evidence of trouble before greater damage occurs. Our master plumbers at Adams and Son Plumbing have proudly served Central Florida homes and businesses with the highest level of quality and experience for over 60 years. We are family-owned and operated, and all of our plumbers are state-certified master plumbers. You can always count on us to keep your plumbing in top repair!

The post How to Tell if Your Pipes are Corroding appeared first on Adams and Son Plumbing Services.

Answering 4 Common Questions About Hidden Leaks

Leak detection and repair are among the most important services we offer for plumbing in Glendale, AZ. No homeowner wants leaky pipes or fixtures in their house since this wastes water and can lead to mold growth and building damage. Since most of the piping in a house is hidden from sight, locating leaks is difficult and requires plumbers with the right skills and tools.

We’re going to answer four common questions people have about the hidden leaks they may have in their homes. We hope this helps you deal with potential problems and avoid the worst outcomes of leaky plumbing.

1. Is there anything I can do to prevent leaks from starting?

Yes, but you cannot stop all leaks through preventive measures. Unfortunately, one cause of hidden leaks is a type of corrosion that occurs in copper pipes called formicary corrosion. This corrosion leads to pinhole leaks, which are difficult to catch. Formicary corrosion comes from chemicals in the water or in the air of a house, and it’s hard to stop it from happening. The best way to avoid leaks is to have repiping done for the house if the plumbing is old (more than 50 years).

2. Can I locate hidden leaks on my own?

It’s possible—but you won’t be able to locate them with the precision necessary to repair the leaks, nor do you have the equipment and training necessary to excavate the pipe, remove the leaking section, and replace it. You can do detective work to determine that you have hidden leaks by checking the water meter, but once you know about the leaks, it’s best to leave the detection/repair job to licensed professionals. 

3. How much water does one of these leaks waste?

When we talk about something called a pinhole leak, it doesn’t sound intimidating. Yet the cumulative water waste from these leaks can be staggering. According to the US Environmental Protection Agency, 10% of homes have leaks that waste 90 gallons or more per day, with a total for the country of one trillion gallons wasted through leaks a year. As a basic guideline, if a family of four has water use per month in excess of 12,000 gallons, it means there are major leaks. 

4. How do professionals find hidden leaks?

The methods and techniques of leak detection continue to advance with each year, and our plumbers use the best tools and the most up-to-date training. Detection starts with plumbing knowledge to narrow down where leaks are most likely occurring. Once our plumbers have a general sense of the problem and where it’s coming from, they use tools such as acoustic listening discs to hear the sound of water escaping and special thermal scanners that pick up on temperature differences and pressure rises in areas where water is leaving a pipe. Video camera equipment inserted into the plumbing can pinpoint leaks and their size with great precision. 

We have emergency services available to handle your home’s leak problems. If you aren’t sure about hidden leaks in your house, scheduling leak detection is an excellent preventive measure that helps you get ahead of problems.

Trust The Trusted Plumber.

This post first appeared on https://www.thetrustedplumber.com

The Importance Of The Plumbing Inspection When Purchasing A New Home

The Importance Of The Plumbing Inspection When Purchasing A New Home

Buying a house is a big investment. Saving some money throughout that process is a reasonable goal, but one area you don’t want to skimp on is scheduling a plumbing inspection before signing on the dotted line.

From sinks, toilets and drains to water heaters, washing machines and showers, plumbing reaches every corner of the home. As such, a leak or major break can result in extra damages that could have potentially been avoided with early detection and a simple fix. So before you start scheduling a move-in date, you should first consider the importance of the plumbing inspection.

Know the Issues

When it comes to plumbing, a small problem can evolve into a major nightmare if an issue goes unresolved. One of the main reasons to schedule a plumbing inspection is to make sure those risks are minimal before moving into a new home. A plumbing inspection includes everything from checking water pressure and sink foundations to inspecting fixtures, pipes, connections, valves and caulking. Major appliances, such as the water heater, will also be given a thorough review to make sure the buyer is aware of any problems in advance.

Save on Repairs

Investing in a plumbing inspection before buying a home can help you avoid more costly repairs down the road. If issues are discovered and addressed early, it’s less likely they will evolve into more catastrophic problems in the months and years to come. When your AC stops working, you might have to spend a day without cool air while waiting for a repair. But when a problem goes unresolved under the kitchen sink, buckets of water can cause additional damage and create the need for even more – and more expensive – repairs.

Peace of Mind

One of the major advantages of getting a plumbing inspection is that you will go into your new home knowing that a professional has given the place a thorough examination and reported on any causes for concern. In the event an issue is discovered, you will still have time to renegotiate cost or repairs before closing escrow. And if the concerns are more substantial, you will still have time to back away from a potentially bad investment. Plumbing issues should not necessarily be considered a deal breaker when buying a home, but an inspection will give you a better understanding of the full picture and, in the end, help you make a well-informed decision.

Trending Topics Right Now

This post first appeared on http://www.atozstatewideplumbing.com

It’s Time to Fix That AC Issue

We know it’s been a difficult year. There were so many plans in 2020 and early 2021 that you had, that inevitably faded away under the pressure of a global pandemic. All of the housework, the new system purchases, and everything that you had thought about now exists on a new calendar that’s far in the future. While we completely understand how the pieces have fallen this year, some problems still need to be addressed.

If your air conditioner has been exhibiting problems, then you could absolutely need air conditioning repair in Montclair. We’re not trying to be alarmists, but we’re trying to help homeowners avoid extra costs down the line from an AC that’s completely broken down, or an AC that requires an extremely expensive fix.

Here’s a tip that we’ll explore below—the earlier you call for AC repairs, the better.

The Earlier the Better

Have you ever heard the saying, “the early bird gets the worm?” It’s not really talking about birds or worms, but rather about people who do things earlier. The earlier you sign up for services, the earlier you make a reservation at a restaurant, you’re always likely to have better results. This is true for AC repairs as well.

If you’re dealing with a refrigerant leak, a short cycling system, or some other problem that’s causing you trouble, then you’ll need repairs eventually. Whether it’s now, or when the system has completely broken down on the hottest day of the year, you’ll need the help of a professional. The earlier you call our team for help, the better the results will be in these three categories.

Avoid Expensive Issues

The longer you wait for a repair, the more expensive the fix will be. While this isn’t certain, it’s highly likely and it’s usually what happens logically when a problem goes unchecked. Parts bump into each other, the system runs inefficiently, and things just get worse.

Also, when your AC breaks down on an inconvenient night during the summer, you could see yourself paying overtime fees and other emergency service fees that come with a broken down system and an emergency. With early repairs, you can schedule them at a convenient time and get them done without any fees or extra labor costs.

Be Ready for Summer

Your system will have trouble keeping you cool this summer if it’s not fixed appropriately. We’re not trying to scare you into getting repairs, we’re just trying to show you the “cold” reality of the situation. If you get your AC repaired before the summer months arrive, you’ll have a better time operating your unit than you would otherwise.

Avoid the Stress of a Breakdown

Breakdowns don’t feel good. If you’re looking to avoid one of the most stressful situations that can happen, then you’re always better off with early repairs. Think about it, when temperatures soar this summer and the heatwave strikes, you don’t want to be the only person in the neighborhood without air conditioning. Call our team to fix your AC today so you have the best temperatures in your home tomorrow!

Call MarGo Plumbing Heating Cooling Inc. for fast and effective AC repair.

The post It’s Time to Fix That AC Issue first appeared on MarGo Plumbing Heating Cooling Inc..

This post first appeared on https://margoplumbing.com

What Should You Have Your Well Water Tested For?

running-faucetMany homeowners in our area choose to provide their home with well water. Well water is a great option, but it does put the responsibility of ensuring that your home’s water is safe in your own hands. This begs the question—what should you look out for? We’re here to cover this today.

We’re prepared to help you with your water testing in Orlando, FL. Today, we’re going to take some time to run through the basics with you. We want to take the time to talk about everything you need to know when it comes to well water. Our friendly technicians are helpful with this because we understand the more information you have about your home, the safer you are in your home.

Test For…

Here are the things you should test your well water for:

  • Total Coliforms: Coliforms are the bacteria found in the digestive system of warm-blooded animals, in soil, on plants, and in surface water. If the total coliform count is high in your water, then the chance that harmful germs, viruses, bacteria, and parasites are in your water as well.
  • Fecal Coliforms: Fecal coliforms are a specific type of total coliform. This coliform is found in the feces and digestive systems of humans and warm-blooded animals. Fecal coliforms can lead to e. coli which leads to larger hygiene problems.
  • pH: The pH of your water tells you how basic or acidic your wat r is. If your water’s pH is too low or too high, it could damage your pipes, your home’s appliances, and make you sick.
  • Nitrates: A high level of nitrates in your home’s water makes you sick. Nitrates in your water can come from a variety of things. A few of these things include animal waste, private septic systems, wastewater, flooded sewers, and more. We’re prepared to help you eliminate this problem no matter where it comes from.
  • VOCs (Volatile Organic Compounds): VOCs are industrial and fuel-related chemicals. The VOCs that you need to test for depend on where you live. Common VOCs here in Orlando come from common things in your household like paint, cleaning supplies, carpets, wood flooring, and more.

Come to us when you want to get the process started with your home’s well water.

How Do Contaminants Even Get In There In the First Place?

Are you wondering how these problems even start in your home’s well water? We touched on a few things that can cause problems in the bullet points above, but there are a few more causes. They include:

  • Naturally occurring chemicals and minerals
  • Local land-use practices (what fertilizer do you use? Any pesticides? Do you have livestock?)
  • Manufacturing process
  • Sewer overflows
  • Malfunctioning water treatment systems

When Should You Test Your Water?

You don’t need to test your well water every day, but you do need to test it when:

  • You have known problems with your well water.
  • There’s been some sort of disturbance near your well.
  • You replace or repair any part of your well.
  • You notice a change in your water quality.

Our professionals can handle any of your needs.

Contact Modern Plumbing Industries, Inc. today to schedule an appointment with our team.

This post first appeared on https://www.modernpi.com

Everything You Need to Know About Plumbing Traps

We are a participant in the Amazon Services LLC Associates Program, an affiliate advertising program designed to provide a means for us to earn fees by linking to Amazon.com and affiliated sites.

If you decide to take on a plumbing project, you’re bound to hear about plumbing traps. Plumbers talk about them all the time. Grease traps, p-traps, s-traps, drum traps, and more. But what the heck are they and what on Earth do they actually do anyway?

If you want to tackle a DIY project that involves plumbing, you definitely need to know the answers to these questions before you start. But we also want to make sure you understand what products to use, how to install them, and what other supplies you’ll need to successfully complete your mission.

We’ll make sure you know what plumbing traps actually do and what kinds are on the market today. In addition, we also want to make sure you know what traps you may want to steer clear of to save yourself a headache. Don’t let plumbing intimidate you. With the right information, you can be on your way to DIY success. And that’s exactly where we come in.

Let’s look at some tips and tricks that will make your life easier when you decide you’re ready to handle the plumbing projects around your house. As a bonus, here are a few of the best plumbing traps you can use.

Basics of Plumbing Traps

Sewage disposal systems produce some pretty nasty odors while others can even come to a point where they are considered dangerous. In order to protect us from these risks, a barrier is placed between the plumbing fixture and sewage waste system.

Sewage disposal systems start in the production phase of the shower, bathtub, or toilet. Then it enters the disposal stage, sending the sediment waste through a series of inline steps. This helps ensure waste doesn’t overflow.

Related Read: All Plumbing Terminology

Common Gases that Are Produced in a Sewage System

  • Methane.
  • Hydrogen Sulfide.
  • Nitrogen.
  • Carbon Monoxide.

Having said that, any plumbing fixture directly connected to the sanitary drainage system must be equipped with a water seal trap. That means every single plumbing fixture used to evacuate waste from a building should have its own plumbing trap.

Plumbing Trap Definition

By definition, a plumbing trap is a device that keeps a small amount of liquid every time the fixtures is used. The amount of retained liquid is called a trap seal. This trap seal prevents sewage system odors, gases, and vermin (mice, insects, etc.) from entering the living or workspace.

Trap seal is the maximum vertical depth of liquid that a trap will retain measured from the crown weir and the top of the dip of the trap. The most common of all plumbing traps is the p-trap. This is used with kitchen sinks, lavatories, and laundry sinks. Check out the diagram in Figure #1.

tubular p-trap graphic

Figure #1 Tubular P-Trap

Plumbing Codes Restrictions

Most Plumbing Codes place restrictions on how a p-trap is used and manufactured. Here are some of those limitations, restrictions, and clarifications.

  • No trap that must depend on moving parts to retain its seal can be used.
  • No trap outlet can be larger than the fixture drain to which it is connected. The sizes of the trap outlet matter. Don’t be flexible with this. For instance, you can’t put a 1 1/2 inch p-trap on a fixture with an 11/4 inch drain.
  • Fixture traps must be self-cleaning by nature. This means that with each use, it must be able to flush away unhindered by lint or hair.
  • You must install a trap level in relation to its trap seal. If the trap isn’t level, it can be susceptible to back-siphonage. Check out the diagram in Figure #2.

two diagrams of P-Trap Level and Not Level

Figure #2 – P-Trap Level and Not Level

  • No plumbing fixture can be double trapped. This is best illustrated using a water closet as an example. Put simply, waste cannot discharge through the integral trap of a water closet and then go through a second trap. Check out the diagram in Figure #3.Double Trapped Water Closet Diagram

Figure #3 Double Trapped Water Closet

  • Most codes allow double bowl kitchen sinks, triple compartment sinks, and laundry sinks to be furnished with one p-trap connected by a continuous waste. The compartments must be next to one another. Each compartment cannot be spaced more than 30” inches apart center to center of the drains. Check out the diagram in Figure #4.

Three Compartment Sink Spacing

Figure #4 Two & Three Compartment Sink Spacing

  • There is usually a maximum allowable vertical drop from the fixture outlet to the water seal. Why is that so? Because the further the liquid waste drops, the greater the velocity of the water.

The greater the velocity of the water rushing through the plumb fixture drain, the more likely the drain will siphon the trap seal. The vertical drop for sinks, lavatories, showers, and bathtubs is between 18” and 24” but not more than 24”. The shorter the vertical distance, the more efficient the trap functions. Check out the diagram in Figure #5.

Horizontal Distance of Tailpiece Drop of a lavatory

Figure #5 Horizontal Distance of Tailpiece Drop

When a water closet has flushed, the velocity of wastewater removes the trap seal completely. The trap seal would remain compromised if the trap seal wasn’t restored by the refill tube on a tank-type toilet. Concealed traps used for bathtubs, showers, etc. cannot have integral cleanouts. Check out the diagram in Figure #6 to observe the v parts of a p-trap.

important part of a trap seal depth

Figure #6 Important Part of a P-Trap

Explaining Deep Seal P-Traps

Deep seal traps have vertical depths of 4″ or more. They are used in a limited number of applications. There are some advantages to using deep seal traps. These benefits are specific to their respective application.

Advantage #1

A deep trap has a deeper seal with more liquid than others. Therefore, the seal doesn’t evaporate as quickly.

Application. Use a deep trap when you install a floor drain in a remote location. This can be a large warehouse. In these cases, the application needs very little water to reseal the trap.

Advantage #2

The deep seal trap has a much greater capacity for resealing. Because the trap is usually quite a bit larger than a traditional trap, it can handle a much greater flow of water. As a result, the trap is less likely to lose its seal because of the extra amount of water.

Application. Use a deep seal trap when a fixture or piece of equipment calls for an indirect waste connection. This can be a commercial ice maker, salad bar, or in some cases a triple pot sink.

Advantage #3

Thanks to its depth, a deep seal trap is less likely to lose its seal due to the backpressure or trap siphonage.

Application. There are instances where a fixture or trap cannot be properly vented. In cases such as these, a deep primer seal trap would be ideal. All of the aforementioned advantages apply here as well.

Deep Seal Traps Don’t Work for All Jobs

Here are a couple of reasons why deep seal traps are not the norm for all applications.

  • The traps are deeper, therefore, larger and tougher to fit into confined spaces.
  • Because of their increased depth and capacity, they are more resistant to flow from a standard fixture. Therefore, they impede drainage and make the fixture drain sluggishly.

Related Read: Plumbing Tools The Homeowner Would Use

What Are the Types of Plumbing Traps that Most Plumbing Codes Prohibit?

commonly prohibited traps

Figure #7 Commonly Prohibited Traps

The majority of plumbing codes agreed on avoiding certain types of plumbing traps. These are:

  • Bell Traps.
  • Running Traps.
  • Crown Vented Traps.
  • ¾ S Traps.
  • Full S Traps.
  • Drum Traps.

I think drum traps need a little bit more explanation. Codes don’t necessarily prohibit them. However, professionals simply choose not to use them in new construction anymore. Drum traps played their part when installing bathtubs and lavatories. A trap adapter is used in residential and commercial drain, waste, and vents systems.

Figure #8 Drum Trap

Figure #8 Drum Trap


A drum trap is a circular metal barrel canister with an inlet near the bottom of the trap. The waste outlet is at the top with a removable cover.

Ideally, professionals install the drum trap in a place with easy access. This way, you can remove the cover to clean. Unfortunately, many drum traps we’ve encountered are behind a wall. In other cases, people have it hard to remove the cover which fused together by time. Therefore, when drum traps stop, they are extremely difficult to clear by rodding. That’s due to their inlet and outlet configuration.

Drum traps existed so that people could find jewelry or valuables if lost down the drain. The trap would catch and guard the ring or earring by sinking to the bottom. The likelihood that a valuable would flow into the waste opening at the top of the trap is highly unlikely. A sand trap also helps to separate sand and oxidized organics found in water supplies.

What Is a Building Trap?

Back in the day, before people used or understood system venting, vermin like rats or insects could move freely from building to building, house to house. Not to mention the sewer gas odor could be unbearable because of backpressure and trap siphonage. Health officials knew that this could pose a serious health risk, especially in heavily populated, wet, and dry areas.

Therefore, to combat the issues above a house, a building trap is required in each building. The building trap provided a secondary line of defense against the vermin and sewer gas. Most times, the building trap was a large diameter S-trap. Today, most codes do not require a building trap. In fact, in most cases, they are against code.

typical Building Trap diagram

Figure #9 Typical Building Trap

Reasons Why Plumbing Trap Seals Break down

Trap Siphonage

Trap siphonage can look like a low negative pressure within the fixture drain. However, you can grasp this concept more easily by describing it through a simple visual image. Picture a large amount of wastewater hitting a waste stack at one time. As the wastewater goes by the other fixtures connected to the stack, it can pull the water from their respective trap seals.

Another scenario that could cause trap siphonage is a fixture using an S-trap. If the fixture is full and the wastewater is released, the water will rush through the trap, with the waste pipe carrying some of the trap water. What happens is that not enough liquid is left to form an adequate trap seal. A similar scenario can occur if people install a fixture on a long run of piping with no ventilation. If the water vacates a vent fixture into the trap, it could build up enough velocity to drain the trap.

Back Pressure

Above we’ve described instances when a trap is compromised by being pulled out of the trap. However, there are instances when water can blow of the trap into the fixture. Subsequently, the water enters the building. This can happen when a large amount of waste flows into the drainage system. The water will compress the air in front of it. If the fixture at the point of compression has no proper ventilation, it will blow out the trap.

bathroom shower head running hot water from white tiles

One of the responsibilities of owning a home is maintenance. Often, you may not realize there is a maintenance problem until you see the damage. A leaking shower is not only a nuisance but can raise your water bill and result in costly repairs.

The shower leaks that you can see are the ones that you quickly notice and are easier to repair. The leaks you cannot see are the ones that are most problematic. Shower leaks behind walls can do internal damage long before you detect them.

Related Read: Shower Leaks Behind Wall: How to Fix Them in 7 Steps

Wind Effect

Have you ever been in your bathroom on a windy day and see the water level in the toilet bob up and down? The same action can compromise the traps in your home. The pressure or suction caused by the strong winds can cause the water to rise and fall into the trap. If the fluctuations are big enough, a small amount of trap seal may spill into the waste system. This incident is going to compromise the trap. As you can imagine, the seal is more susceptible to both backpressure and trap siphonage.

Evaporation

This is a very common occurrence especially in instances where a fixture or drain has a sporadic activity. The water in the trap then evaporates when not in use, at least once a week. Laundry room floor drains, remote floor drains, fixtures and all traps in a summer home are all more vulnerable. Under these circumstances, evaporation has a high chance of happening.

Capillary Action

This doesn’t happen often. However, if there is a constant issue with a fixture losing its trap seal, this is something you can rule out. I think an example will serve this concept better than a lengthy explanation.

diagram of Capillary Attraction

Figure #10 Capillary Attraction

Maybe a cleaning person runs out of clean water while mopping a large public toilet room. They may not want to fill up the bucket again. The alternative is that they flush one of the water closets a few times to make sure the water is clean. They rise the mop off in the toilet. One of the strands of the mop dislodges and gets stuck inside the trap seal. The piece stretches to the fixture branch and into the waste system. The water from the trap will pick up the string and into the waste piping, draining the trap seal.

Minimum Drain Sizes For Plumbing Fixtures

So many people have asked about trap/drain sizing for fixtures we decided to give you at least a loose guide for each type of plumbing fixture. Please note, although these sizes are pretty universal they are still subject to local plumbing codes.

Toilet Drain Size – The universally accepted toilet drain size is 3″. Please note, closest flanges have a 4″ inlet and a 3″ outlet.

Shower Drain Size – The universally accepted shower drain size is 2″

Bathtub Drain Size – The universally accepted shower drain size is 1 1/2″. Please note this includes combination tub and shower fixtures.

Kitchen Sink Drain Size (Domestic) – The universally accepted kitchen sink drain size is 1 1/2″. Please note this size assumes there is no dishwasher or garbage disposal installed.

Bathroom Sink Drain Size (Lavatory Sink Drian Size) – The universally accepted bathroom sink drain size is 1 1/4″

Bathroom Sink Drain Size In Sets (If you have two lavatory sinks side by size) – The universally accepted bathroom sink drain size is 1 1/2″

Washing Machine Drain Size – The universally accepted washing machine drain size is 1 1/2″

Dishwasher Drain Hose Size – The universally accepted dishwasher drain size is 1 1/2″

Bidet Drain Size – The universally accepted bidet drain size is 1 1/4″.

Drinking Fountain Drain Size/Water Cooler Drain Size – The universally accepted drinking fountain/water cooler drain size is 1 1/4″.

Washfountain Drain Size (This depends on the discharge of the fixture) – The universally accepted wash fountain drain size is between 1 1/2″ and 2″

Urinal Drain Size – The universally accepted urinal drain size with an exposed trap is 1 1/2″ if the trap is integral to the fixture the trap drain size is 2″

Laundry Tub Drain Size – The universally accepted laundry tub drain size is 1 1/2″

Bar sink Drain Size – The universally accepted bar sink drain size is 1 1/2″

Related Read: How To Properly Vent Your Pipes: Plumbing Vent Diagram

Final Word on Plumbing Traps

Now that the plumbing traps are no longer a secret of the trade to you, you will be able to understand your system better and visualize how it truly works. You can now choose the right type of device for your home and make sure you leave no loopholes for a breakdown.

If you have any tips or tricks regarding plumbing traps, share them in the comment section below. You’ll provide additional insight to our readers and maybe even save someone from a plumbing disaster.

Last update on 2021-04-30 at 08:13 / Affiliate links / Images from Amazon Product Advertising API

This post first appeared on http://www.theplumbinginfo.com
Shower Leaks Behind Wall: How to Fix Them in 7 Steps

We are a participant in the Amazon Services LLC Associates Program, an affiliate advertising program designed to provide a means for us to earn fees by linking to Amazon.com and affiliated sites.

Part of owning a home is maintaining it. These responsibilities are amplified if you have an older home. In fact, you may not have even realized just how much work it actually needed when you bought it. If the problems you encounter include shower leaks behind the wall, you could end up with lasting damage to your walls and a sky-high water bill.

Ironically, the shower leaks you see are the ones that are relatively easy to fix. It’s the leaks you can’t see that are the real hazard. Often, you don’t even know there is a problem until you notice the damage. If you are facing these issues, we have a few quick tips on how to fix the problem yourself and prevent more damage from occurring.

A word to the wise: If shower leaks behind walls are a bigger project than you feel comfortable handling, there is no shame in contacting a reliable plumbing service. There are times when you need to call in a professional, and this may very well be one of them.

Delta Faucet R10000-UNBX MultiChoice Universal Tub and Shower Valve…

  • Complete flexibility: Delta’s MultiChoice universal valve gives you flexibility to upgrade your shower trim without…
  • Recommended use: Compatible to meet the needs for the most commonly used plumbing methods and is ideal for shower units…
  • Universal connection options: 1/2-inch universal inlets accept 1/2-inch copper, 1/2-inch iron pipe, PEX or CPVC adapters

1. Signs of a Shower Leak Behind Wall

Shower leaks behind walls are not always easy to notice. In these cases, your detective skills will be as important as your handyman skills. While you may not “see” an internal leak, you will find its evidence.

If your shower is on the first floor and you have a basement you may find water dripping from the ceiling onto the basement floor. Water leaks can be tricky to track. How water moves is interesting. It can wick up a wall, it can run along a stud or a beam and end up in a completely different spot. So you have to be diligent in your detective duties.

One of the tell-tale signs of a water leak coming from a shower valve behind the wall is water stains. If you have an upstairs bathroom, you may notice dried water stains on the ceiling below the shower. When someone is showering, you might see water dripping from the ceiling. Most times shower valve leaks behind the wall are very slow. Usually, they are pinhole leaks from a faulty valve or sloppy soldering from the water connection points to the valve.

Over the years the joint wears out or the flaw in the casting process of the valve rears its ugly head. One other sign of a shower leak behind the wall is the drywall/tile in front of the valve becomes spongy. This is usually caused by water spraying from the leak in the back of the wall.

2. Determine Where Your Shower Is Leaking

If your shower leaks behind the wall, most times you can’t tell from the front side of the shower. So you have to do one of the two things.

  1. Remove the shower plate to see if you have enough room around the valve to inspect the valve connections.
  2. If you can, remove a portion of the wall behind the valve so you can inspect the valve and all associated piping.

Sometimes builders or homeowners (Especially someone that has had problems in the past) install an access panel in the wall behind the shower so you can easily inspect or repair water pipes that go to the tub and shower. If this is the case for you, just take the panel off for inspection. For most houses, it is necessary to cut a little window out of the drywall to see the water pipes. It is an easy fix, considering the water damage that could occur if you do not seal the leak.

3. Cut an Inspection Window

A stud finder would be an excellent help for this project. To decide where to cut the window in your drywall, you must locate the studs in the wall. If you do not have a stud finder, then you have to go old school. Most homes have studs on 16″ centers. Meaning they have a stud every 16″ center to center. You can measure 16″ from the inside wall and knock on the wall. You can hear the difference in the way a dry wall sounds when a stud is behind it.

Please note, most showers aren’t big enough at least along the side with the showerhead and valve to have two studs in the right spot, The carpenter may only use two in the middle of the wall with the valve so they can brace the and secure the valve.

hands in plastic gloves shower repairs with wrench on wall tiles

Use a reciprocating saw to cut a small window into the drywall. A 10X8 inch square should be enough for you to inspect the shower pipes. You will need a flashlight and a small mirror to get the best view of your shower leaks behind a wall.

4. Look for Signs of Leaking

If your shower leaks behind the wall, you will see water stains on the drywall ceiling below the tub drain. To be sure these stains were not from the bathtub drain, run a little water in the tub and see if the drain is leaking. Feel around the copper pipes for any wetness from recent use. You will probably observe greenish-white discoloration on the copper pipes due to oxidation from the water leaking on the outside of the copper piping. If you have a home using PEX it’s tough to tell.


Delta Faucet R10000-UNBX MultiChoice Universal Tub and Shower Valve…

  • Complete flexibility: Delta’s MultiChoice universal valve gives you flexibility to upgrade your shower trim without…
  • Recommended use: Compatible to meet the needs for the most commonly used plumbing methods and is ideal for shower units…
  • Universal connection options: 1/2-inch universal inlets accept 1/2-inch copper, 1/2-inch iron pipe, PEX or CPVC adapters

5. Turn on the Shower

The reality is many homes don’t have access to the shower valve from the backside of the valve. So for many front side access is a must. Be that as it may, being able to watch the valve and surrounding piping while the water is on is the true test to see if your shower leaks behind the wall.

While it is running look for signs of water leaking. If you feel water trickling down the sides of the pipes, you have found your source. Sometimes, the leaks are faint, so you may need your flashlight and mirror to look for minute drops of water forming around the joints of the water pipes.

Inspect above in the access window with your flashlight. The water may be leaking from the pipe that services the showerhead (called the shower arm). However, it could also be leaking from the shower valve.

6. Fix a Leaking Shower Arm

If the shower arm is the reason your shower leaks behind the wall, it is not a difficult fix. On the shower wall side, take off the circular metal plate call the escutcheon that surrounds the shower arm. These escutcheons are decorative in nature and they are either split and can be removed without taking off the showerhead or they are solid which means you must unscrew the showerhead and slip the cover off.

Next, unscrew the shower arm and inspect it. Some reasons that shower arms leak are that it was not tightened properly or the threads aren’t sealed properly.

To fix the leak, clean the old joint compound off with a wire brush. Make sure the threads are clean and dry. Wrap the threads with Teflon plumbing tape (found at any hardware store), and screw the arm into the back into the water pipe joint. Old Pipe dope didn’t have a Teflon base so over time it yellows and cracks. In lieu of Teflon tape, you can buy Teflon pipe dope. You can buy a bottle with an integral brush. Brush on evenly covering all of the threads and screw back in place.

Related Read: Plumbing Tools The Homeowner Would Use

7. Fix a Leaking Shower Valve

Fixing a leaking shower valve to stop shower leaks behind the wall is a little trickier. When you turn on your tub/shower valve the hot and cold water enters the valve and mixes to the desired temperature.

Kohler

First, most brands of shower valves use similar methods to install the valve. It’s hot water in, cold water in, mixed water to the showerhead, and mixed water to the tub. Unless you have a diverter valve to redirect the water to your shower head it’s usually a pull-type stop on the tub spout.

If the valve is leaking from the valve stem you may simply have to turn off the water to the valve and replace the cartridge. If it is a leak from the valve body itself then the valve needs to be cut out and replaced. When you cut out the valve make sure to out far enough from the valve that you can piece it in with a repair coupling. If you’re using PEX you don’t need to be near as precise.

Delta Faucet R10000-UNBX MultiChoice Universal Tub and Shower Valve…

  • Complete flexibility: Delta’s MultiChoice universal valve gives you flexibility to upgrade your shower trim without…
  • Recommended use: Compatible to meet the needs for the most commonly used plumbing methods and is ideal for shower units…
  • Universal connection options: 1/2-inch universal inlets accept 1/2-inch copper, 1/2-inch iron pipe, PEX or CPVC adapters

Final Word on Shower Leaks Behind Walls

Fixing shower leaks behind the wall saves you money in water bills and expensive repairs. If the culprit is a leaking shower arm, the fix should be easy. A leaking shower valve may require a professional if you do not have the experience. Any time that you feel unsure, it is better to call a plumber than to let the problem persist.

Image source: 123

Last update on 2021-05-01 at 08:22 / Affiliate links / Images from Amazon Product Advertising API

This post first appeared on http://www.theplumbinginfo.com
+1-877-959-3534