Category: Uncategorized

Our Handy End-of-Summer Plumbing Checklist

home-exterior-in-early-autumn

As the long days of summer wind down, it’s the perfect time to prepare your home for the cooler months ahead. By catching small plumbing issues now, you can prevent costly and inconvenient problems later. If you’re not sure where to start—or if you spot something that needs professional attention—our expert team is here to help. And if you ever need a skilled plumber in Cedar Grove, NJ, you know who to call!

Inspect Outdoor Faucets and Hoses

Start with your home’s exterior. Check all outdoor spigots and hose bibs for leaks or drips. Even minor leaks can worsen during freezing temperatures, potentially leading to pipe bursts. Disconnect and drain garden hoses before storing them to prevent trapped water from freezing. If you notice persistent leaks or cracks in the faucet assembly, it’s time to have a plumber take a closer look.

Test Your Sump Pump

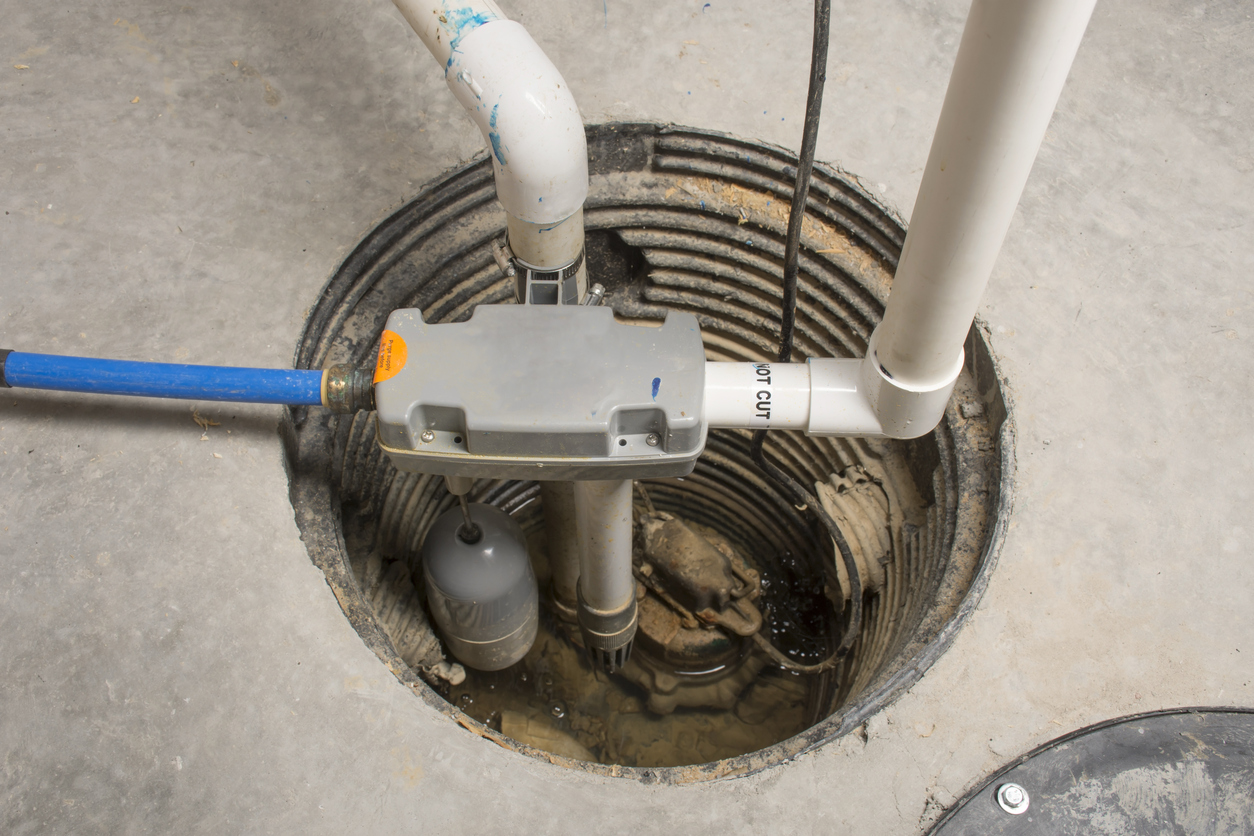
If you have a basement sump pump, test it by pouring a bucket of water into the pit and watching to see if it kicks on and drains properly. This small step can help you avoid flooding issues during heavy fall rains or early snowmelts. If your pump doesn’t respond, makes unusual noises, or runs constantly, a professional inspection is in order.

Check Toilets and Faucets for Silent Leaks

A toilet that runs occasionally—or constantly—could be wasting hundreds of gallons of water a month. The same goes for dripping faucets. Check toilets by adding a few drops of food coloring to the tank; if the color appears in the bowl without flushing, you have a leak. This means it’s time to call in a pro.

Clean and Inspect Drains

End-of-summer barbecues and gatherings can lead to extra grease, food debris, and soap scum going down your drains. Run hot water through kitchen and bathroom sinks, and use a safe, enzyme-based cleaner to help keep pipes clear. If you notice slow drains, gurgling sounds, or recurring clogs, don’t rely on chemical drain cleaners—those can damage your plumbing. A plumber can clear the line safely and thoroughly.

Examine Exposed Pipes

Take a look at any exposed pipes in your basement, crawlspace, or garage. Check for signs of corrosion, mineral buildup, or damp spots that may indicate a slow leak. This is also a good time to add insulation to pipes in unheated areas to protect against winter freezing. If you do spot any problems, we can help you sort them out right away.

Schedule a Water Heater Flush

Over time, sediment builds up inside your water heater, reducing its efficiency and lifespan. Flushing your water heater at the end of summer helps prepare it for the increased use that often comes with colder weather. If you hear rumbling noises or see rusty water, you may need professional service.

By running through this simple checklist now, you can ensure your home’s plumbing is in great shape before the cold weather sets in. And remember—if anything on this list raises concerns you can’t tackle yourself, our experienced team is ready to help you make sure your home is ready for a worry-free winter!

Contact MarGo Plumbing Heating Cooling Inc. today to schedule an appointment or with any questions for a plumber in Cedar Grove, NJ!

The post Our Handy End-of-Summer Plumbing Checklist first appeared on MarGo Plumbing Heating Cooling Inc..

This post first appeared on https://margoplumbing.com

How Do I Install a Sump Pump?

home sump pump

How Do I Install a Sump Pump?

A wet basement can cause serious headaches for homeowners. One of the best ways to protect your home from flooding is by installing a sump pump. While some handy homeowners take this on as a DIY project, it’s not as simple as it looks. Here’s what you need to know before getting started.

What Is a Sump Pump & Why You Might Need One

A sump pump is designed to keep your basement or crawl space dry by collecting excess water in a sump pit and pumping it safely away from your home’s foundation.

You may need a sump pump if:

  • Your basement floods during heavy rainstorms

  • You live in a low-lying or high-water-table area

  • Your home has poor exterior drainage

Without one, you risk water damage, mold growth, and costly structural repairs.

Tools & Materials Needed

Before beginning installation, you’ll need the right supplies:

  • Sump pump and pit liner (basin)

  • Gravel

  • PVC pipe and a check valve

  • Drill, shovel, and level

  • Concrete mix

  • GFCI outlet or dedicated electrical source

Step-by-Step Guide to Installing a Sump Pump

  1. Choose the location – Pick the lowest spot in your basement where water collects most often.

  2. Dig the pit – Dig about 2 feet deep, large enough to fit the sump basin.

  3. Place the basin – Set it in the hole, fill around it with gravel, and make sure it’s level.

  4. Install the pump – Place the sump pump inside the basin and connect it to the discharge pipe.

  5. Add a check valve – This prevents pumped water from flowing back into the pit.

  6. Run the discharge line – Extend PVC pipe outside, sloping it away from your home’s foundation.

  7. Seal the pit – Pour concrete around the basin to secure it.

  8. Power and test – Plug the pump into a GFCI outlet and pour water into the pit to confirm it works.

Common Mistakes to Avoid

  • Not sloping the discharge line away from the house

  • Forgetting to install a check valve

  • Skipping local building codes or required permits

When to Call a Pro

Installing a sump pump requires electrical and plumbing know-how. You should consider hiring a professional if:

  • You’re not comfortable working with wiring or drainage

  • Your basement layout makes installation tricky

  • Your system needs to tie into an existing drainage setup

The experts at Len The Plumber Heating & Air provide sump pump installation and replacement throughout the Baltimore area, so you can protect your home without the hassle.

Frequently Asked Questions

Can I install a sump pump myself?
Yes, if you have the right tools and experience. But many homeowners prefer a professional installation for peace of mind.

How long does sump pump installation take?
DIY installation usually takes 4–8 hours, depending on your experience and basement setup.

Do I need a permit to install a sump pump?
It depends. Some areas require permits for electrical or drainage work—always check local codes.

How much does professional installation cost?
In Baltimore, most installations range from $500 to $1,500, depending on complexity.

Sump Pump Installation in Baltimore

If you’re ready to protect your basement from flooding, Len The Plumber Heating & Air is here to help. We offer expert sump pump installation and repair services across the Baltimore area.

Call today to schedule sump pump service with our team!

This post first appeared on https://lentheplumber.com

Why You Can’t Install a Gas Line on Your Own

There are many times when you might need to install a new gas line in your home. Maybe you had an electric appliance such as an oven, water heater, or clothes dryer, and you are purchasing a new one that runs on natural gas. Or maybe you’re tired of swapping out grill tanks all the time, and you want to install a gas line directly to the backyard so you can hook up your grill and have barbecues any time you like. 

This leaves many wondering if homeowners can install a gas line themselves. While the DIY spirit is admirable for many projects, when it comes to installing gas lines, the answer is a firm and resounding no. A safe and successful natural gas line installation requires a level of expertise and certification that goes far beyond a weekend project.

The Dangers of Doing A Gas Line Installation Yourself

The primary reason to avoid installing a natural gas line yourself is safety. Natural gas is an efficient and reliable fuel, but it’s also highly combustible. A mistake during a new gas line installation can have devastating consequences.

  • Leaks and Explosions: The smallest imperfection in a fitting or connection can lead to a gas leak. Over time, this can fill an enclosed space, creating a severe risk of fire or explosion.
  • Carbon Monoxide (CO) Poisoning: An improperly sized or vented line can cause gas appliances to malfunction, producing deadly, odorless carbon monoxide gas.
  • Material Failure: Professional gas line installers know the proper pipes and fittings needed for the job. Common plumbing pipes are not rated for gas and can corrode quickly, leading to leaks.

The Legal and Financial Risks in Florida

Beyond the immediate dangers, attempting to install a gas line yourself can lead to serious legal and financial trouble. In Florida, all gas line work requires permits and must adhere to the strict Florida Fuel Gas Code.

This process ensures the proper installation of a gas line in a residential property and requires passing a final inspection from a local official. Unpermitted work will automatically fail this inspection, forcing you to pay a professional to redo the entire job correctly. Furthermore, if an incident occurs due to unpermitted work, your homeowner’s insurance will likely deny the claim, leaving you financially responsible for all damages.

Who Installs Gas Lines? 

So, who installs gas lines? The answer is simple: licensed and certified plumbers. Modern Plumbing Industries is proud to be among the leading plumbers that install gas lines in the Orlando area.

When you hire a professional plumber to install a gas line, you can rest assured knowing that you’re investing in:

  • Certified Expertise: Our technicians are experts in every aspect of natural gas line installation, including specialized work like installing gas lines in a house or performing an underground gas line installation for outdoor appliances.
  • Specialized Tools: A professional gas line installation requires tools like manometers for pressure testing and electronic leak detectors to guarantee a perfect seal—equipment that is expensive and not part of a standard DIY toolkit.
  • Peace of Mind: Knowing your residential gas line installation was completed safely and to code is invaluable. Our work is insured and guaranteed, protecting your family and your property.

Your Trusted Partner for Gas Line Services in Central Florida

From planning a simple appliance hookup to installing a gas line for your entire home, the process must be handled with professional precision. The team at Modern Plumbing Industries, Inc. has been the trusted choice for safe and reliable gas line installation in the greater Orlando community since 1975.

Don’t risk your safety or the value of your home. Contact our expert gas line installers today for a consultation and a free estimate.

This post first appeared on https://www.modernpi.com

Ice on Your AC: Good News or Bad?

Spotting ice on your air conditioner might seem odd—after all, AC units are supposed to cool your home, not freeze themselves. If you’ve recently noticed frost or ice buildup on your system, don’t ignore it. While it may not always mean a major problem, it’s definitely a sign that something isn’t working as it should. Whether you rely on your system daily or seasonally, maintaining reliable air conditioning in Montville, NJ, means knowing how to respond when something goes wrong.

Step 1

First things first: turn the system off immediately. Running an air conditioner with ice on it can cause further damage to the compressor or other internal components. Next, allow the ice to melt completely. This can take several hours, so be patient. While waiting, keep an eye on the drainage around your indoor unit. As the ice melts, the excess water needs somewhere to go. Make sure the condensate drain is working properly and monitor the area to avoid water damage to floors, ceilings, or walls.

Step 2

Once all the ice has melted, clean the evaporator coils if you can access them. Ice can often form because the coils are dirty and can’t absorb heat effectively. A gentle brush or coil cleaner can remove dust and grime that’s blocking airflow. You’ll also want to check the air filter—if it’s dirty or clogged, replace it immediately. Proper airflow is crucial to your AC’s operation, and restricted air movement is one of the most common reasons ice forms in the first place.

Step 3

Now it’s time for the test: turn your air conditioner back on. Let it run and keep a close eye on it for the next few hours. If the system seems to be cooling normally and no ice returns, the issue may have been temporary—possibly due to a dirty coil or filter.

However, if the ice builds up again, it’s time to call in the professionals. Recurring icing usually indicates a deeper issue that needs expert attention. Our team is fully equipped to diagnose and resolve persistent AC icing problems.

Common Causes of Repeated AC Icing

  • Low refrigerant levels: Often due to a leak, this can prevent the system from absorbing heat properly, leading to freezing.
  • Faulty blower fan: If the fan isn’t pushing enough air across the coils, they can get too cold and start freezing up.
  • Dirty or blocked ductwork: Restricted airflow anywhere in the system contributes to temperature imbalances and icing.
  • Thermostat problems: A malfunctioning thermostat can cause the system to run too long or at inappropriate temperatures.
  • Mechanical failures: Issues with the expansion valve or other internal components may lead to frost buildup.

When in doubt, don’t wait. Ignoring ice on your AC can lead to bigger, more expensive problems down the line. Contact our team for professional inspection and repairs—we’re here to help keep your system running smoothly and your home comfortable.

Contact MarGo Plumbing Heating Cooling Inc. today to schedule an appointment or ask any questions about your air conditioning in Montville, NJ!

The post Ice on Your AC: Good News or Bad? first appeared on MarGo Plumbing Heating Cooling Inc..

This post first appeared on https://margoplumbing.com

How to Maintain an Air Conditioning System

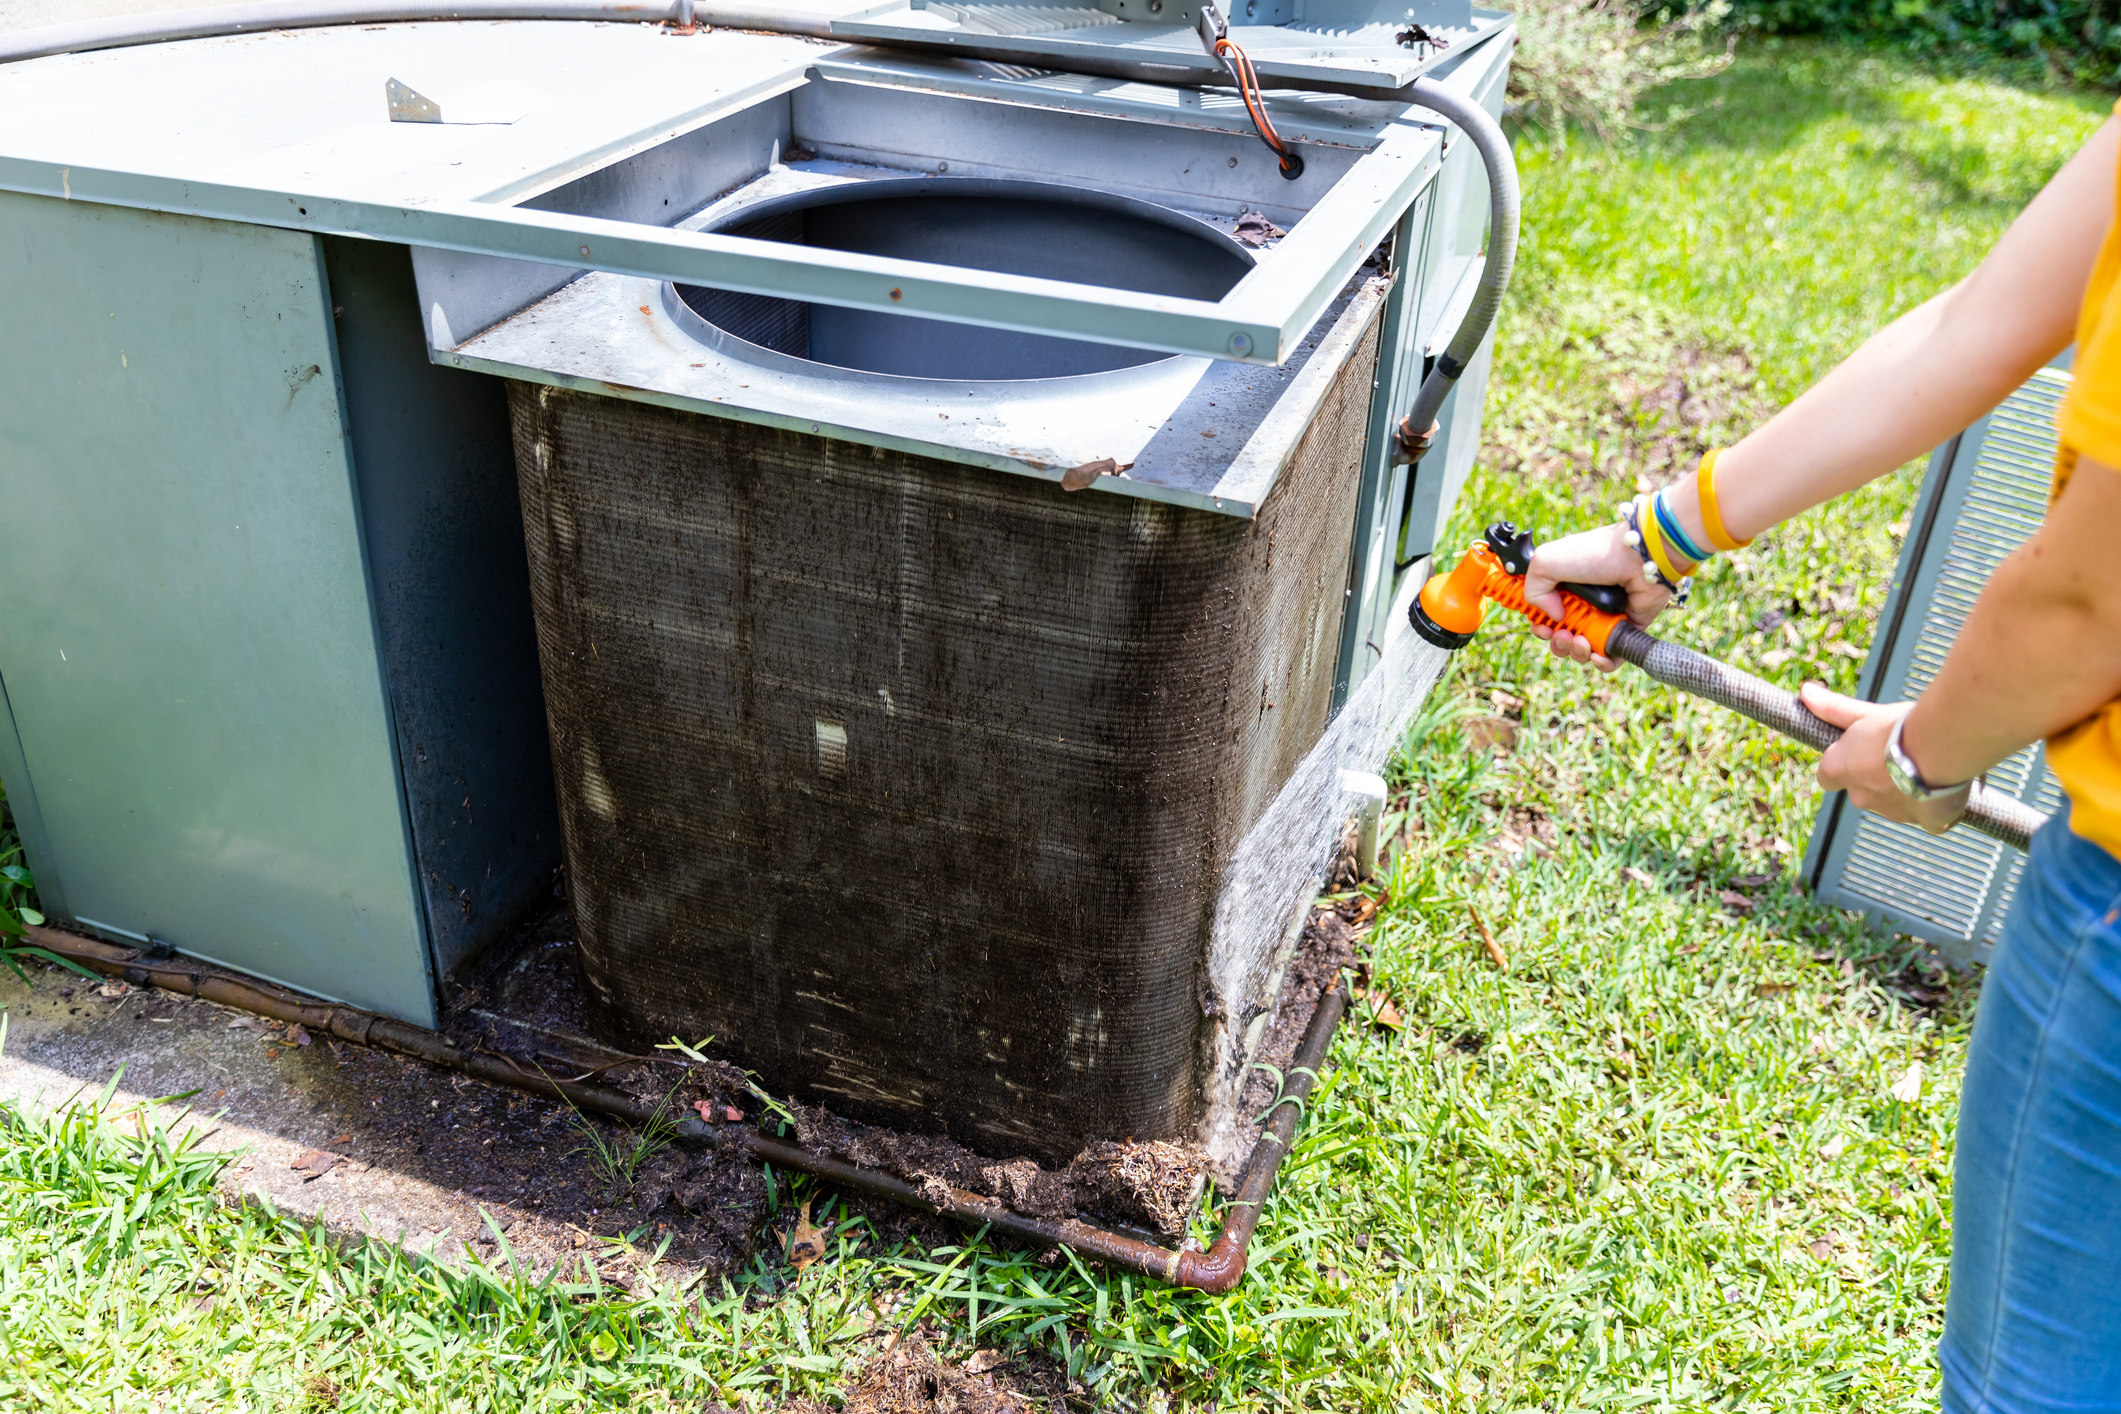
Person cleaning dirty condenser coils on an air conditioner systemKeeping your air conditioner in top shape means lower bills and fewer breakdowns. With a few simple steps, you can boost efficiency and catch issues before they become costly repairs.

At Len The Plumber Heating & Air, we’ve seen how routine care makes all the difference in home comfort and system lifespan. Read on for easy air conditioner upkeep tips and tricks.

Why Regular AC Maintenance Matters

AC maintenance matters because a clean, tuned‑up system cools faster and uses less power. According to the U.S. Department of Energy, a neglected air conditioner can use up to 15% more energy than one that’s regularly serviced.

When filters, coils, and fins stay clear of dirt and debris, the system doesn’t struggle to push air through. That saves you money on each electric bill and reduces strain on motors and compressors.

Regular air filter replacement also keeps dust and allergens out of your living space, improving air quality for allergy sufferers. Ultimately, routine HVAC maintenance keeps your home comfy and your pockets happy.

Key Components to Check During Maintenance

An effective HVAC maintenance checklist covers several vital parts.

  • Replace the air filter: A clogged filter chokes airflow and forces the unit to run longer.
  • Inspect evaporator and condenser coils: Dirt buildup on these metal fins reduces their ability to absorb and release heat. Check the aluminum fins themselves and use a fin comb to straighten any that are bent.
  • Clear the condensate drain line: Algae or condensation blockages can cause water damage and mold growth inside your home.
  • Test your thermostat: Ensure accurate temperature readings and replace its batteries if needed.

Skipping any of these checks can shorten the life of your unit and lead to avoidable AC repairs.

DIY Air Conditioning Maintenance Tips

You don’t need to be an HVAC pro to handle basic AC unit cleaning.

  1. Turn off the power at the breaker panel.
  2. Remove and inspect your air filter monthly during heavy use, and replace it if it looks gray or clogged.
  3. Vacuum dust off supply vents so that air can move unimpeded.
  4. Head outside and clear at least two feet around the condenser; trim back weeds, leaves, and grass to keep airflow strong.
  5. Use a hose‑end coil cleaner and a gentle rinse to wash debris off the outdoor coil.

By following these AC maintenance tips, you’ll keep your system healthy and ready for seasonal demands.

Signs Your AC Needs Professional Servicing

Even the best DIY care can’t catch every issue.

  • Watch for weak airflow from vents, which can signal a clogged evaporator coil or a failing blower motor.
  • Listen for unusual noises like grinding, rattling, or high‑pitched squeals. These often mean worn bearings, loose panels, or failing fans.
  • Pay attention to temperature imbalances in different parts of your home. Your ductwork might be leaking.
  • Don’t ignore an unexplained jump in energy bills. It suggests your AC system is working harder than it should.
  • Address ice forming on the refrigerant lines or evaporator coil. You likely have a refrigerant leak.

If you notice any of these warning signs, it’s time to schedule professional HVAC service. Experts can perform a full inspection, tighten electrical connections, and adjust refrigerant levels to restore peak performance.

How to Choose a Reliable HVAC Technician

Finding the right service pro starts with checking credentials. Look for a licensed, insured technician with NATE (North American Technician Excellence) certification, which shows they’ve passed industry exams.

Read reviews on Google, Yelp, or Angie’s List to see real customer experiences.

Before booking, call and ask a few key questions:

  • Do you offer service guarantees?
  • Do you perform comprehensive coil cleanings and refrigerant checks?
  • Can you provide a written estimate upfront?
  • What is your emergency service policy?

A trustworthy company will answer confidently and walk you through their maintenance process. With the right professional in your corner, you’ll get thorough, stress‑free service.

Why Should You Choose Len The Plumber Heating & Air?

Len The Plumber Heating & Air stands behind every job to ensure your satisfaction. Our certified technicians follow a detailed HVAC maintenance checklist that covers filter changes, coil cleaning, condensate drain clearing, and full system inspections. We service all brands, so we can help no matter what system you have.

From seasonal tune‑ups to emergency repairs, we deliver friendly, professional service that keeps your AC running smoothly.

If you are ready to boost efficiency, extend your AC’s lifespan, and avoid costly breakdowns, contact Len The Plumber Heating & Air today to book your next maintenance visit.

We’re available to service homeowners in Baltimore, Washington, D.C., Northern Virginia, New Jersey, Pennsylvania, and the Delaware Valley.

This post first appeared on https://lentheplumber.com
Does Homeowners Insurance Cover Plumbing? What You Need to Know

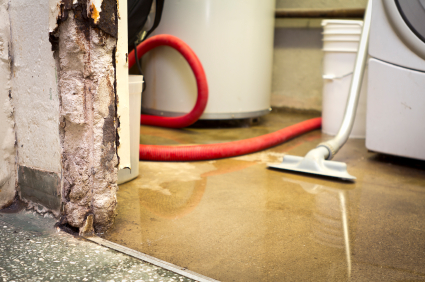
Water damaged wall in basement with shop vac hose next to puddle of water.When a pipe bursts or an overflow floods your floor, you may ask: Does homeowners’ insurance cover plumbing mistakes? Standard policies often cover the repair of sudden water damage to walls, floors, and cabinets, even if the pipe itself isn’t replaced.

At Len The Plumber Heating & Air, we help you navigate your coverage so you know which plumbing insurance claims make sense.

What Plumbing Issues Are Typically Covered?

Homeowners’ insurance water damage coverage usually kicks in for sudden, accidental events. If a frozen pipe bursts in winter, flooding your laundry room, or if a faucet supply line fails and soaks your kitchen ceiling, you’re likely covered. Most insurance policies will pay for fixing drywall and replacing damaged flooring. It also covers repairing structural issues caused by the damage.

It does not replace the old pipe itself, but it does cover the harm it caused. Accidental overflows, like a bathtub left running that floods the bathroom, may also qualify. The key is that the event must be sudden and unplanned. As long as it isn’t due to neglect or a slow leak, you can file a plumbing insurance claim for interior repairs.

Plumbing Problems Not Covered by Homeowners Insurance

Home insurance plumbing exclusions include wear and tear and poor maintenance. If a hidden drip eats away at a pipe or if an old fitting springs a leak after years of service, the insurer will likely deny a claim. Pre-existing conditions, like corroded pipes or outdated plumbing, are also excluded.

Damage from mold growth or sewer backups generally requires optional riders. To get sewer backup insurance coverage, you must add it to your policy. If you skip that add-on, any sewer backup cleanup and repairs come straight out of your pocket. Stay on top of maintenance and fix little drips so they never turn into big, expensive headaches.

How to File a Plumbing-Related Insurance Claim

When you spot water damage inside your home, act swiftly.

  1. Shut off your main water valve so the leak stops.
  2. Take clear photos of any standing water, wet walls, and ruined items.
  3. Reach out to your insurance company and walk them through what happened, and they’ll want dates, what went wrong, and your photo proof.
  4. Get plumbing repair estimates from a few licensed plumbers or contractors so you can compare prices.
  5. Keep in mind your deductible. If the fix costs less than that, you might want to handle it yourself.
  6. Keep all your receipts, emails, and notes. Good records help the claims process advance without trouble. They also ensure you get paid back for covered repairs.

Optional Insurance Add-Ons That Can Help

Standard homeowners insurance may miss certain plumbing woes.

Water backup coverage protects against sewer line or sump pump failures that cause flooding in your basement.

Service line protection pays to fix broken water supply lines from the street to your house. These riders fill gaps in plumbing insurance coverage so you’re not left holding the bill for a collapsed sewer pipe or a failed underground pipe.

When you talk with your agent, ask about customizing your policy with these add-ons. They carry a small extra premium but can save thousands if a rogue tree root or aging service line causes a major leak.

Tips to Prevent Plumbing Damage in the First Place

Preventing water damage in home plumbing starts with regular maintenance:

  • Schedule annual inspections, during which a plumber checks pipe joints and pressure levels.
  • Wrap exposed pipes in foam insulation to stop freezing.
  • Install smart water sensors under sinks and near appliances; they alert you to leaks before you see a puddle.
  • Consider an automatic shut-off valve that cuts water flow if sensors detect a leak.
  • Shut off the main water valve before going on vacation. It’s a simple action that keeps any sneaky leaks from turning into a nasty flood while you’re out.

Why Should You Choose Len The Plumber Heating & Air?

Len The Plumber Heating & Air has served homeowners for over 25 years, handling everything from burst pipes to sewer backups. Our services include leak detection, pipe repair, and complete repiping.

For plumbing insurance questions or repairs, Len The Plumber Heating & Air is here to help. Whether you have a sudden pipe leak or need a routine inspection, you can count on expert service and honest advice.

Call us today to protect your home and keep your plumbing in excellent condition. Schedule plumbing services in Baltimore, Washington, D.C., Northern Virginia, New Jersey, Pennsylvania, or the Delaware Valley.

This post first appeared on https://lentheplumber.com
What Is PEX Plumbing?

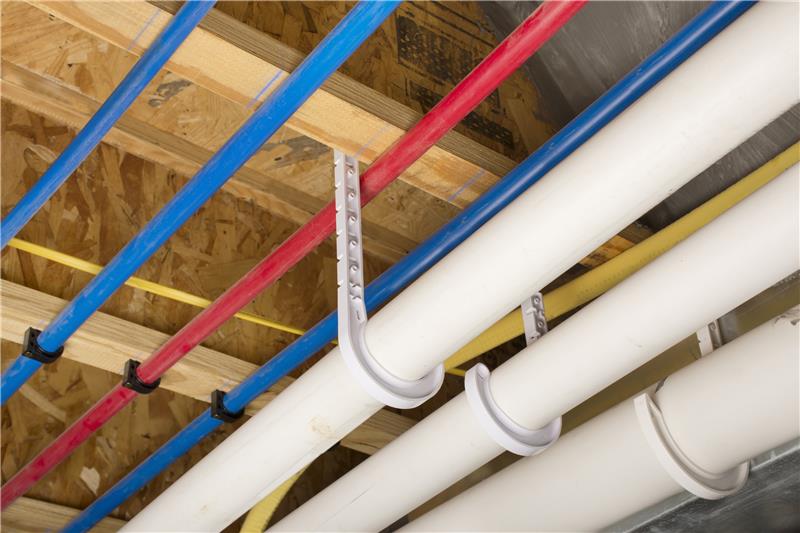
PEX pipingPEX plumbing uses flexible cross‑linked polyethylene tubing instead of rigid metal or PVC. This flexible plumbing pipe bends around corners and weaves through walls without extra fittings.

At Len The Plumber Heating & Air, we’ve helped homeowners switch to PEX for faster installs and fewer leaks. Read on to discover how PEX differs from copper and other types of pipes, its pros and cons, and when it makes sense for your home.

Understanding PEX Plumbing Basics

PEX stands for cross‑linked polyethylene. In simple terms, manufacturers treat ordinary polyethylene under heat or radiation to create bonds between its plastic molecules. This process gives PEX its strength, flexibility, and resistance to heat. PEX tubing arrived in Europe decades ago and reached U.S. homes in the 1980s. Back then, plumbers used copper or rigid PVC, which required soldering or solvent welding at every joint.

PEX changed the game by letting installers use crimp rings or push‑fit connectors instead. Unlike metal pipes, PEX won’t corrode, and it won’t burst if water freezes inside. It meets all modern plumbing codes and offers a friendly way to deliver water to kitchens, bathrooms, and laundry rooms.

Types of PEX Pipes and Their Applications

There are three main PEX pipe types:

  • PEX‑A uses the Engel method and offers the most flexibility, which helps it bounce back after a freeze. It often serves as radiant‑floor heating loops in homes because it can handle repeated expansion.
  • PEX‑B uses the silane method, making it slightly stiffer. However, it’s easier to bend than metal. PEX-B works well for kitchen and bathroom water lines.
  • PEX‑C is made by irradiating finished tubing; it offers a middle ground in flexibility and cost. It also works well for kitchen and bathroom water lines.

You’ll spot red PEX for hot water, blue for cold, and white for general use. Swapping among these types helps plumbers match performance with budget on each job.

Key Benefits of PEX Plumbing

When weighing PEX plumbing pros and cons, the advantages often stand out first:

  • The flexibility of PEX piping slashes labor time because you need fewer joints and fittings. A single length of PEX can snake from the basement to the bathrooms without extra couplings. That saves on both parts and plumber hours.
  • PEX costs less than copper and won’t be affected by fluctuating metal prices.
  • PEX resists corrosion and mineral buildup inside the pipe so you won’t lose flow over the years.
  • PEX can stretch slightly if water freezes, which cuts down on burst‑pipe emergencies.

All these perks add up to lower installation costs, fewer repairs, and better performance in both hot and cold climates.

Common Concerns & Limitations

Every material has drawbacks, and PEX is no exception.

  • PEX is sensitive to UV light, and prolonged sun exposure can weaken the tubing. That means you shouldn’t run PEX outdoors unless it’s sheathed in UV‑resistant conduit.
  • Mice and rats sometimes chew plastic, so PEX piping is at greater risk of rodent damage. Always protect exposed runs in crawlspaces or attics.
  • Not every municipality accepts PEX yet, so you’ll need to check local plumbing codes and insurance rules before installing it.

Despite these hiccups, PEX remains one of the most versatile and cost‑effective options in modern residential plumbing.

PEX vs Copper vs PVC: Which Should You Choose?

When comparing PEX vs copper vs PVC, balance factors like durability, cost, and maintenance.

Copper lasts for decades and resists UV, but it can corrode in acidic water and costs two to three times more than PEX. PVC is cheap and rigid, good for drains, but brittle in cold weather. PEX sits in the sweet spot: it’s durable, flexible, and mid‑priced.

Pipe repairs for PEX are simple; you cut out the bad section and crimp on a new fitting. Copper repairs demand soldering, and PVC needs solvent welding.

For a whole‑house repipe or new construction, PEX often wins by saving money on parts and labor, while still delivering reliable performance.

Why Should You Choose Len The Plumber Heating & Air?

You’ve learned what PEX plumbing offers: bendable tubing, fewer leaks, and big savings on installation. Len The Plumber Heating & Air has over 25 years of experience working with cross‑linked polyethylene and all other piping materials.

Our plumbers stay up to date on the latest PEX pipe installation methods and local code requirements. Whether you need a simple kitchen repipe, a radiant‑heat upgrade, or a whole‑house repiping project, we bring craftsmanship and honesty to every job.

If you are ready to switch to PEX or explore other plumbing solutions, contact Len The Plumber Heating & Air today and keep your water flowing seamlessly. We serve Baltimore, Washington, D.C., Northern Virginia, New Jersey, Pennsylvania, and the Delaware Valley.

This post first appeared on https://lentheplumber.com
Ask a Plumber: What Causes Hard Water Buildup?

Here’s a common question we hear from our customers: “What causes this white buildup I see on my pipes, faucets, drains, and other fixtures?” They usually follow up with: “Is it serious? Can I do anything about it aside from scrubbing it away?” Let’s explore what causes this issue and the best ways to fix it.

Hard Water

That white buildup that often encrusts the surfaces of your fixtures is calcite residue from hard water. You may have heard about hard water before, but you may not fully understand what it means. 

What is Hard Water?

Hard water generally refers to any water with a high mineral content. Specifically, it refers to water with large amounts of calcium-containing minerals, such as gypsum. The magnesium mineral dolomite, which also contains calcium, is another common mineral suspended in hard water.

How to Tell if You Have Hard Water

Beyond the visible white calcium buildup, you can often tell you have hard water if your soaps and shampoos refuse to lather properly, leaving behind a sticky soap scum on your shower doors and tubs. You might also notice that your freshly washed clothes feel stiff and your glassware comes out of the dishwasher covered in spots. These are all common indicators that your home’s water has a high mineral content.

What Causes Hard Water?

The visible white hard water buildup on pipes, dishes, and other surfaces is a result of calcification from the minerals in hard water. Aside from looking ugly, this calcite will start to coat the inside of your pipes, restricting water flow and increasing pressure within the plumbing until it erupts into a leak. The calcification will also infiltrate your hot water heater (or boiler, if you use one) and leave limescale deposits along the inside of the tank, which can significantly impair its performance. Hard water will also damage components in your dishwasher and laundry.

Is Hard Water Bad For You?

Usually, these minerals pose no threat to your health: hard water may not taste as good as “soft water,” but it is rarely dangerous. However, it can cause trouble for your plumbing and any appliance hooked to it.

How to Fix Hard Water?

Hard water comes to you through the municipal water system, so the best way to combat it is through a whole-house water treatment system attached to the main line. Water softeners will filter out the excess minerals from hard water and rebalance the water with sodium. Installing a water softener of this size requires the work of professional plumbers.

Protect Your Plumbing with a Professional Solution

Do not ignore the evidence of hard water in your home: it might be causing damage to your plumbing out of your sight. The experienced plumbers at Modern Plumbing Industries, Inc. will test your water and then offer solutions to the problem. We have experience with various types of water treatment systems, and we will determine the best solution to address your hard water issues. Schedule your appointment to have a member of our team contact you about your water problems and provide a time for us to come out and address your hard water issues. 

This post first appeared on https://www.modernpi.com

Why You Should Flush Your Water Heater Before the South Florida Heat Hits

Why You Should Flush Your Water Heater Before the South Florida Heat Hits

As South Florida gears up for another hot, humid summer, many homeowners and business owners in Fort Lauderdale, Miramar, Pembroke Pines, Hollywood, and throughout Broward County are preparing their properties for the seasonal shift. But while you’re checking your air conditioning and sealing up windows, there’s one important task you may be forgetting: flushing your water heater.

At A to Z Statewide Plumbing, we recommend flushing your water heater every year—especially before the summer heat arrives. Why? Because hard water and high usage during warmer months can cause mineral buildup that affects performance, energy efficiency, and even your water quality.


What Happens Inside Your Water Heater?

South Florida is known for having hard water, which means it contains a high concentration of minerals like calcium and magnesium. Over time, these minerals settle at the bottom of your water heater tank and form a thick layer of sediment.

This buildup can lead to:

-Reduced efficiency — Your water heater has to work harder (and use more energy) to heat the water through layers of sediment.

-Hot water shortages — Mineral buildup takes up space in the tank, reducing the amount of hot water available.

-Strange noises — Sediment can cause popping or rumbling sounds as it heats up and moves around.

-Shortened lifespan — Over time, excess sediment can damage the tank and heating elements, leading to early failure.


Why Summer Is the Right Time to Flush Your Water Heater

  1. Increased Demand for Hot Water
    While we may not take piping hot showers in summer, your water heater still works hard to supply hot water for laundry, dishwashing, and outdoor cleaning projects. Flushing it before this busy season ensures it runs smoothly when you need it most.
  2. Reduce Strain During High Temperatures
    South Florida summers are brutal—not just for people, but for plumbing systems too. Flushing your water heater reduces the stress on your appliance during the hottest part of the year.
  3. Prevent Costly Repairs
    By removing built-up sediment, you reduce the risk of overheating, pressure problems, and long-term damage to your tank. Preventive maintenance is always cheaper than emergency repairs or full replacements.

Take Advantage of Our Seasonal Special!

To help our residential and commercial customers get ready for the summer heat, A to Z Statewide Plumbing is offering a limited-time Water Heater Flush Special. Our professional technicians will:

-Drain and flush your water heater

-Inspect for signs of wear or corrosion

-Test performance and temperature settings

-Offer recommendations for maintenance or upgrades

Now’s the time to get your water heater in top shape for summer!


Schedule Your Water Heater Flush Today

Don’t let hidden sediment drag down your water heater’s performance—or your energy bill. Whether you’re in Fort Lauderdale, Miramar, Pembroke Pines, Hollywood, or anywhere in Broward County, A to Z Statewide Plumbing is here to help.

Call us today at 954-981-2133 or book your service online!
Stay cool, stay efficient, and let A to Z Statewide Plumbing help you beat the heat this summer.

Trending Topics Right Now

This post first appeared on http://www.atozstatewideplumbing.com

How Long Does AC Replacement Take?

analog-clock-face

If your air conditioner has seen better days and it’s time for an upgrade, one of the first questions you probably have is, “How long will this take?” The good news is that most air conditioning replacement jobs are completed in a single day—often in as little as 4 to 8 hours. Still, the exact timeline depends on a few key factors.

If you’re planning an air conditioning replacement in Livingston, NJ, working with a professional HVAC team is essential. This will ensure a smooth, efficient process from start to finish. Here’s what you should know.

Why a Professional Team Matters

A new AC system is a big investment—not just in terms of cost but also in comfort, energy efficiency, and home value. That’s why it’s so important to have trained HVAC professionals guide you every step of the way. A trustworthy team will start by evaluating your home’s layout, square footage, insulation levels, and cooling needs. From there, they’ll recommend a properly sized and efficient system that fits both your comfort preferences and your budget.

Choosing the right system is only part of the equation. An experienced HVAC contractor will also assess whether any modifications are needed before installation. These can affect how long the actual replacement takes.

When AC Replacement Takes More Than a Day

In the simplest cases—when the existing ductwork, wiring, and infrastructure are in good shape—replacement is fast and easy. But if your home needs extra work, the timeline can be extended slightly. Here are a few situations that may cause your project to go beyond one day:

  • Ductwork repairs or upgrades: Leaky, undersized, or aging ducts may need to be sealed, resized, or replaced to ensure efficient airflow and system performance.
  • Electrical upgrades: If your electrical panel can’t support the new unit or if outdated wiring is in place, an electrician may need to make adjustments to bring everything up to code.
  • Access issues: Installing an AC in tight crawlspaces, attics, or multi-story homes can add time to the job, especially if special equipment is needed.

Your HVAC team will identify these potential concerns in the planning stage, so there won’t be any surprises on installation day.

What Happens on Installation Day

On the day of your AC replacement, your HVAC technicians will arrive with all necessary equipment and materials. Here’s a typical step-by-step rundown of what happens:

  1. System removal: The team safely removes your old air conditioner, refrigerant, and any outdated components.
  2. Site preparation: They’ll prepare the space for the new system, including making any minor adjustments needed to accommodate it.
  3. New system installation: The new air conditioning unit is installed, along with any updated thermostats, wiring, or drainage lines.
  4. Testing and calibration: The system is carefully tested to ensure it’s working properly and efficiently.
  5. Clean-up and walkthrough: The work area is cleaned up, and your technician will walk you through the new system’s operation and maintenance.

Enjoy Same-Day Comfort

In most cases, your new system will be up and running within the same day—often in as little as 4 hours. By working with experienced professionals and planning ahead, your AC replacement can be a stress-free experience with long-term benefits in comfort, efficiency, and peace of mind.

Contact MarGo Plumbing Heating Cooling Inc. today to schedule an appointment or ask any questions about air conditioning replacement in Livingston, NJ!

The post How Long Does AC Replacement Take? first appeared on MarGo Plumbing Heating Cooling Inc..

This post first appeared on https://margoplumbing.com

+1-877-959-3534